
Best Hikes & Must-Stop Spots in Valley of Fire State Park
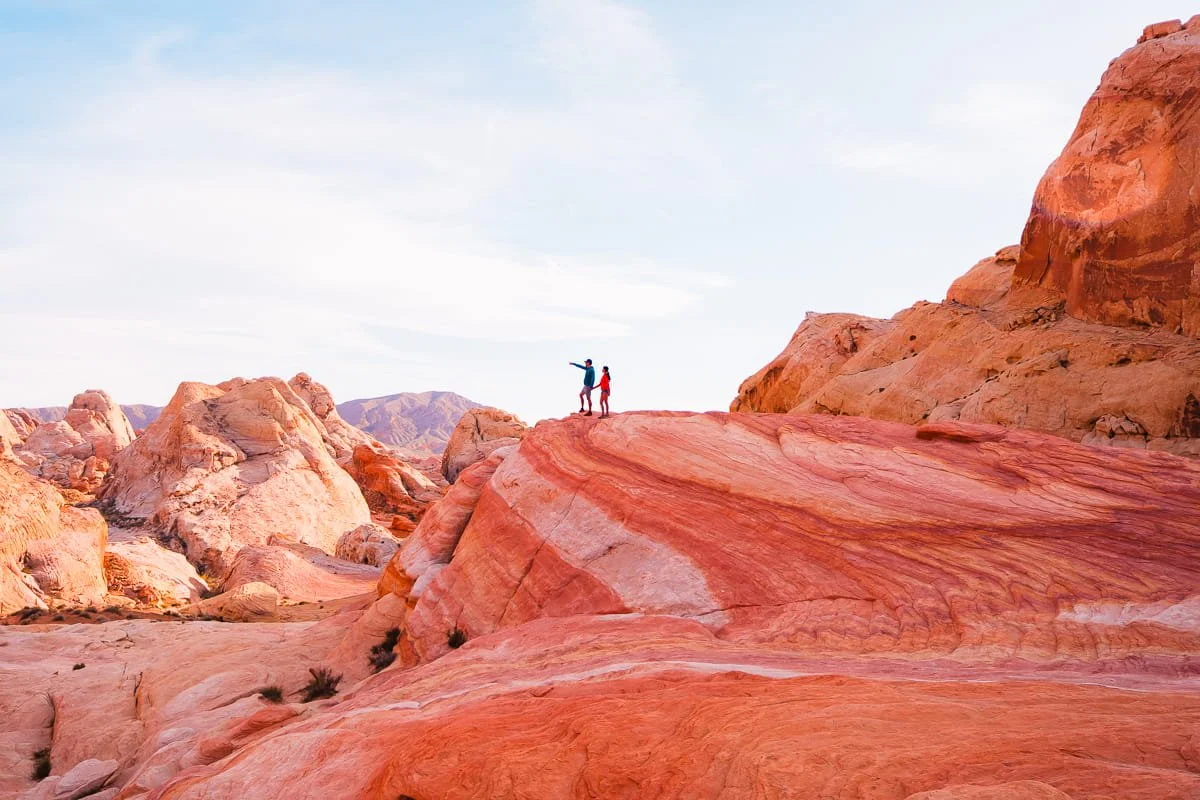
A First-Timers Guide to Valley of Fire Trails & Viewpoints: The Complete Guide to Every Hike and Must-See Spot
If you are visiting Las Vegas, Nevada, then Valley of Fire is a must-do day trip for amazing views and hiking. Valley of Fire State Park packs an enormous amount of landscape into a relatively small area, and for first time visitors that can be a little overwhelming, but we want to show you that the best spots and hikes can be seen in a day or two.
Most first-time visitors follow the same loop, stop at the same two or three pull-offs, and leave thinking they've seen it. They haven't. Every trail and viewpoint here has its own character: different light, different geology, a different reason to linger or move on.
Some hikes are must-dos. Some are worth a five-minute stop on your way to a bigger viewpoint. And a couple are honestly fine to skip if you're pressed for time, which we’ll let you know in the sections below, because that's more useful than pretending everything is equally worth your time.
This guide goes deep on every must-do hike and viewpoint in Valley of Fire so you can make the most of your day, whatever that looks like for you. For everything else, how to get there, where to camp, park fees, and a full one-day itinerary — head to our Ultimate Valley of Fire Travel Guide.
We visit Las Vegas twice a year for climbing, and always stop at Valley of Fire when we’re there. So we have a lot of knowledge on the park and what hikes and viewpoints are really worth a stop.
Table of Contents
Affiliate disclaimer: This post contains affiliate links, meaning we receive a small commission on purchases made through our links at no additional cost to you.
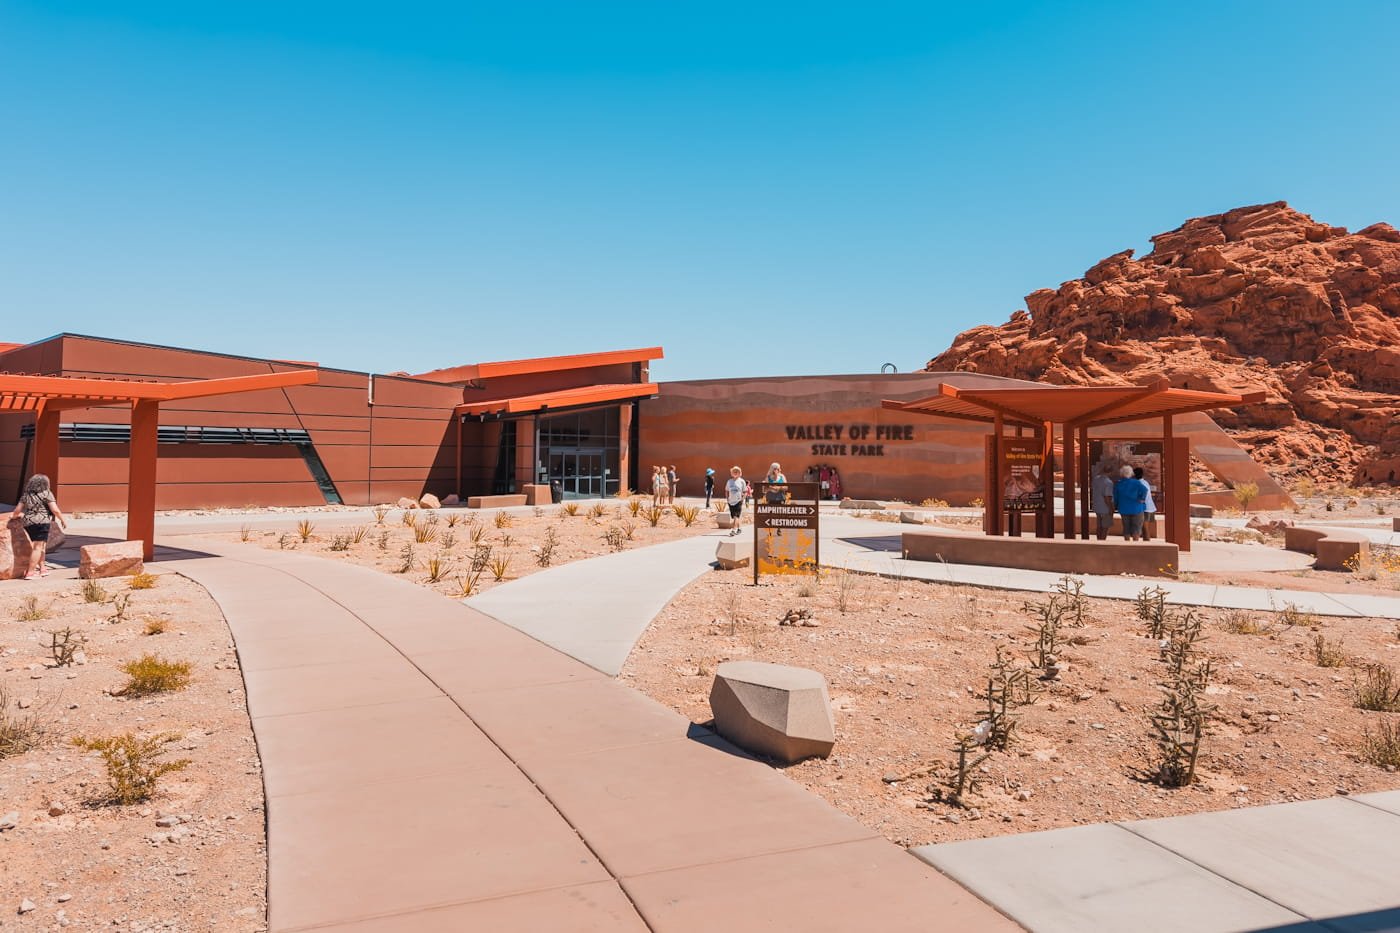
The brand new visitor center in Valley of Fire that opened in spring of 2026
Before You Go: Quick Tips for Visiting Valley of Fire in Nevada
Below are the basic details you should know about visiting Valley of Fire State Park, but we go way more in-depth on the park in our Ultimate Guide to Valley of Fire. There we cover driving directions, camping in and near the park, and hotels near Vegas, more in depth.
Visiting Valley of Fire State Park
You don’t need a reservation to visit Valley of Fire, it’s easy to just drive up and pay for your day pass at one of the two entrances. But you do need to know the following details to help you plan the best trip possible, and make sure the trails you want to hike will be open when you arrive.
Park hours: Open daily 6:00 AM – 9:00 PM.
Seasonal trail closures: Between May 15 and September 30, the park closes certain trails due to extreme heat. Shorter viewpoints and walks typically stay open, but check at the visitor center when you arrive. If you're visiting in summer, plan to be done hiking by 10:00 AM at the absolute latest.
Entrance fee: $10 per vehicle for Nevada residents, $15 for non-residents.
What to bring on every hike:
At minimum 2–3 liters of water per person - more in warmer months. You can fill up at the visitor center.
A sun hoodie or sun shirt - the sandstone amplifies heat significantly, and there is a high UV index in the desert, so you want full coverage that is lightweight and cool. We have a full gear guide on the Best Sun Hoodies for Hiking to help you pick the best one for your needs.
A wide-brim hat and sunglassesfor extra sun protection.
Sunscreen - reapplied every two hours + SPF lip balm. Our new favorite sunscreen is the Sport Sunscreen Spray SPF 50 by Dermatone.
Offline map downloaded before you arrive - cell service is unreliable throughout the park (Gaia GPS is what we use)
Snacks & a lunch - there is minimal food in the store at the visitor center, but we always pack our own so we don’t have to buy anything.
→ For a full gear breakdown, see What to Pack for a Day Hike. And lower down in this guide, you will find a section on what to wear for desert hiking.
Everything You Need to Know to Visit the Best Hikes & Viewpoints in Valley of Fire
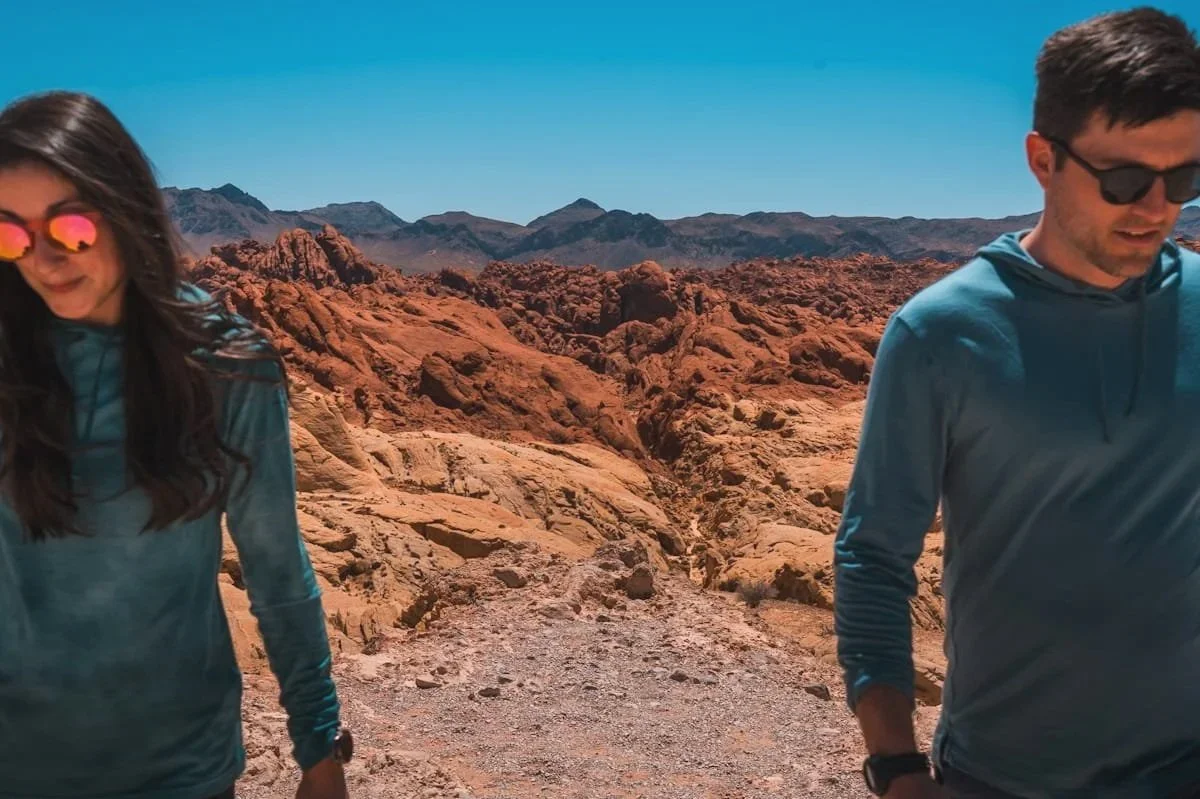
Walking around the Silica Dome viewpoint
All Valley of Fire Hikes & Viewpoints at a Glance
| Hike | Type | Distance | Difficulty | Est. Time | Notes |
|---|---|---|---|---|---|
| Arch Rock | Viewpoint | 0.1 mi | Easy | 5 min | Park and view — no real hiking required. Great photo op. |
| Atlatl Rock | Viewpoint | 0.1 mi | Easy | 10–20 min | Metal staircase leads up to the petroglyph panel. Great morning stop. |
| Mouse's Tank Trail | Out-and-Back | 0.7 mi RT | Easy | 30–45 min | Sandy canyon walk with petroglyphs lining the walls. |
| Rainbow Vista | Out-and-Back | 1.0 mi RT | Easy | 30–45 min | Colorful banded sandstone amphitheater. Pleasant but not a standout. |
| Fire Canyon / Silica Dome | Viewpoint | ~0.1 mi | Easy | 10 min | Short walk to a sweeping valley view and dramatic white silica dome. |
| Fire Wave Trail Top Pick | Out-and-Back | 3 mi RT | Moderate | 1 hr | Slickrock route-finding via cairns. Swirling pink, red, and white sandstone. |
| White Domes Loop Top Pick | Loop | 1.1 mi | Moderate | 1 hr | Includes a short yet photogenic slot canyon. Most memorable hike in the park. |
| Elephant Rock | Out-and-Back | 0.2 mi RT | Easy | 15–20 min | Great sunset spot. Park welcome sign photo op here too. |
Click any column header to sort. Distance and time are approximate. Difficulty ratings assume mild temperatures — heat significantly increases effort in summer.
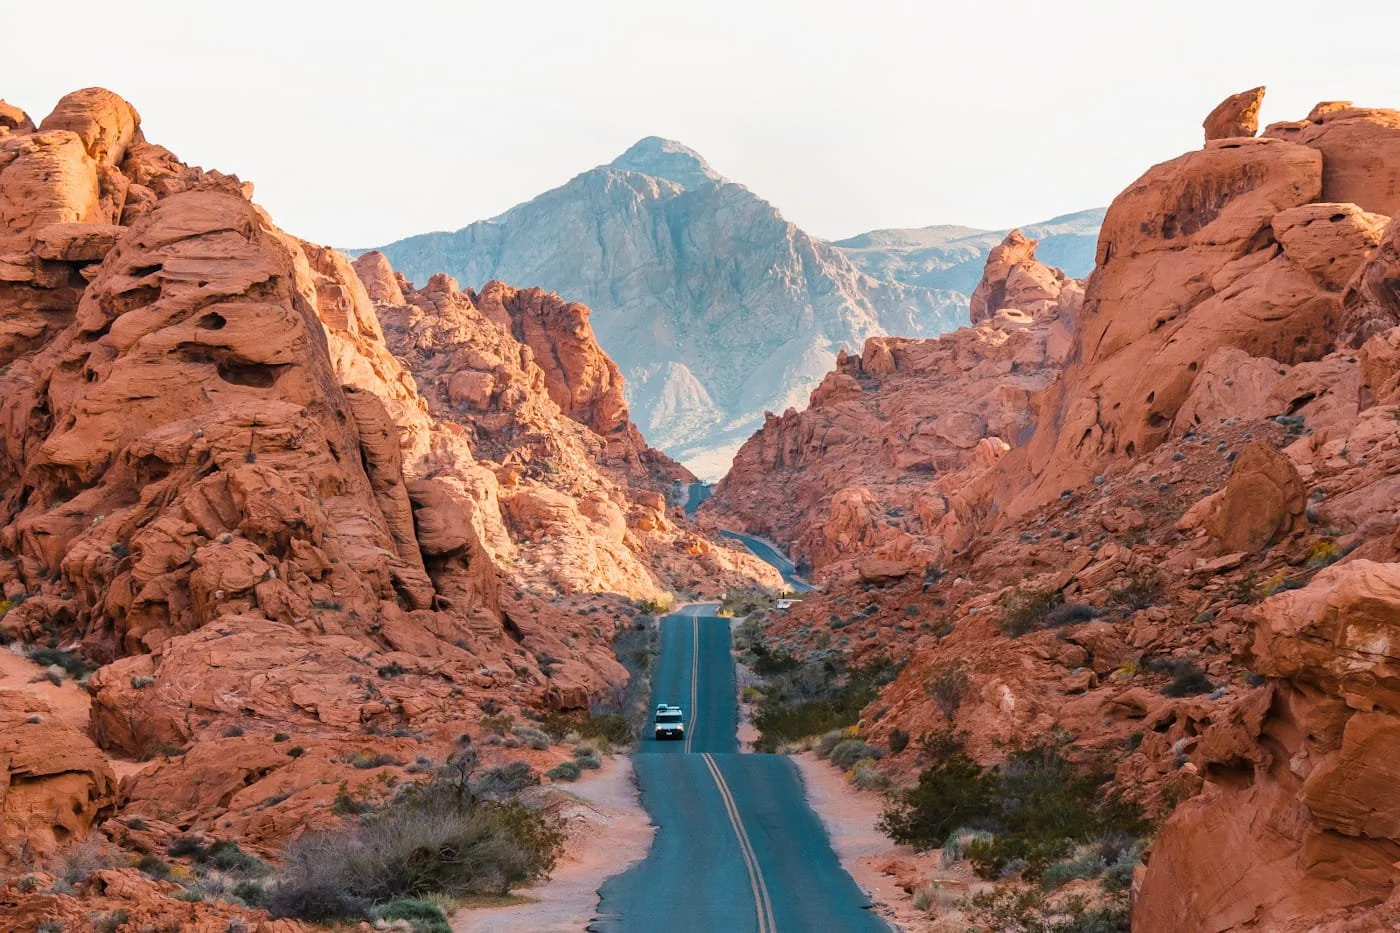
Driving up Mouse’s Tank Road in Valley of Fire
Must-Stop Viewpoints & Drive Up Spots in Valley of Fire
These spots require little to no hiking, most are a short walk from the parking area or just a drive up pull-off. They're all worth a visit even if you are planning to do some of the actual hikes. We checked all of these plus the main hikes off in one day, so don’t skip out on viewpoints.
Some of these are more accessible as well, for those who don’t want to hike, or can’t walk too far from the car. All of these we did with my parents (who are in their 70s), and since they did not want to hike, we hit up all the drive up spots and they still really enjoyed the park.
Atlatl Rock Petroglyphs
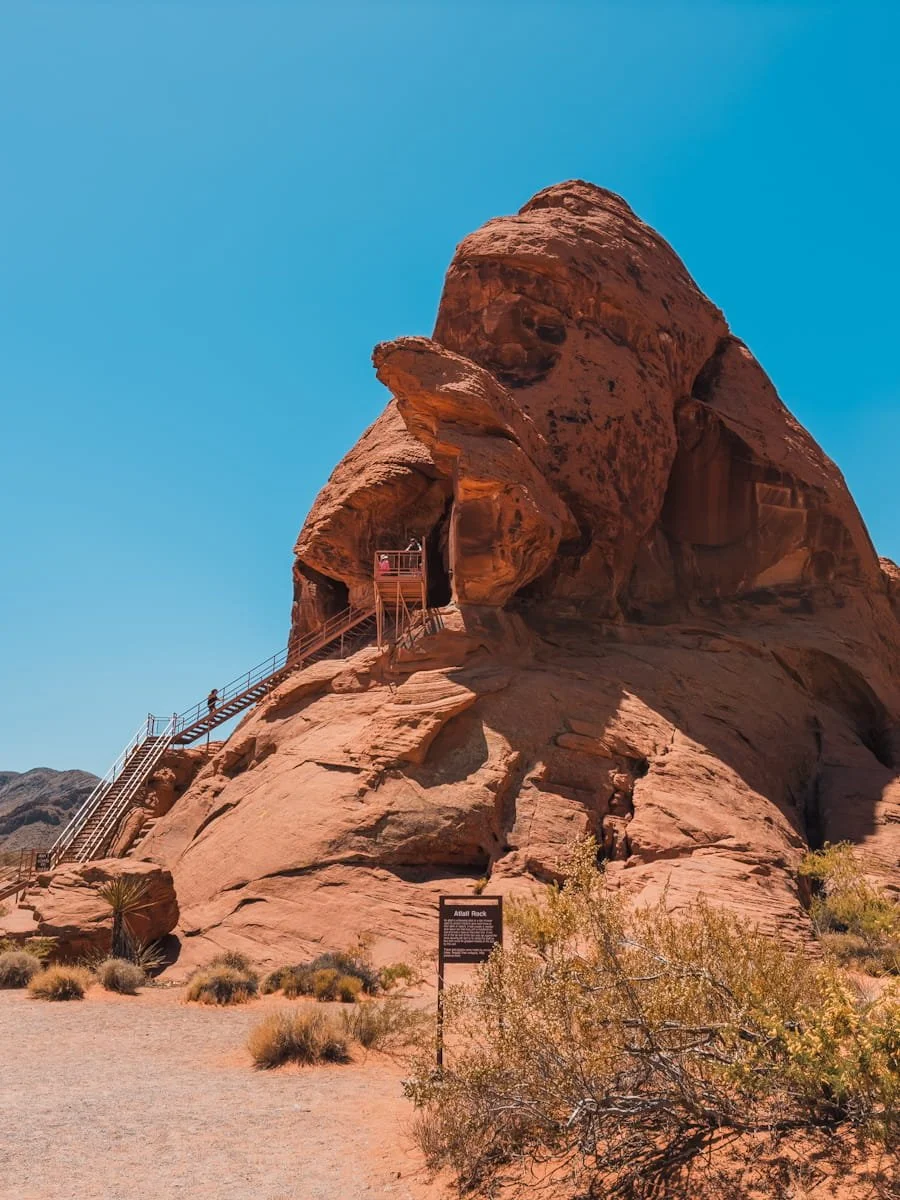
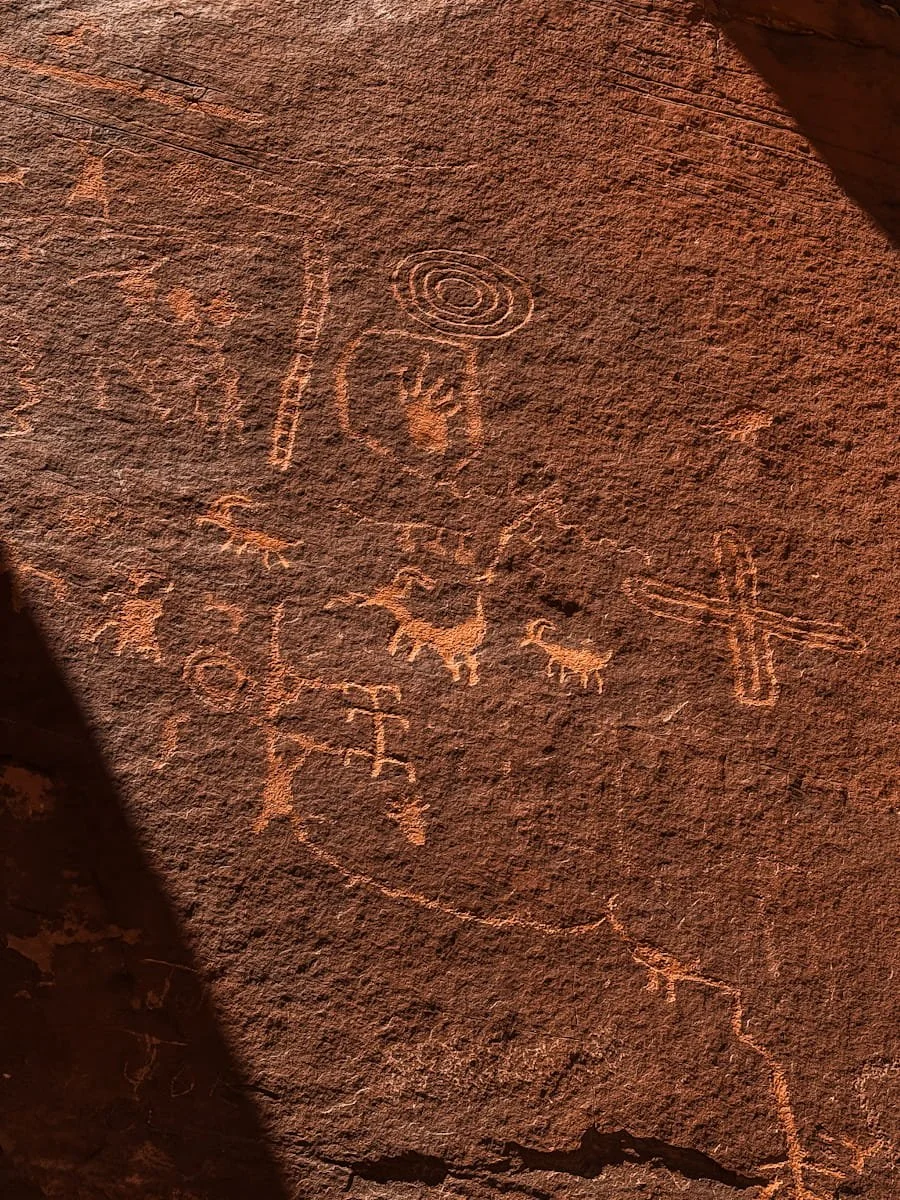
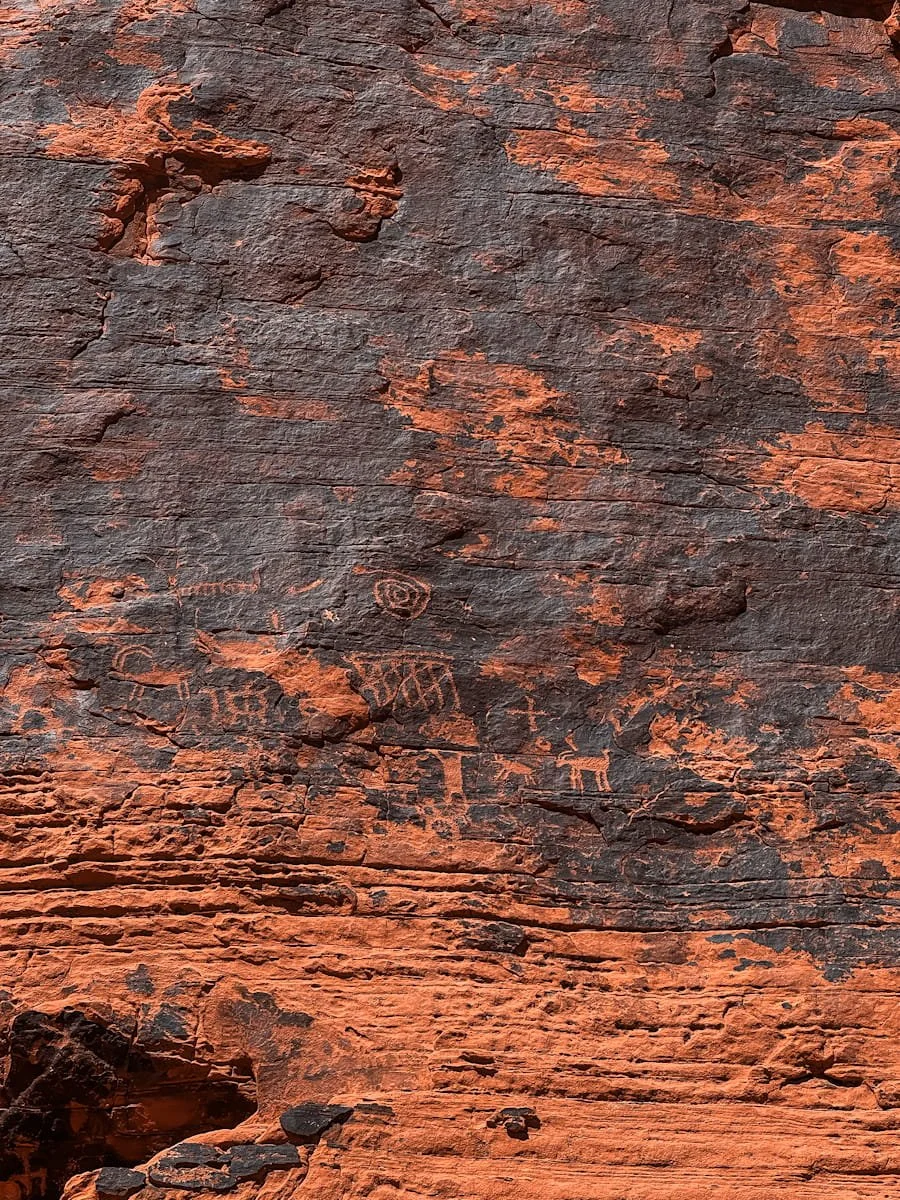
📍 Google Maps Location | ⏱ 10–20 min | 🟢 Easy | Viewpoint with Stairs
Atlatl Rock is one of the most accessible and impressive petroglyph sites in the park, and we'd argue it's underrated as a great place to start your day. The picnic area here is large, with shaded tables, good views, and is a great spot to eat breakfast before the day heats up.
The main attraction is the petroglyph panel carved into the face of the rock above the parking area. A metal staircase takes you up close to the primary carvings, which depict human figures, animals, and the atlatl (a spear-throwing tool) that gives the rock its name. The carvings are estimated to be between 2,000 and 4,000 years old.
One thing most people miss: there are additional petroglyphs at the base of the rock, just a short flat walk from the parking area, that are equally detailed and far less crowded since most visitors head straight for the staircase. Take the extra couple of minutes to walk the base panels before or after going up.
Please remember not to touch the petroglyphs, or carve any markings into the rock yourself.
→ Honest take: This is a must-stop spot. The combination of the picnic area, accessible petroglyphs at multiple levels, and the early morning light hitting the red rock makes it the ideal first stop of the day.
→ Photography tip: Though light is always better at sunrise and sunset, the petroglyphs are pretty easy to photograph at any time of day since you can get right up close to them.
Fire Canyon / Silica Dome Overlook
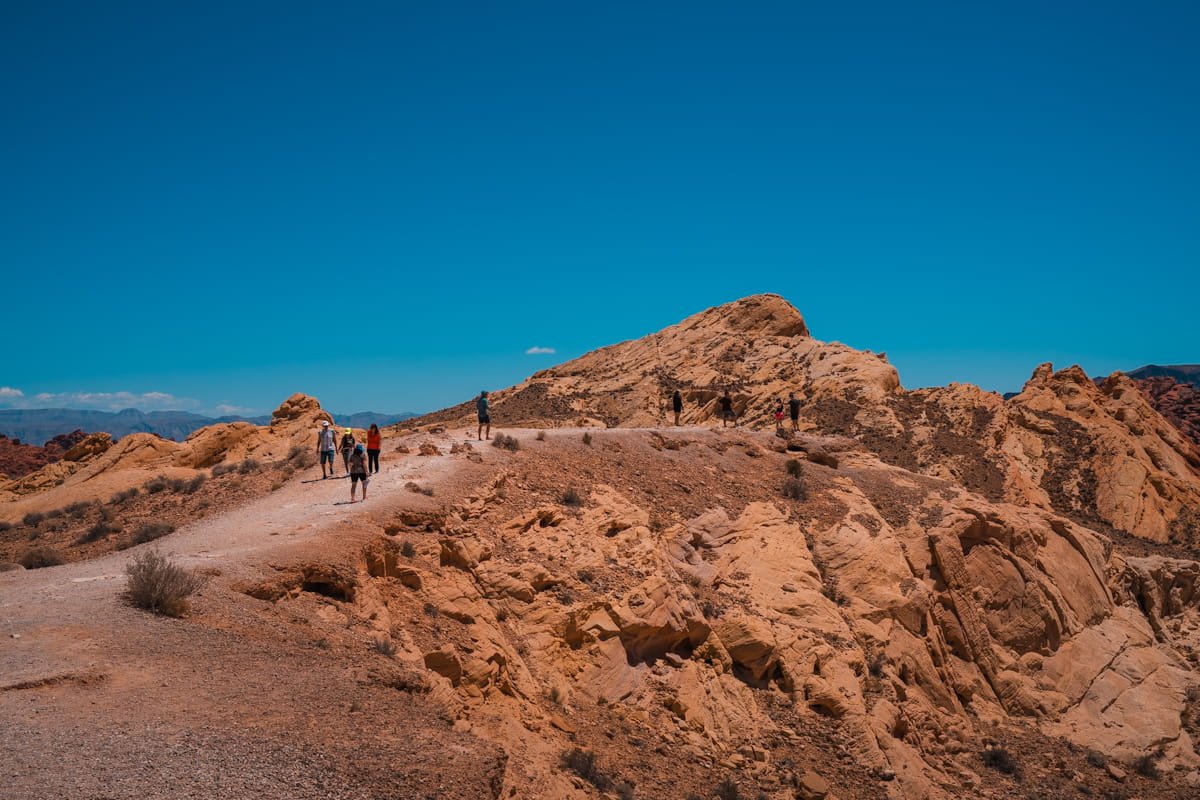
The short path up to the Silica Dome Overlook
📍 Google Maps Location | ⏱ 10–15 min | 🟢 Easy | Drive Up Viewpoint
This is one of the most underrated stops in the park. Most people drive past the turnoff without realizing what the viewpoint looks like, or that it’s worth a stop.
Drive up to the small parking area, walk out a short distance to the overlook, and you're looking at a sweeping view of the valley alongside a dramatic white silica dome, a striking geological contrast against all the red sandstone surrounding it. The silica dome was formed from ancient sand dunes that were superheated by lava flows, turning the sand into a pale, almost glowing white rock. It genuinely looks like it belongs on another planet.
→ Honest take: This is one of my favorite quick stops in the entire park. The payoff-to-effort ratio is unbeatable — ten minutes and you get one of the most visually striking views Valley of Fire has to offer.
Elephant Rock
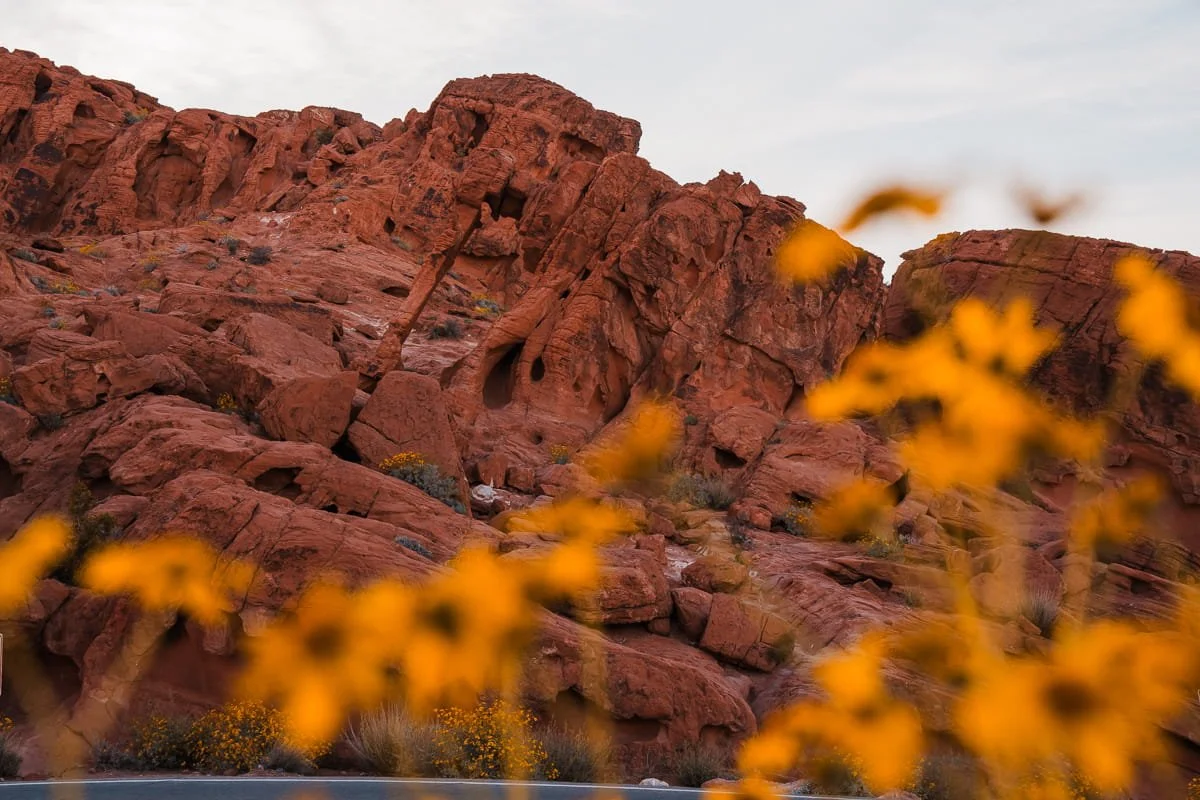
Elephant Rock just before sunset at Valley of Fire
📍 Google Maps Location | ⏱ 15–20 min | 🟢 Easy | Short Walk/Hike
Elephant Rock is a natural sandstone arch shaped like an elephant. It's accessible via a very short, flat walk from the parking area, and the formation itself is larger and more impressive than photos suggest.
The area around the parking lot is also beautiful itself. When we visited in spring, wildflowers were scattered across the desert floor in every direction, and the views of the surrounding red rock formations from the parking area were stunning at sunset. This is also where you'll find the park's famous welcome sign, which is worth a stop even if you don’t plan to walk up to Elephant Rock.
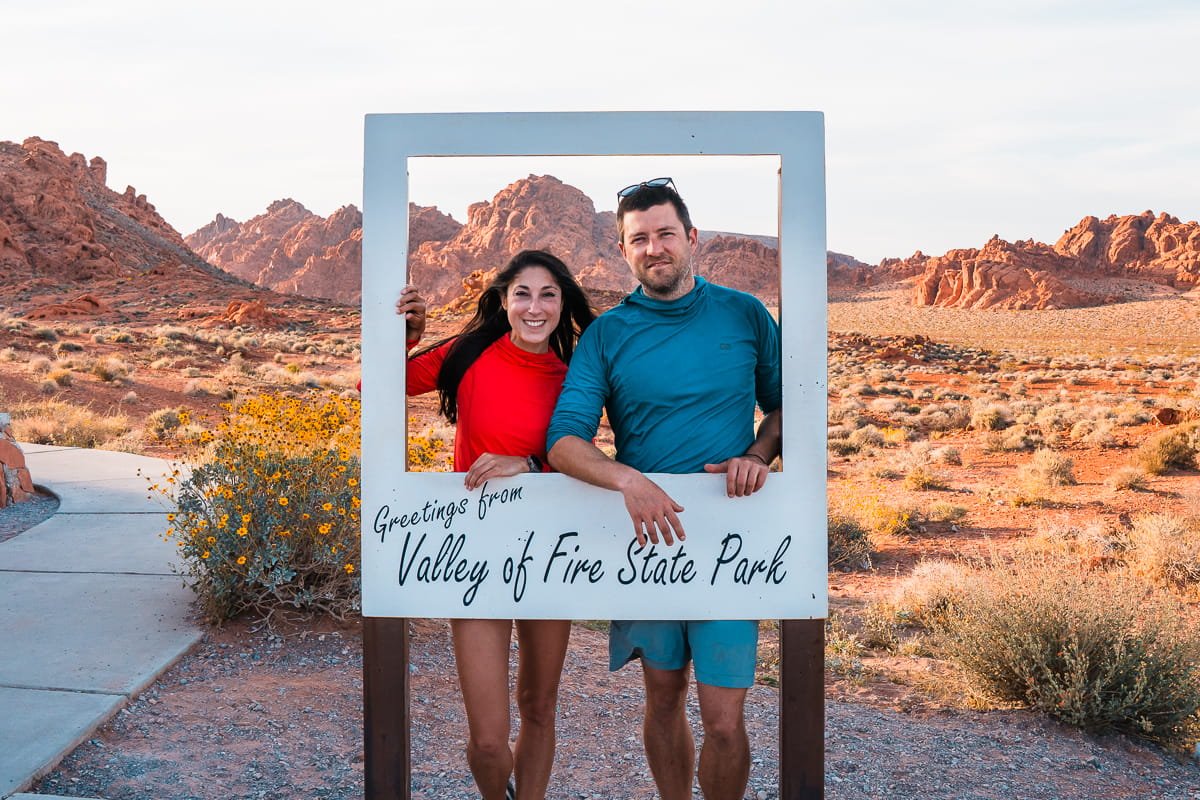
The picture frame photo opportunity in the parking lot for Elephant Rock
→ Honest take: A must-stop spot at or near sunset. The warm evening glow on the red rock here is some of the best in the park, and the wildflowers in spring push it over the top. Plan to end your day here before you head out.
→ Photography tip: Arrive 30–45 minutes before sunset. The welcome sign gets a lot of foot traffic, arrive early enough in that window to get your shot before the light fades.
Arch Rock
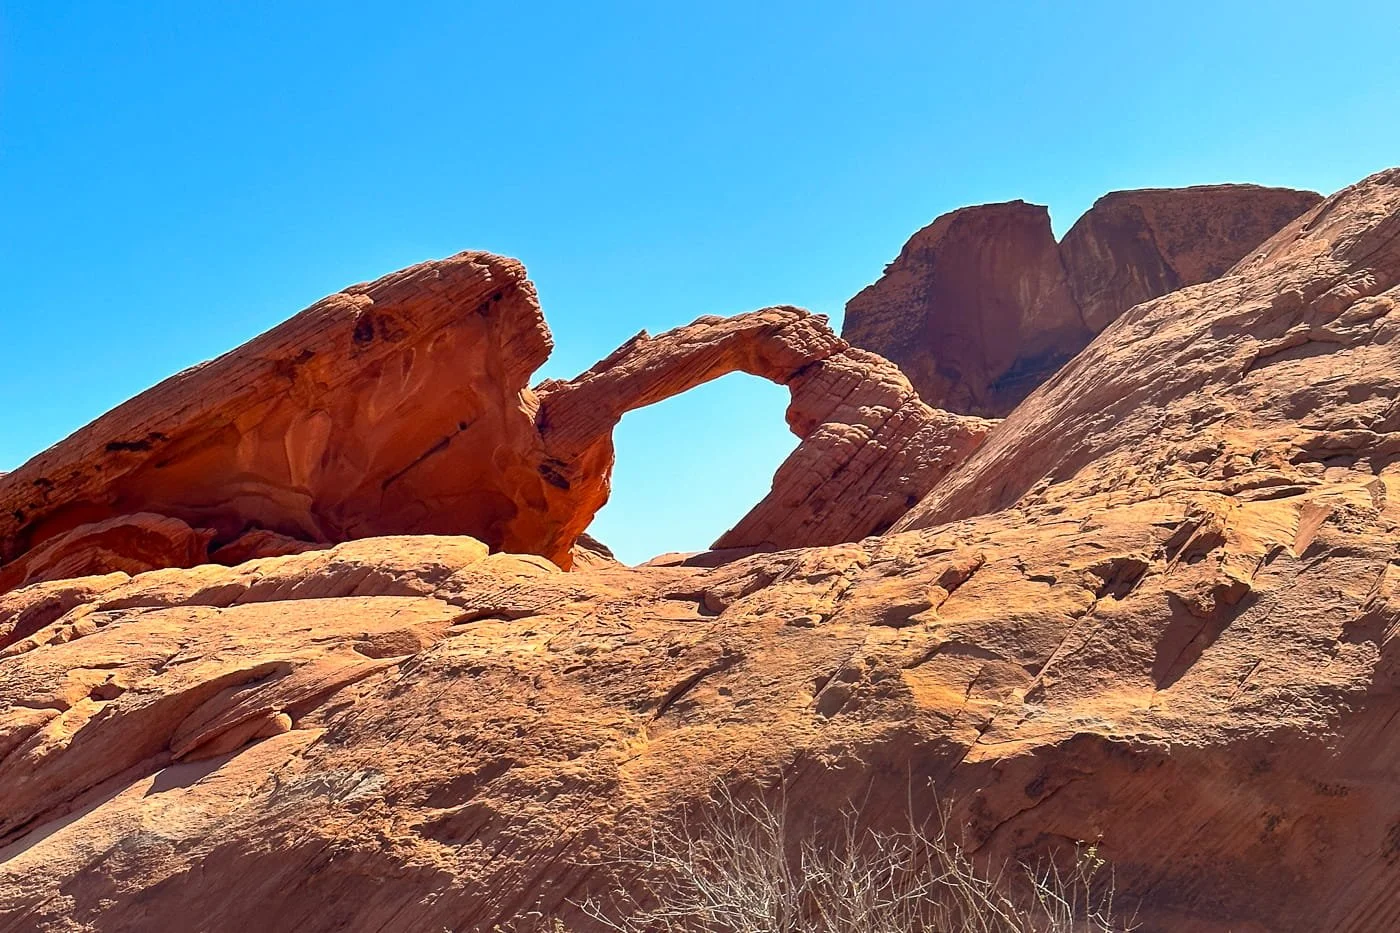
Arch Rock from the viewpoint
📍 Google Maps Location | ⏱ 5 min | 🟢 Easy | Viewpoint
Arch Rock is a small natural sandstone arch a short walk from a campground and parking area, and it's an easy viewpoint to check off. Park in a pullout next to the arch, walk over, take a photo, and move on. It's not the most dramatic arch you'll ever see, and you could skip this spot if you have seen other large arches before.
→ Honest take: Worth a five-minute stop if you have the time, especially since it's close to Atlatl Rock and easy to combine. But don't rearrange your day for it. If you are short on time, skip this one. It’s not as impressive as larger arches in Moab and Arches National Park.
→ Tip: Pair it with the Atlatl Rock stop since they're close together near the west entrance. Hit Atlatl first for breakfast, then swing by Arch Rock on your way east through the park.
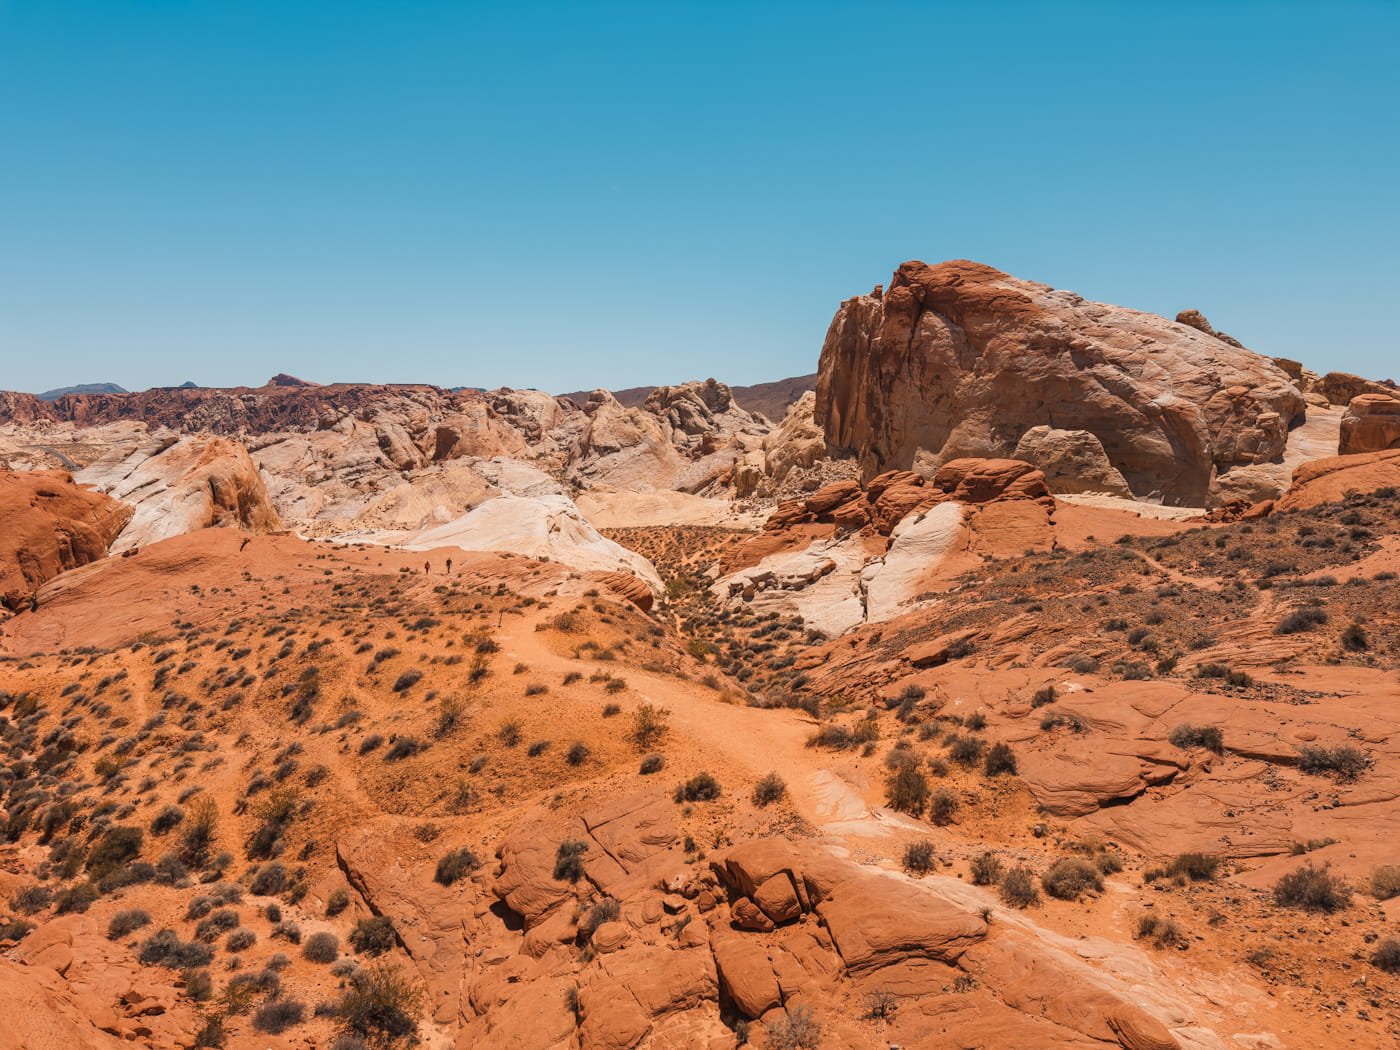
The trail along the Seven Wonders Loop at the Fire Wave area
Must-Do Hikes in Valley of Fire
These trails are all worth a hike and require more than a five-minute walk from the parking area. None of them are technically demanding by most hiking standards, but in the heat and walking through sand can make them feel more difficult. Each hike entry includes an honest assessment of what the hike is actually like.
Mouse's Tank Trail
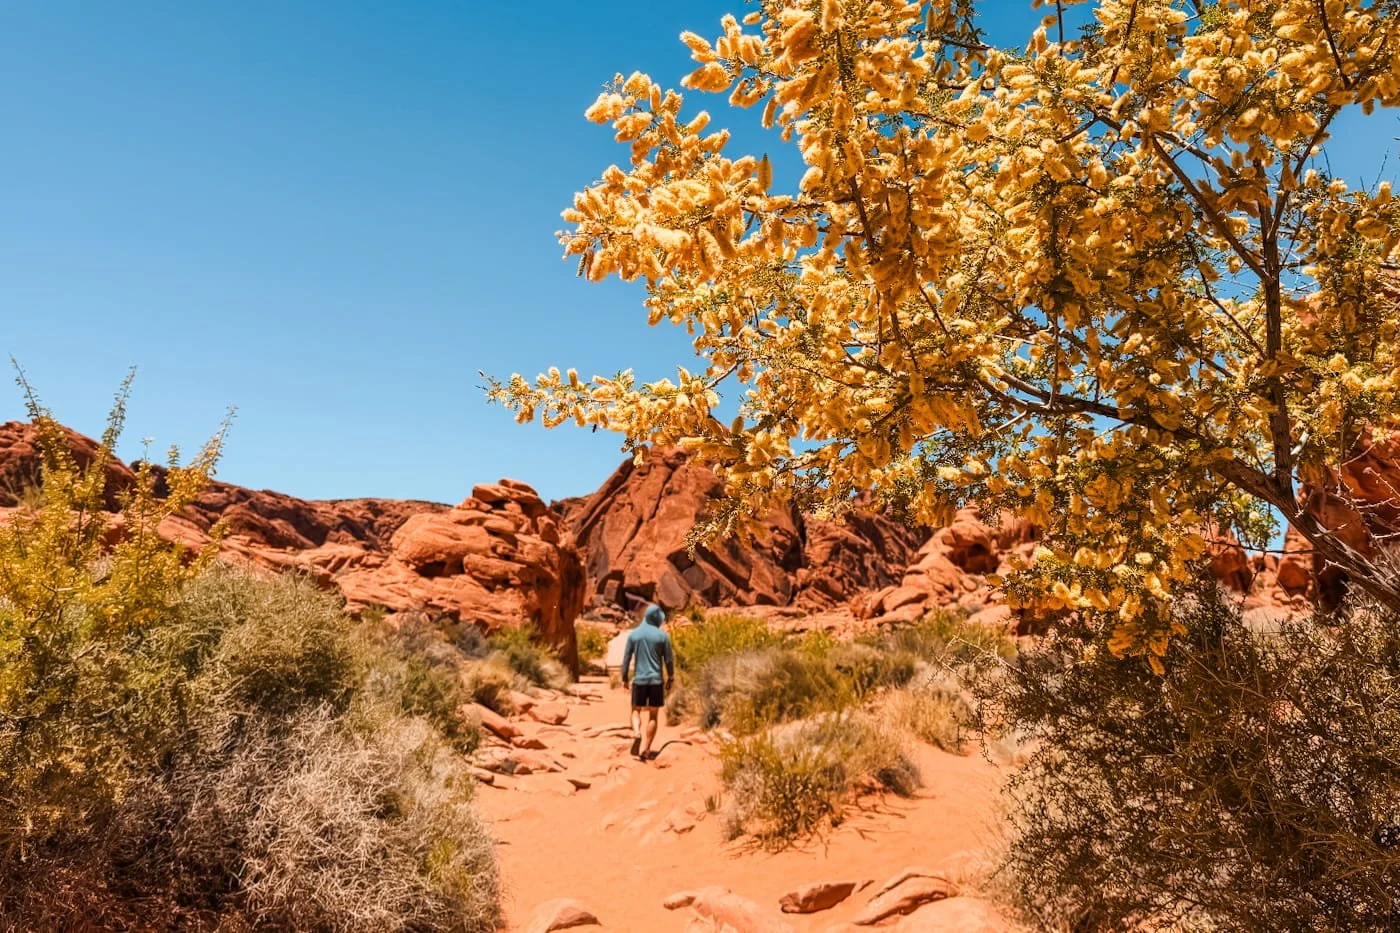
Garrett hiking Mouse’s Tank Trail in the spring
📍 Google Maps Location | 0.7 mi RT | ⏱ 30–45 min | 🟢 Easy | 🔄 Out-and-Back
Mouse's Tank is a short canyon hike with petroglyphs carved into the rock walls above the trail, it's essentially an open-air petroglyph gallery, and for anyone interested in the cultural history of the park, it's definitely worth a hike.
The trail follows a sandy wash through a narrow canyon to Mouse's Tank, a natural rock basin that collects rainwater. The tank itself is modest, a shallow, dark pool in a rock depression — but the trail you walk through to reach it is beautiful and worth the walk to the viewpoint at the end.
A word of warning: the trail is sandy. Not mildly sandy, soft, deep sand for significant stretches that makes every step slightly harder than it looks. Trekking poles are useful here if you have them, and you will most likely get sand in your shoes.
→ Honest take: Great for petroglyph lovers and anyone interested in the park's history. If you're purely here for dramatic landscapes and big views, this isn't your highlight, but it's short enough that it's worth doing even if petroglyphs aren't your thing.
→ Tip: Walk slowly and look up at the canyon walls throughout — many carvings are easy to miss if you're focused on the sandy footing.
Rainbow Vista
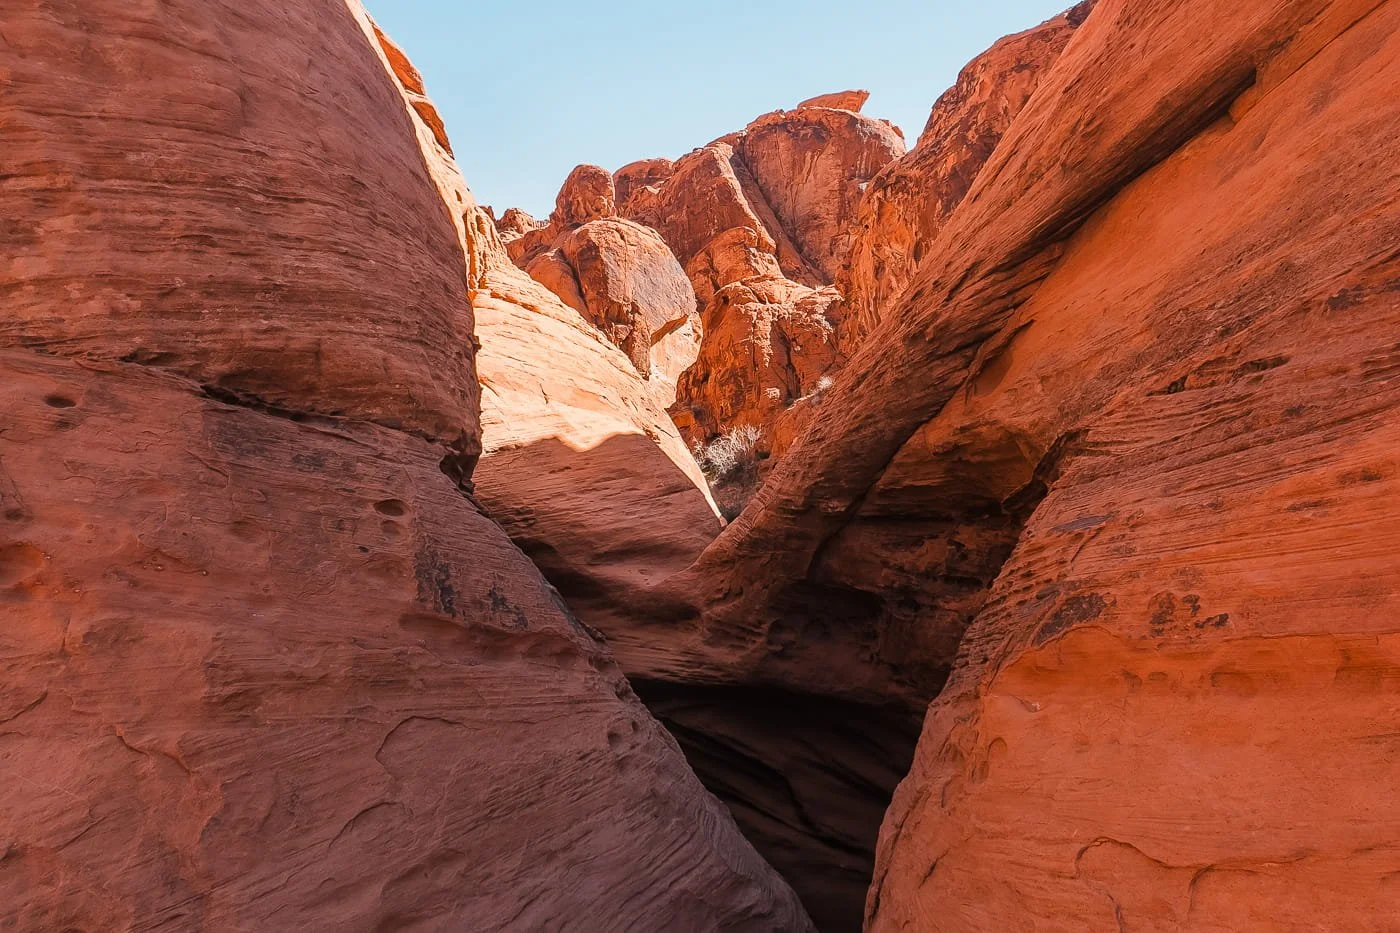
Views along the Rainbow Vista trail
📍 Google Maps Location | 1.0 mi RT | ⏱ 30–45 min | 🟢 Easy | 🔄 Out-and-Back
Rainbow Vista is a short walk into a natural amphitheater of banded, multicolored sandstone, layers of red, pink, orange, and cream stacked into a bowl-shaped depression. The geology is genuinely interesting and the colors are striking in the right light.
Rainbow Vista is the one stop on this list where we'd say to skip if you're pressed for time. It's pretty, but compared to Fire Wave and White Domes, it doesn't have the same wow factor. That said, if you have a full day in the park and want to check off everything, it's a pleasant and easy hike.
→ Honest take: Hit or miss for us and the lowest priority on this list. Worth doing if you have time and are already nearby, but not worth building your schedule around.
→ Photography tip: Midday light is actually decent here since you're looking down into the amphitheater rather than at a vertical face. Early morning and late afternoon still produce the warmest tones.
Fire Wave Trail + Seven Wonders Loop
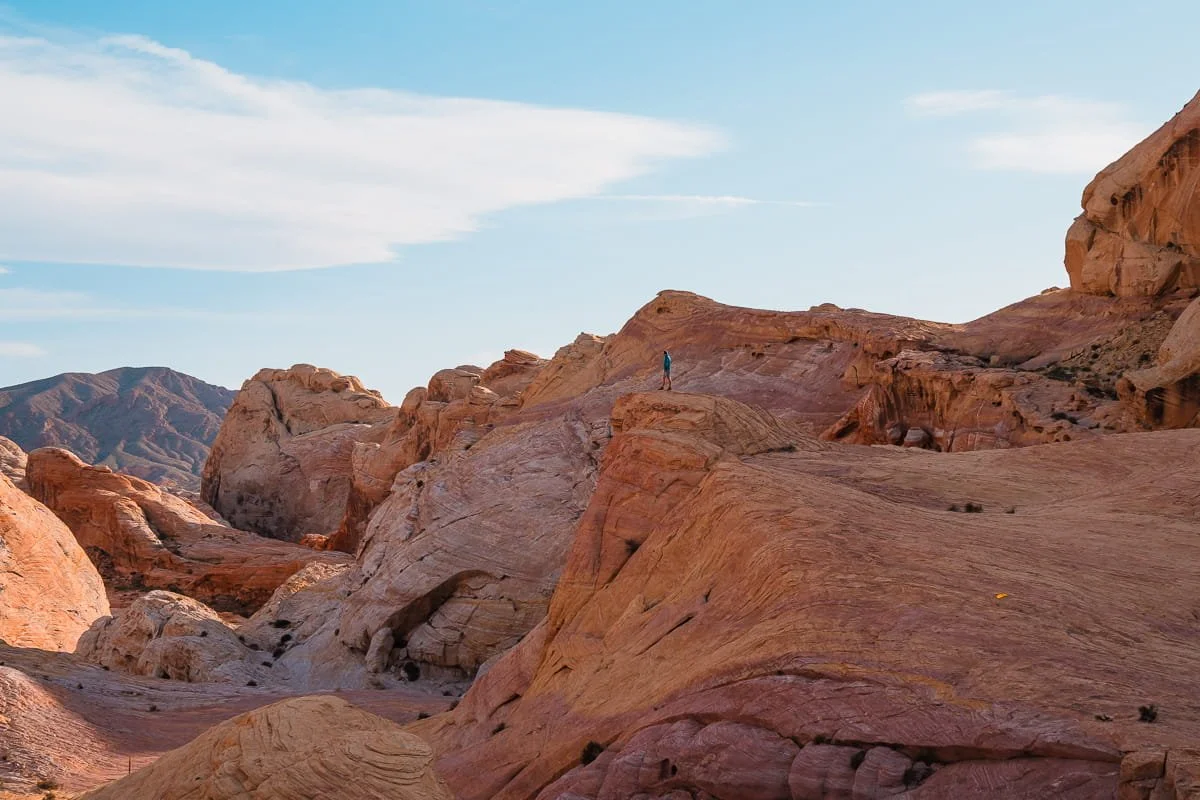
Views along the Fire Wave trail, easily hiked from the parking lot
📍 Google Maps Location | ~1.3 mi to the formation, ~3 miles RT for the full loop | ⏱ 1–2 hrs | 🟦 Moderate | 🔄 Out-and-Back
Fire Wave and the Seven Wonders Loop is the most iconic hike in Valley of Fire, and a must-do hike in our book. The formation itself - swirling bands of pink, red, white, and salmon sandstone that look like a wave frozen mid-crash - is unlike anything else in the park, and genuinely one of the more striking geological features in the entire American Southwest.
Getting there is part of what makes it interesting. The trail doesn't follow a conventional dirt path, it routes across open slickrock using cairns (small stacked rock markers) as guides. This makes the hike feel more like an adventure than a typical trail walk. Keep your eyes on the cairns rather than wandering off-route; the slickrock is disorienting and it's easy to drift in the wrong direction.
The formation itself is a broad expanse of swirling rock that you can walk on and explore freely, there's no single "right" spot. The colors shift dramatically depending on the light: midday sun washes the colors out somewhat, while golden hour, especially sunset, turns the pink and red tones bright and colorful. We hiked it once at midday and came back just before sunset, and the difference was remarkable enough that I'd recommend visiting closer to sunset if possible for the colors to look brighter.
A note on distance: You'll see different numbers for this hike across different sources. The 1.3-mile figure gets you to the Fire Wave formation and back to the trailhead. Some sources cite 3–4 miles for a longer Seven Wonders loop that takes in additional formations and even goes through a mini canyon. Both are accurate, just different routes from the same trailhead and parking area. Do the full Seven Wonders Loop, it’s worth it!
→ Honest take: If you only do one hike in Valley of Fire, make it this one. The formations are genuinely stunning, and the slickrock route-finding makes the approach more interesting than a standard trail. Come back at sunset if you can, or hike it later in the day for the best lighting.
→ Photography tip: Sunset and blue hour have the best light here. Arrive at the trailhead at least 90 minutes before sunset to give yourself time to walk in, find your composition, and not feel rushed. The pink and cream tones in the sandstone saturate beautifully in the last 30 minutes of light.
White Domes Loop
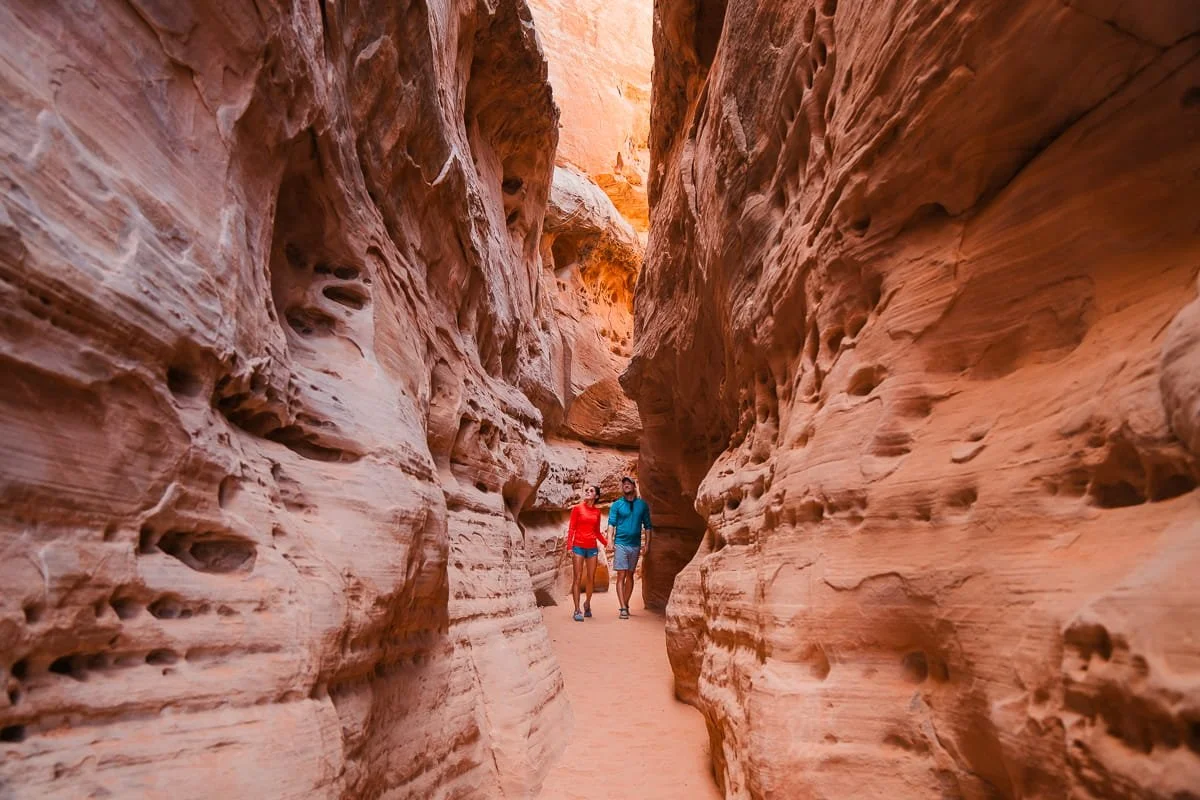
Hiking through the slot canyon on the White Domes loop trail
📍 Google Maps Location | 📏 ~1.1 mi | ⏱ 45–75 min | 🟦 Moderate | 🔁 Loop
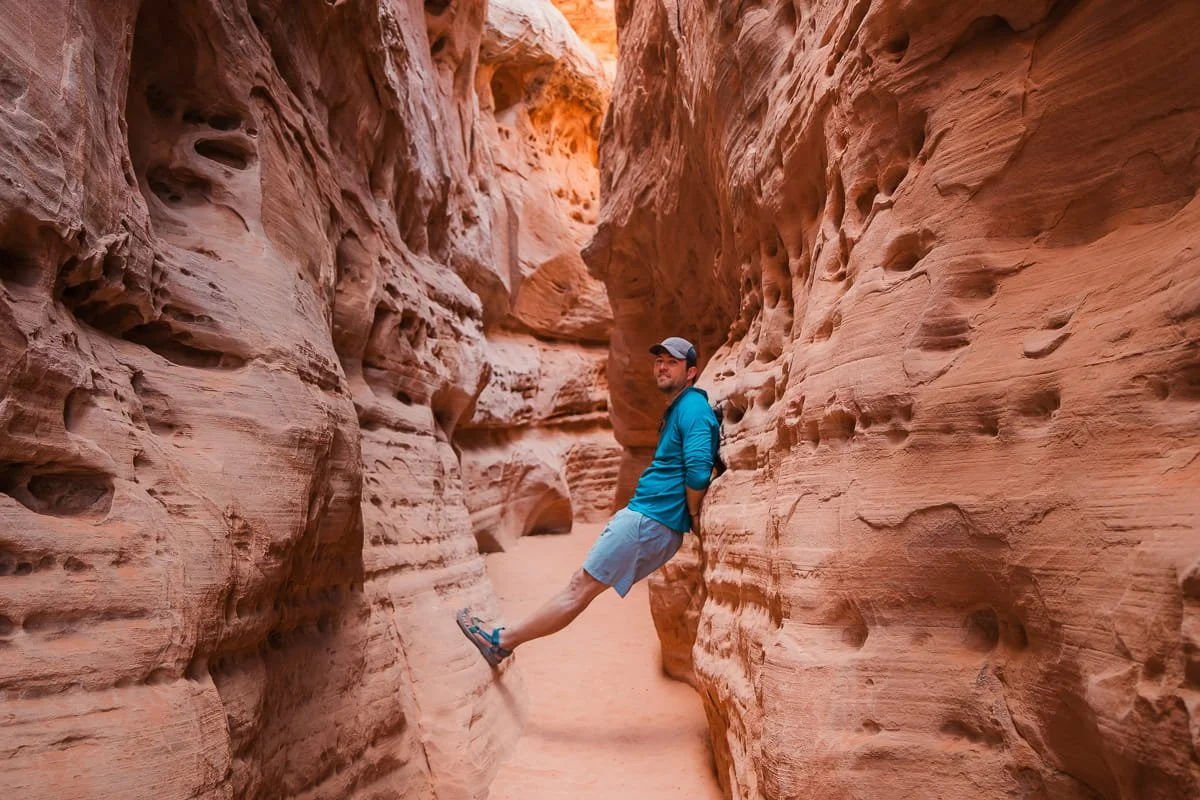
White Domes is one of our favorite hiking spots in all of Valley of Fire. The loop takes you through a short but dramatic slot canyon. The narrow sandstone walls rise on both sides with light filtering down in shifting shapes, before opening into a landscape of white and red domes that you’ll see along the trail.
The slot canyon section is the highlight. It's not long, but the walls are sculpted into smooth curves by centuries of flash flood erosion and the colors shift from deep red to cream to pale orange depending on where you're standing. It's one of those places where photos don't quite capture what it feels like to be inside it.
After the slot canyon, the trail opens into a more exposed landscape of the white and red domes that give the hike its name, before looping back to the trailhead through open desert. The full loop is short enough that almost anyone can complete it, but the terrain is uneven enough in spots to earn its "moderate" rating.
Hiking Tip: Do it in the morning or late afternoon if possible, the slot canyon gets crowded at midday and the light inside is better with the sun at an angle. Also, the trail is a loop, so choose your direction based on whether you want to hit the slot canyon first (go clockwise from the trailhead) or save it for the end.
→ Honest take: Do not skip this one. It's the single most memorable experience in the park for most visitors, and at just over a mile it has no good excuse to be left off any itinerary.
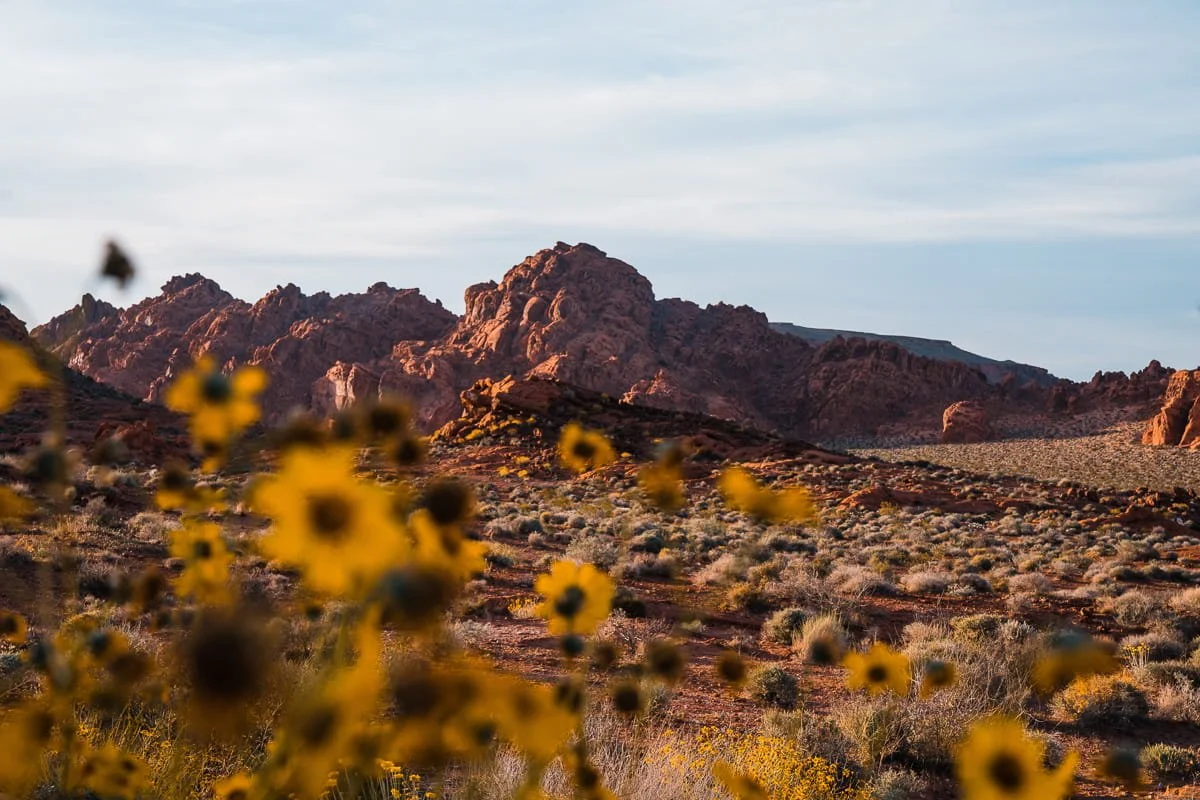
Views from the Elephant Rock parking lot
Suggested One Day Itinerary for Valley of Fire - How to Combine Hikes & Viewpoints
You can see the majority of Valley of Fire in one day. It just takes a little planning and an early start to make sure you have enough time to see everything you want to. But even if this is just a half day trip for you, it’s still worth a visit.
Check out Valley of Fire Guide for a more complete one-day itinerary for hitting up every viewpoint and hike on the park map. But below are a few quick combinations based on how much time you have.
If you only have 2–3 hours:
Atlatl Rock (breakfast stop) → Arch Rock (quick stop) → White Domes Loop (hike). You'll hit one great petroglyph site and the best hike in the park.
If you have a half day (4–5 hours):
Atlatl Rock → Arch Rock → Mouse's Tank (short hike) → White Domes Loop → Silica Dome Overlook. Geographic order, west to east, hits everything except the far end of the park.
If you have a full day:
Follow the sequence above, then add Fire Wave and the Seven Wonders Loop (midday or afternoon), and finish at Elephant Rock for sunset. That's the complete park in roughly 8–10 hours.
If you're a photographer with flexible timing:
Elephant Rock or Fire Wave at sunrise. White Domes and Mouse's Tank midday. Fire Wave again at sunset. Two visits to Fire Wave in the same day sounds excessive — it isn't.
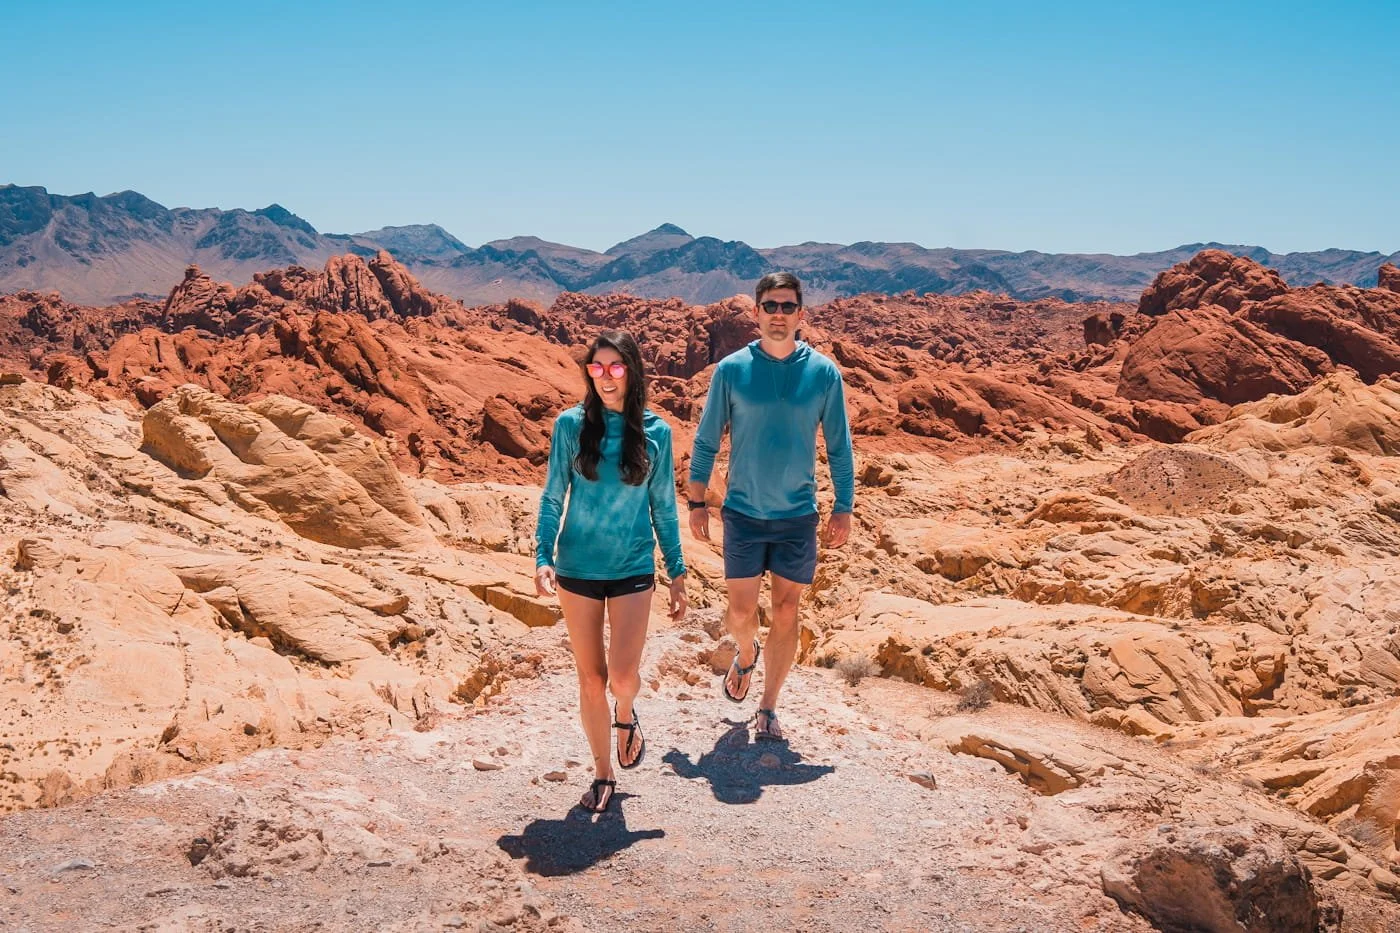
The viewpoint at Fire Canyon / Silica Dome Overlook in our Ridge Merino sun hoodies
What to Wear for Desert Hiking in Valley of Fire
Packing the right clothing for Valley of Fire can make or break your day. The desert heat is relentless, the sun reflects off the sandstone and amplifies the temperature, and there's almost no shade on any trail. Even on a mild spring or fall day, you'll feel the sun exposure.
For planning your hiking and sightseeing gear, the goal is lightweight, breathable clothing with solid UPF sun protection, covering as much skin as possible without overheating. Below is what we wear and what we recommend after years of gear testing on hikes in deserts all around the world.
Sun Hoodies & Sun Shirts
A sun hoodie is the single most important clothing item you can bring to the desert, and it's the one piece we’ll never skip regardless of the season. A good sun hoodie covers your arms, neck, and face with UPF protection while staying lightweight and breathable enough that you won't feel like you're trapped in a layer.
In direct sun on reflective sandstone, the difference between bare arms and a sun hoodie is significant — both in terms of comfort and how quickly you may burn.
Look for something with a relaxed hood that actually stays up while you're moving and a fabric that is lightweight and dries quickly if you're sweating. Fit matters too, you want something you can move freely in, not a tight or form-fitting layering piece.
The Best Sun Hoodies for Desert Hiking
Outdoor Research Astroman Sun Hoodie: Our all-time favorite for all types of hiking and backpacking, and it feels the best in the desert. The Astroman is incredibly lightweight, has excellent UPF coverage (UPF 30-50 depending on color), and the fit is flattering while being loose and breezy.
Outdoor Research Echo Sun Hoodie: A slightly more packable, minimalist option from OR, great for warmer days when you want as little fabric as possible. We love Echos for a more fitted look and for lots of color options.
Ridge Merino Lightweight Solstice Pullover: Our top pick if you want a Merino wool option (non-synthetic). Merino naturally resists odor in a way synthetic fabrics can't match, which makes it a great choice for multi-day trips or general travel when you need to wear it over and over without washing. It still offers UPF 50+ protection and has that soft, next-to-skin comfort.
→ Want more sun hoodie options to choose from? Check out our Best Sun Hoodies of 2026 Guide for more of our favorites!



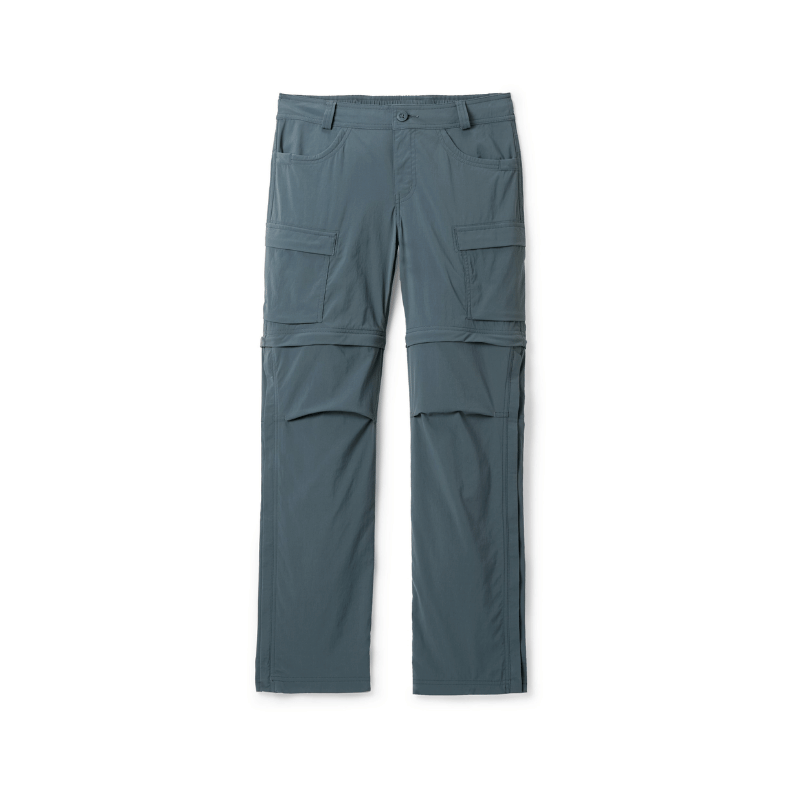
Pants vs. Shorts - How to Choose for Desert Hiking
Both pants and shorts work well in Valley of Fire, and honestly the right answer depends on the time of year and how sun-sensitive your skin is. Both of us always opt for shorts, but if you want more sun protection, lightweight pants are a great option.
Shorts are the more comfortable choice on a warm day and work well for most spring, summer, and fall visits. If you're going the shorts route, pair them with a sun hoodie and a good sunscreen routine — your legs will be fully exposed on every trail.
Lightweight hiking pants are the better call in two situations: if you burn easily, or if you're visiting when temperatures swing dramatically between morning and afternoon. A pair of lightweight, breathable, or convertible pants gives you sun coverage on the trail and the option to zip off the legs if you're overheating.
Top Picks for Hiking in Shorts
Outdoor Research Ferrosi Shorts: Stretchy, durable and breathable, these are our workhorse shorts that can handle dusty trails and hot temperatures.
Patagonia Strider Pro: Great for hotter days and those who prefer a built-in brief and a shorter cut. These are running shorts but we love hiking and backpacking in them.
Stio CFS Drifter Shorts: A favorite since they are lightweight and very quick drying, these are a great and very comfortable option for those who want shorts without a built-in brief.



Top Picks for Hiking in Pants
Outdoor Research Ferrosi Pants: Similar to the OR Ferrosi shorts, we love the stretchy comfort and durability of these pants. They’re lightweight and look great on the trail and in-town.
REI Sahara Convertible Hiking Pants: Also very lightweight, but these offer the option to wear pants, or zip them off into shorts if you get too hot. A really great option for desert hiking.
Stio Pinedale Pants: We use these for cooler temps (winter in the desert) since they are a bit thicker than the Ferrosi pants. They still have that stretchy breathable feel for high active days and have the added bonus of a built in belt system.



Desert Hiking Accessories: Sun Hat, Buff, & Sun Gloves
The details matter more in the desert than almost anywhere else, because the sun hits you from every angle, directly overhead, and reflected back up off the sandstone. Even if you are planning to wear a sun hoodie, having a hat also helps shield your face more.
Sun hat: A wide-brim hat is non-negotiable. You want coverage over your face, ears, and the back of your neck, a standard baseball cap won't cut it for a full day in Valley of Fire. Look for a brim of at least 3 inches all the way around. The Outdoor Research Helios Sun Hat has full coverage and good packability for travel, and the Sunday Afternoons Adventure Hat is a slightly more structured option.
Buff or neck gaiter: Underrated for desert hiking. A lightweight buff pulled up over your nose and neck blocks direct sun and wind without adding any real warmth. On sandy trails like Mouse's Tank, it also keeps dust off your face. We pack one on every desert trip and reach for it more than we expect to.
Sun gloves: Optional but genuinely useful if you're prone to burning on your hands (or forget to apply sunscreen there), which happens faster than most people expect on a full day of hiking when your hands are constantly exposed to direct sun. Lightweight UV-protective gloves are a small addition to your kit that can save you a painful few days of peeling afterwards. We’ve tested out and recommend Outdoor Research ActiveIce Spectrum Sun Gloves.
Footwear: Boots, Trail Runners & Sandals
Trail runners are our strong preference over traditional hiking boots for Valley of Fire. The trails here are mostly flat and low-mileage, meaning you don't need the ankle support or stiffness of a boot, and trail runners breathe significantly better in the heat. On the slickrock sections of Fire Wave, the rubber sole on a good trail runner grips just as well as a boot. We normally hike in Altra Timp trail runners and they've been our go-to for desert hiking for years. But if you want something with a little more support, Skye has been loving her new Salewa Pedroc 2 shoes in the desert.
Hiking boots are a reasonable choice if that's what you prefer, especially if your ankles need the extra support on uneven terrain. Just be aware that a stiffer, heavier boot will feel noticeably warmer on a hot day.
Hiking sandals as an option: On our last trip to Valley of Fire, we wore sandals for all of the viewpoints and shorter walks like Atlatl Rock, Arch Rock, the Silica Dome Overlook, and Elephant Rock, and they worked great. If you're planning to split your day between viewpoints and longer hikes, sandals for the short stops and trail runners for the hikes is a practical combination. A comfortable hiking sandal with a grippy sole is all you need, we love LUNA Sandals (15% off through that link) and have taken them on everything from viewpoint walks to light canyon scrambles.


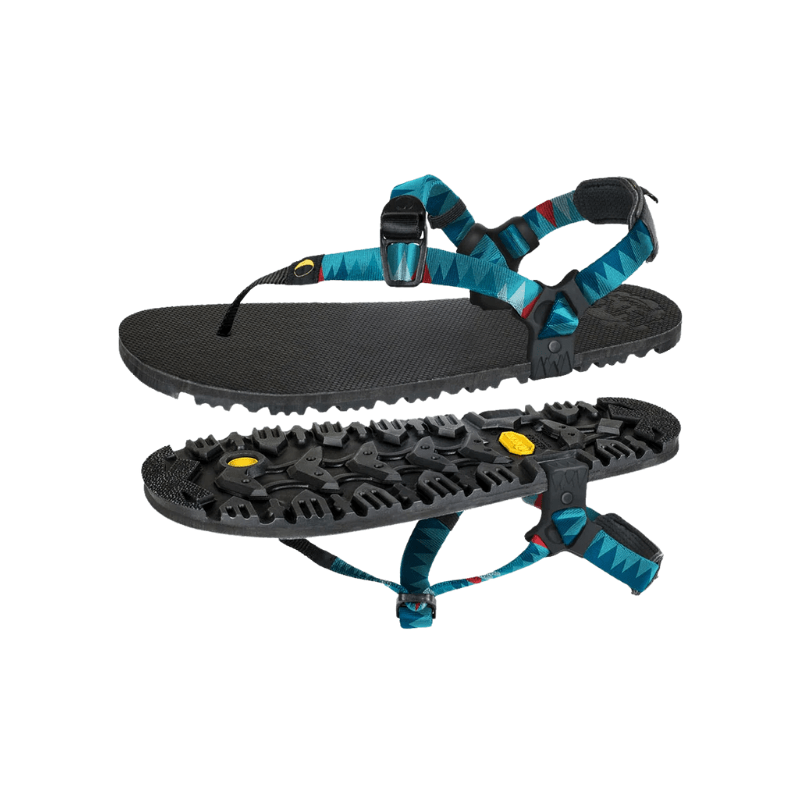
Our Top Picks for Trail Runners & Hiking Shoes
Altra Timp 6: Extra cushion for long trail days on rocky, technical terrain. Great for hikers transitioning from more padded tennis shoes and looking for a similar feel in their trail runner.
Altra Lone Peak 9: Features a wide toe box that excels in the thru-hiking and high-mileage days. Less cushion than the Altra Timp 6 for hikers who want maximum ground feel and a more natural stride.
Salewa Pedroc 2: Burly lugs and cushy feel, these hike like a boot but give you the mobility and breathability of a trail runner.
Lowa AMPLUX 2: A new trail runner that is lightweight and perfect for hot hikes. We love seeing a big hiking boot company get more into light and fast shoes.
Our Top Picks for Hiking Boots
Pedroc 2 Leather Mid Powertex Boot: Our go-to hiking boot for ankle support, comfort and coverage. We only wear ours on winter hikes, but it is the most comfortable boot we’ve tried and highly recommend these if you want boots.
Danner Mountain 600 Leaf GTX: A very popular option that are comfortable and less stiff than others.
Lowa Renegade Evo GTX Mid: More of a true hiking boot than the others, with a stiff sole and lots of stability.
Whatever footwear you choose, pair it with moisture-wicking hiking socks, even in sandals if you're prone to blisters on longer walks. And if you're doing Mouse's Tank or any sandy trail, consider low gaiters to keep sand out of your shoes. It makes a bigger difference than you'd think.
→ For everything else you'll want to pack for a day in the desert — water, navigation, first aid, and sun protection — see our full Day Hike Packing List.
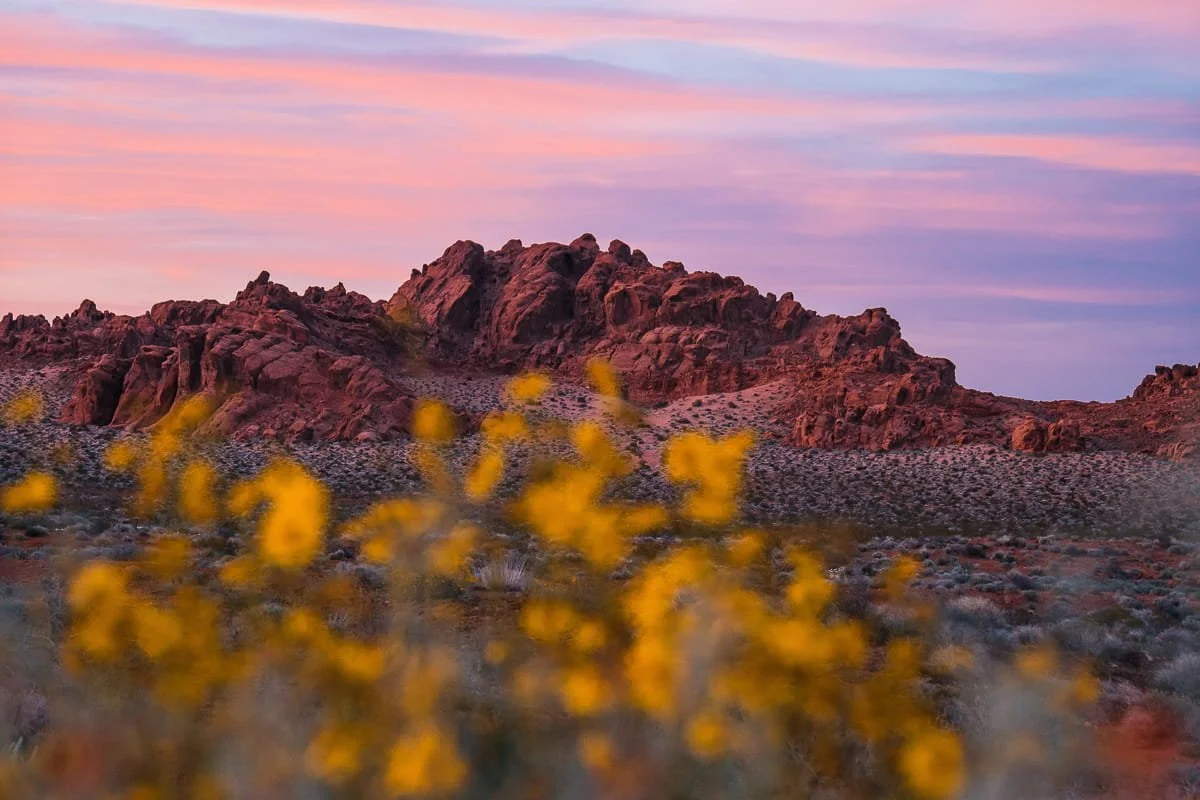
Sunset in the spring at Valley of Fire
Photography Tips for Valley of Fire
Valley of Fire is one of the most photogenic state parks in Nevada, but like most desert landscapes, you really need to time your trip right to get the most out of it. After many trips to Valley of Fire, below are our suggestions to get the best light for your photos.
Best time of day to shoot: The two hours after sunrise and the 90 minutes before sunset. Midday light is harsh and flattens the color of the red rock. If you're serious about photos, plan your most important stops around the golden hours.
Sunrise vs. Sunset by Location
Fire Wave → Best at sunrise or sunset
Elephant Rock → Best at sunset (warm evening light, west-facing)
Silica Dome → Good in both morning and afternoon
White Domes slot canyon → Mid-morning, when the sun is high enough to light the canyon walls but not directly overhead
Visit in Spring For Wildflowers
March and April bring occasional desert wildflowers that add foreground interest to almost any composition in the park. Not every year is a super bloom year, but when conditions are right, the contrast of yellow and purple flowers against the red rock is stunning.
Photography Gear to Bring to Valley of Fire
I always bring my camera on every trip, but if you are not a photographer, a cell phone works great as well. Do note that drones are not allowed inside the park. But, you can use a 360 camera to get drone like shots on hikes.
For all of the viewpoints and hikes, my Sony a7iv with 24-70mm lens was perfect, but you could add a wide angle lens if you want larger landscape shots. All of our camera gear we travel with usually comes with us just in case we need more lenses or options.
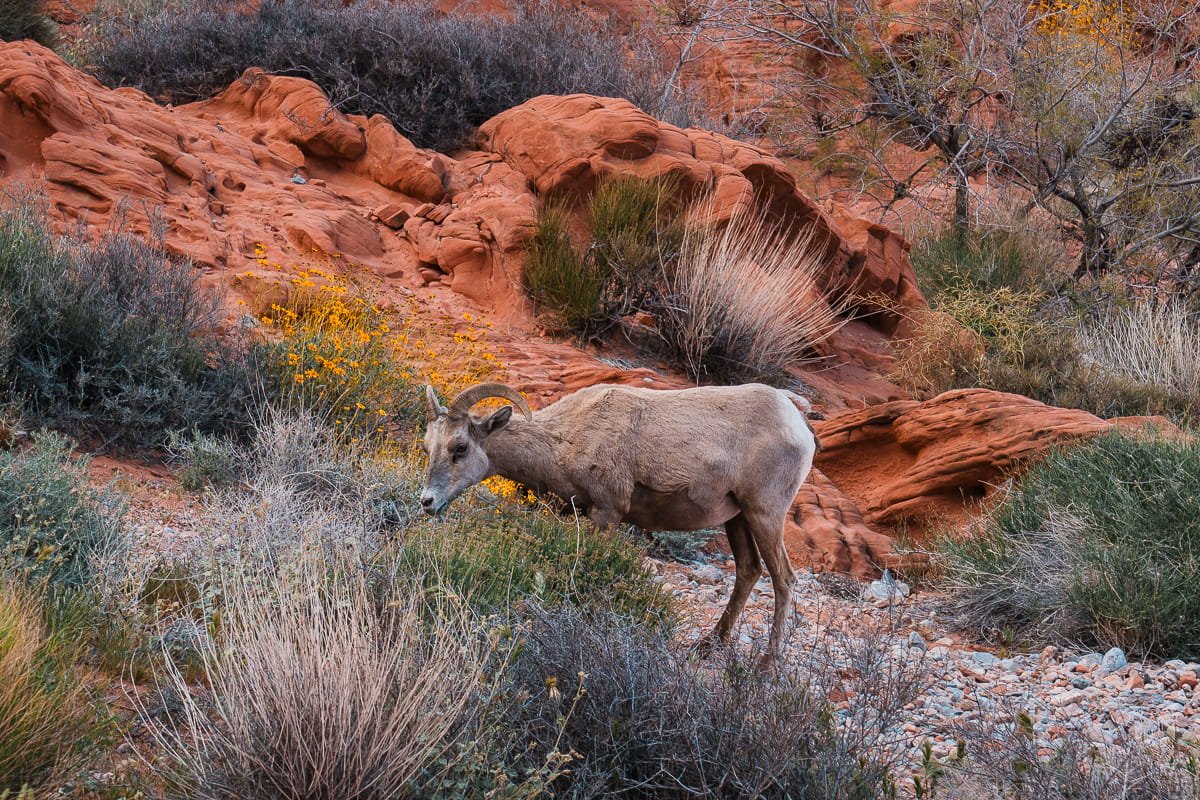
Big horned sheep are everywhere in the park
Leave No Trace in Valley of Fire
Valley of Fire's landscape and petroglyphs are irreplaceable. Please follow these principles on every visit:
How to Be a Responsible Visitor
- Stay on marked trails. The desert crust (cryptobiotic soil) around trails takes decades to recover from a single footstep. When in doubt, walk on established rock surfaces.
- Do not touch the petroglyphs. Oils from your hands cause permanent damage to carvings thousands of years old. Look, don't touch.
- Pack out all trash. There are no trash cans on the trails. If you carried it in, carry it out.
- Leave rocks, plants, and artifacts in place. Removing anything from a state park is illegal and can carry significant fines.
- Keep dogs leashed at all times — and bring enough water for them too.
Valley of Fire Hikes FAQ
Which hike is best for first-timers in Valley of Fire?
White Domes Loop. It's short, manageable for almost any fitness level, includes a slot canyon, and delivers a genuinely memorable experience. Fire Wave is a close second — both are must-dos, and most people with a full day can comfortably do both.
Is Fire Wave worth the hike?
Yes, without question. The formation is the most visually striking in the park and the slickrock route-finding makes the approach more interesting than a typical trail. Visit at golden hour if at all possible.
Can I do White Domes and Fire Wave in the same day?
Absolutely — most people with a full day in the park do both. White Domes is about 1.1 miles and Fire Wave is about 1.3 miles to the formation; together they're well under four miles and take around 3–4 hours combined, including time to explore each.
Are the trails marked, or do I need a map?
Most trails are reasonably well-marked, but Fire Wave uses cairns across open slickrock rather than a conventional path, and it's easy to drift off-route. Download an offline map before you arrive — Gaia GPS and AllTrails both work well. A physical park map is also available for free at the entrance gate.
Which trails close in summer?
The park closes certain trails between May 15 and September 30 due to extreme heat. Viewpoints and shorter walks typically remain accessible, but check with the visitor center when you arrive. Plan to be off trail by 10:00 AM if visiting in summer.
Is Rainbow Vista worth doing?
It's pleasant but the lowest priority on this list. If you have a full day and want to see everything, yes. If you're short on time, skip it in favor of White Domes, Fire Wave, and the Silica Dome Overlook.
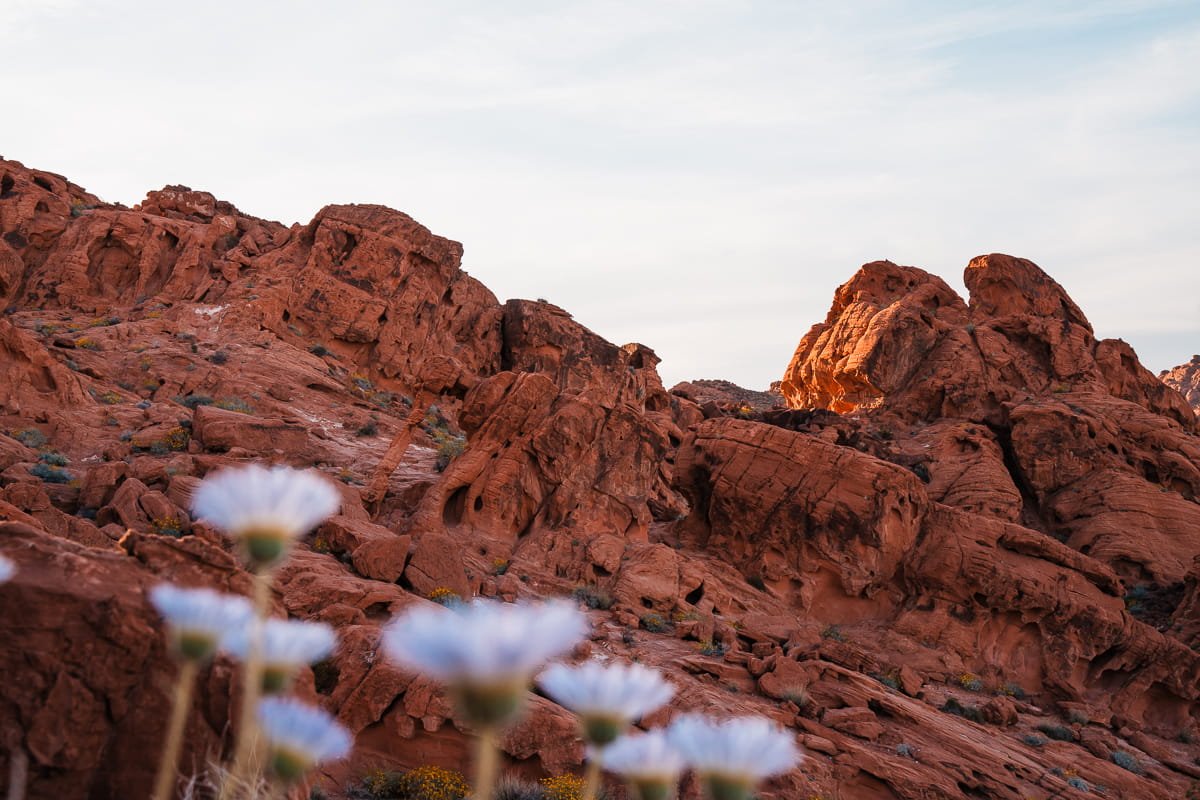
Elephant Rock just before sunset
Final Thoughts on Visiting Valley of Fire
Valley of Fire will forever be a park we go back to whenever we visit Las Vegas. It is just so stunning and really gives you a feel for the desert, without having to spend more than a day there.
Every trail has something new, petroglyphs at Mouse's Tank, a slot canyon at White Domes, slickrock navigation at Fire Wave, that impossible white dome rising out of the red desert at the Silica Dome Overlook. All of these trails are worth a hike.
When visiting the park, go early. Bring more water than you think you need. Come back to Fire Wave at sunset if you can manage it. And don't skip White Domes, we've never met anyone who regretted that hike.
For the full trip planning picture — getting there, where to stay, camping options, and a complete one-day itinerary — head to our Ultimate Valley of Fire Travel Guide.
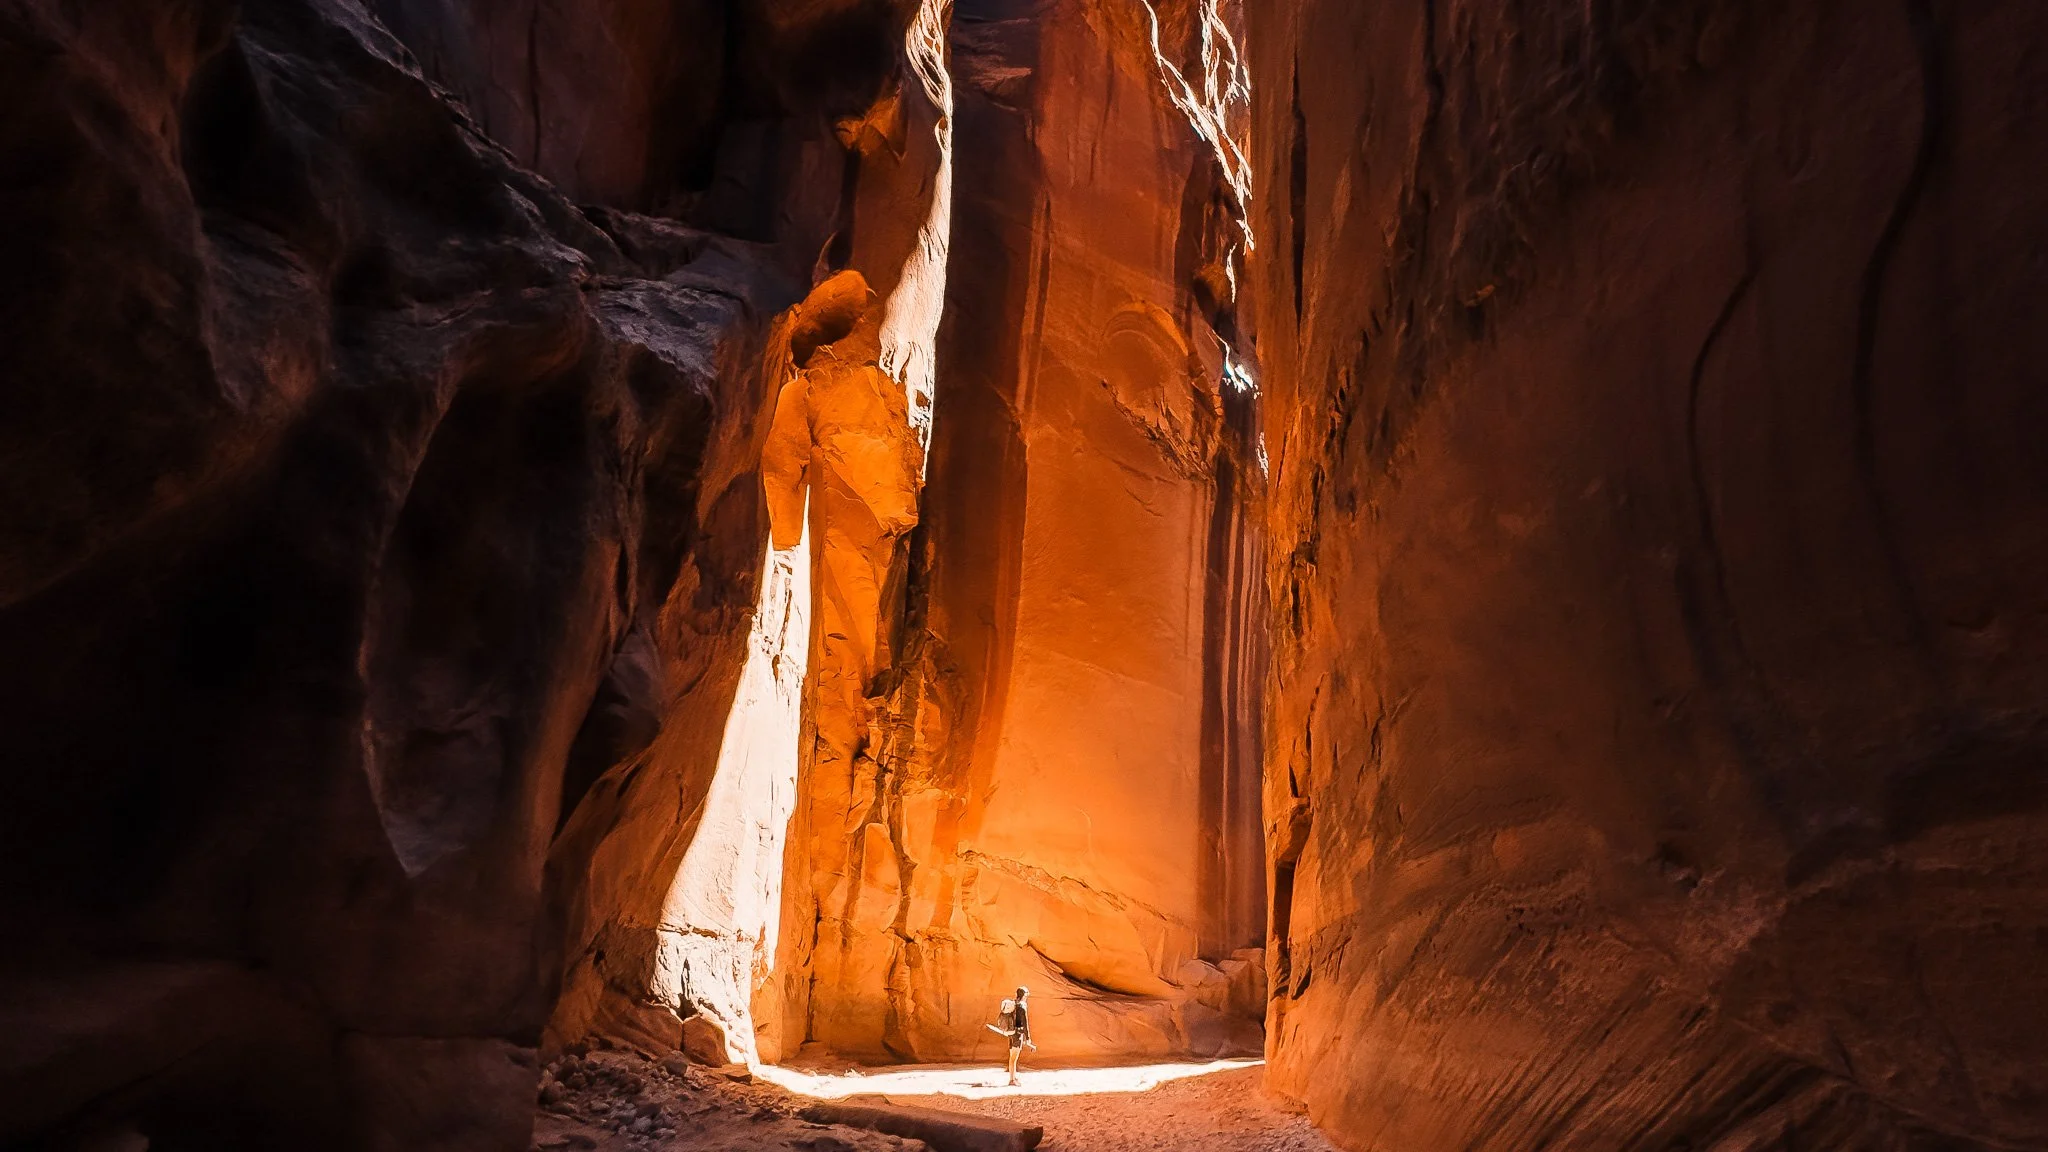
Backpacking through Buckskin Gulch in Utah
Read On - More Desert Adventures to Explore
Desert Hiking & Trip Itineraries
Hiking Gear & What to Pack

Like this Post? Pin it & Save it For Later
Cathedral Pass Loop: Backpacking the Pasayten Wilderness in Washington
Icicle Ridge Day Hike: The Closest Trail to Downtown Leavenworth
This image is copyrighted and owned by Skye Stoury Photography and skyestoury.com, if you would like to licence any images on this site, please email us at hello@skyestoury.com