
Wind River High Route Guide: Complete Backpacking Itinerary and Trail Tips
Complete Trail Guide to Stoury-Arnold High Alpine Route In the Wind River Range of Wyoming
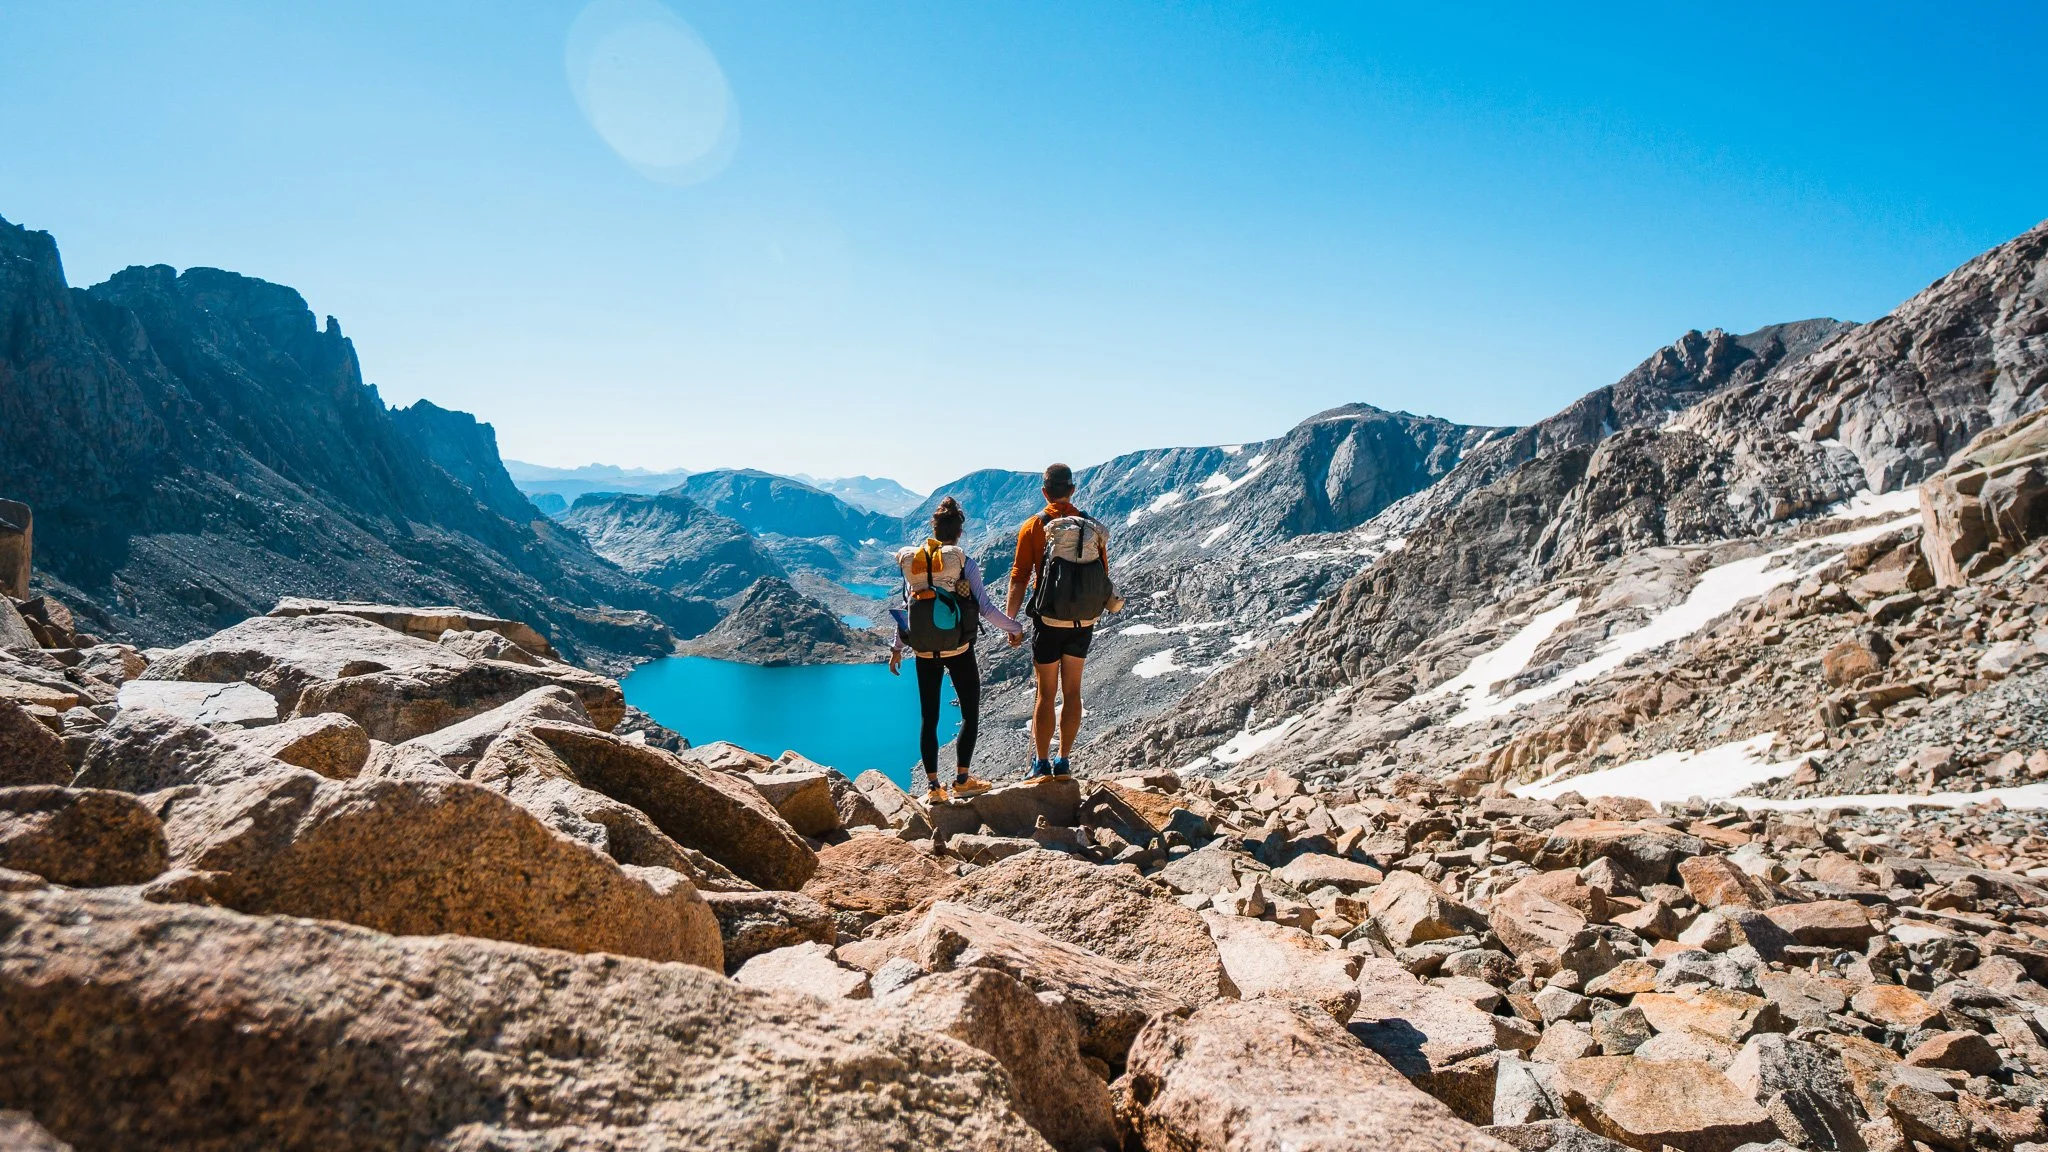
The Wind River High Route in Wyoming is an 80-104 mile (129-167km) off-trail adventure through the highest alpine sections of the Wind River Range. The Wind River High Route traverses the highest alpine sections of this range, making it one of Wyoming's most challenging backpacking routes, staying primarily above 10,000 feet (3048 m). This is a journey for experienced backpackers with strong navigation, scrambling, and off-trail travel skills.
We learned about the Wind River High Route in 2020, but never had the time to plan that long of a backpacking trip until now. My husband Garrett and I love backpacking off-trail routes and connecting popular areas in Washington's North Cascades, so when I heard about the High Route, it sounded perfect for us. What I love about this route is that it combines backpacking, off-trail navigation and travel, and scrambling skills into just over a weeklong trip with some of the most beautiful high alpine scenery in the US.
Why trust this guide? We completed our own 94-mile (151 km), 8-day variation of the Wind River High Route in 2023, combining sections of both the Andrew Skurka and Dixon-Wilson routes (detailed below). As experienced alpine climbers and off-trail backpackers with extensive experience in Washington's North Cascades, we understand the unique challenges of high alpine routes. This guide combines our firsthand experience with comprehensive planning resources to help you prepare for one of America's most demanding backpacking adventures. You may choose to do your own route variation, but we strive to share all our wisdom and on-the-ground experience to help make your trip a success.
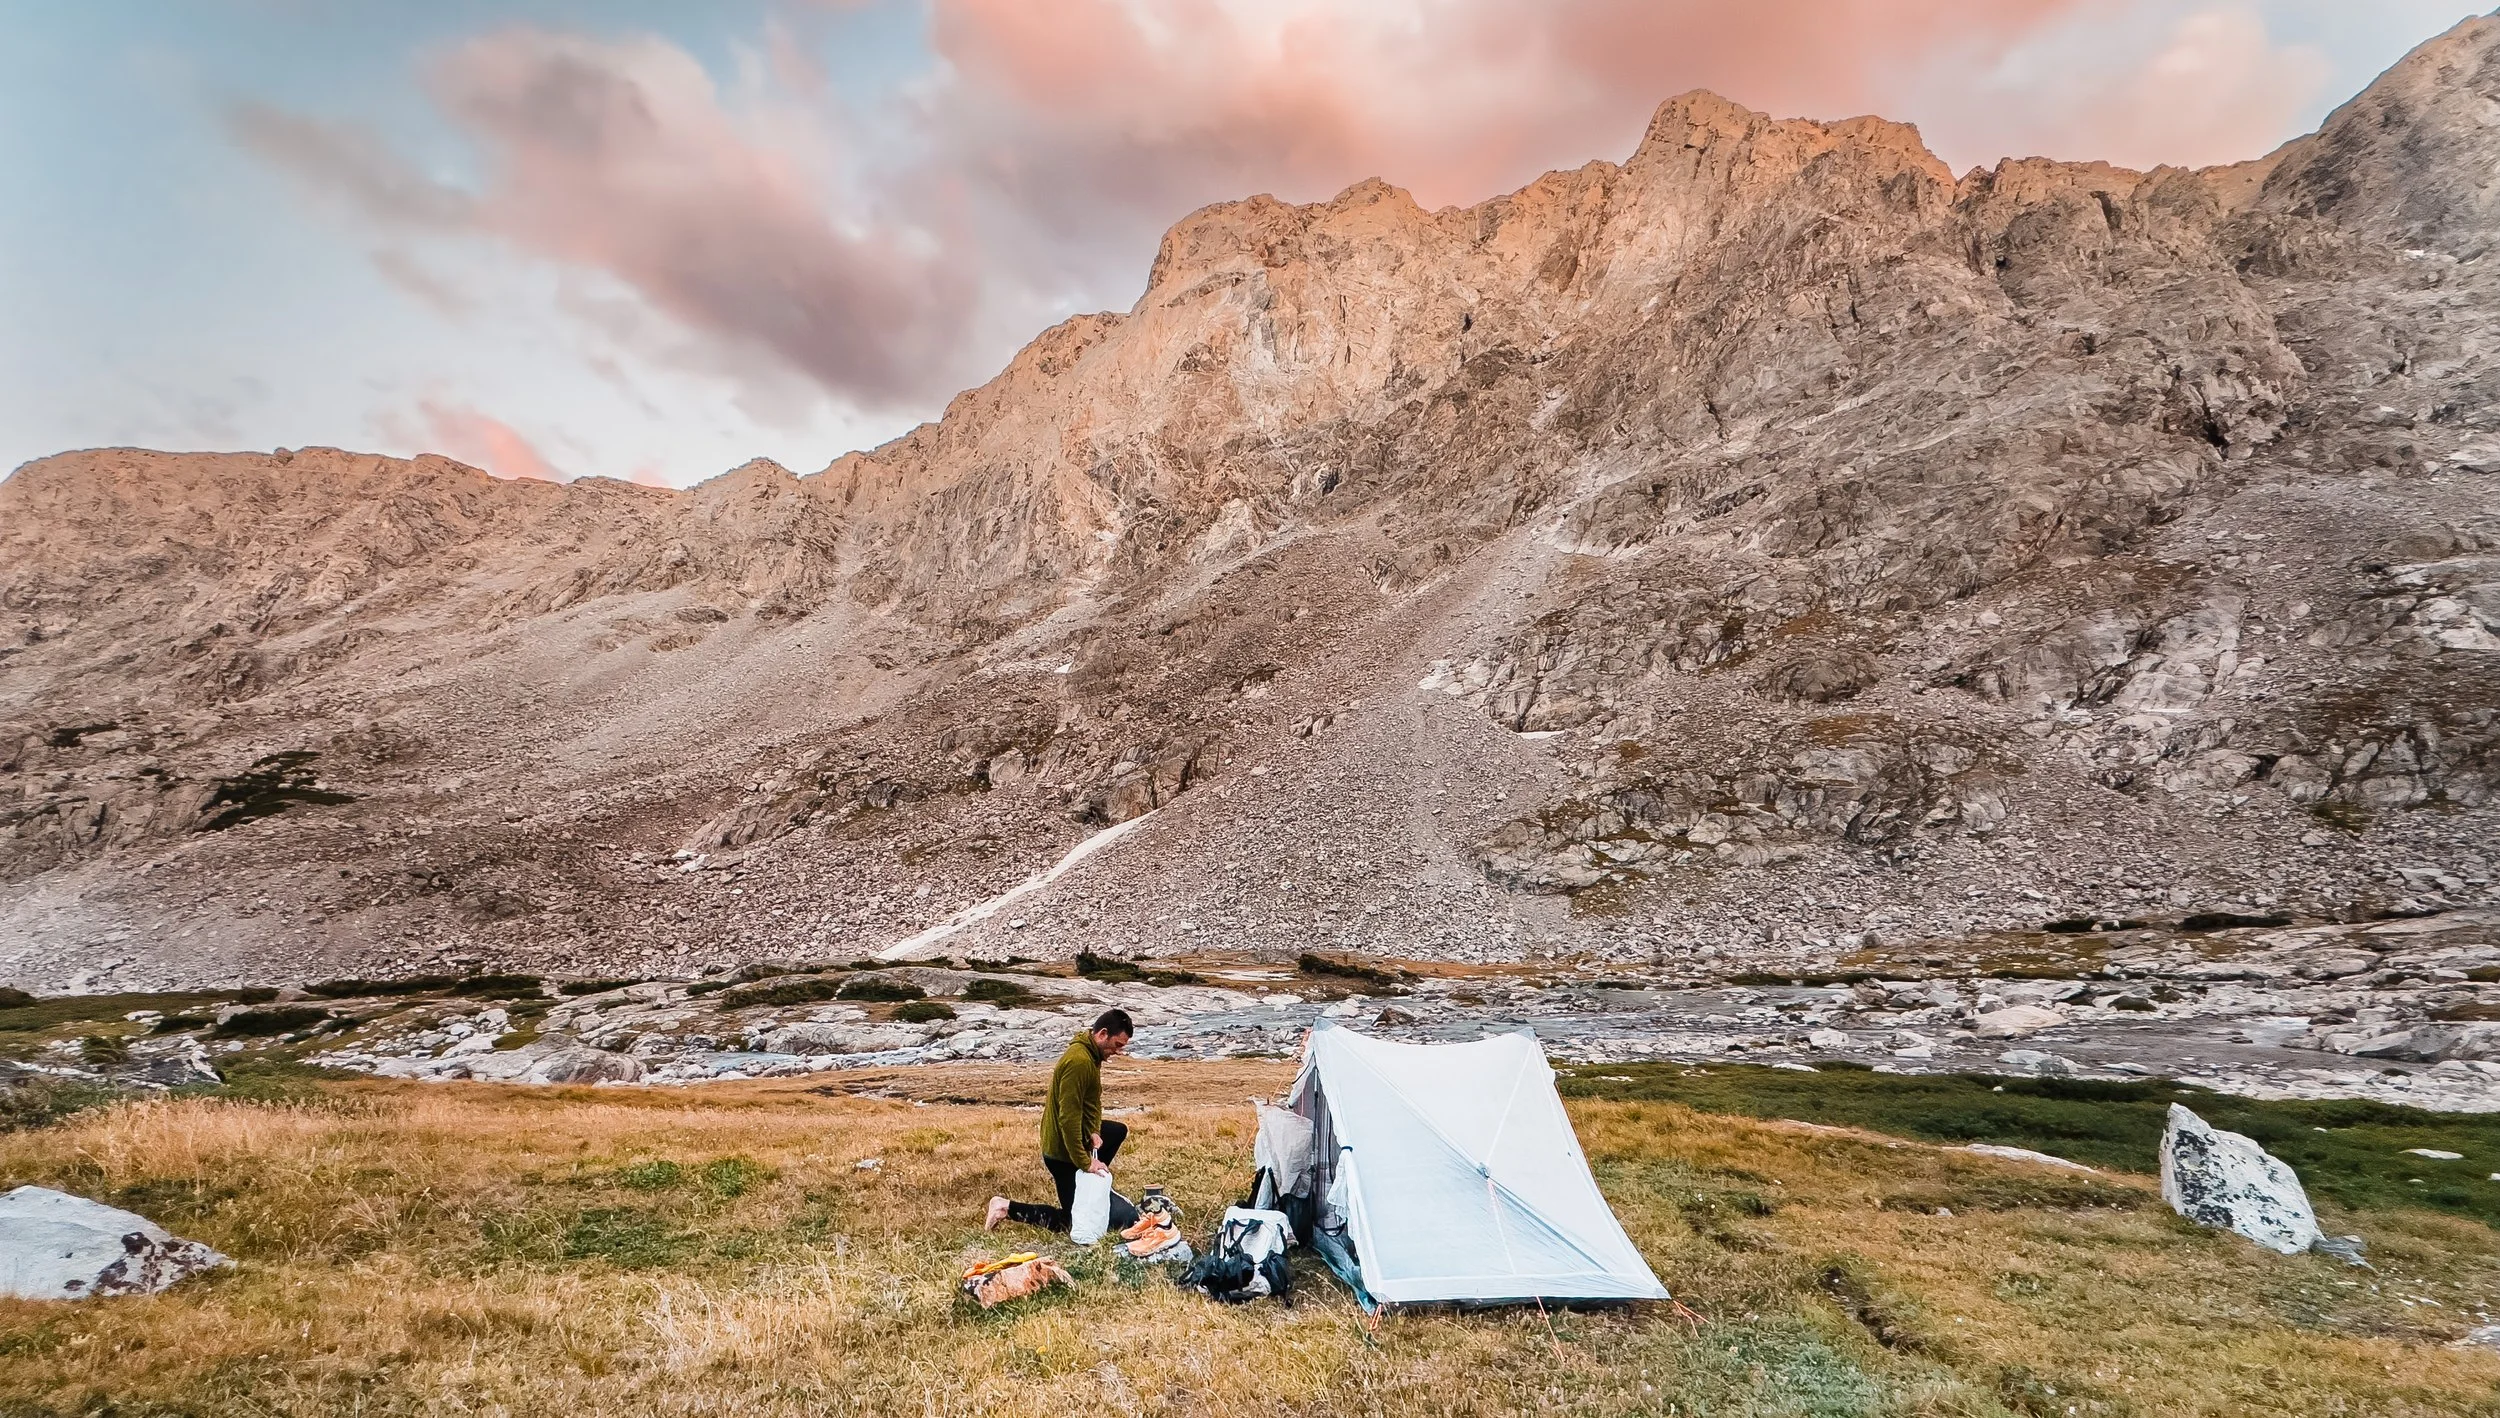
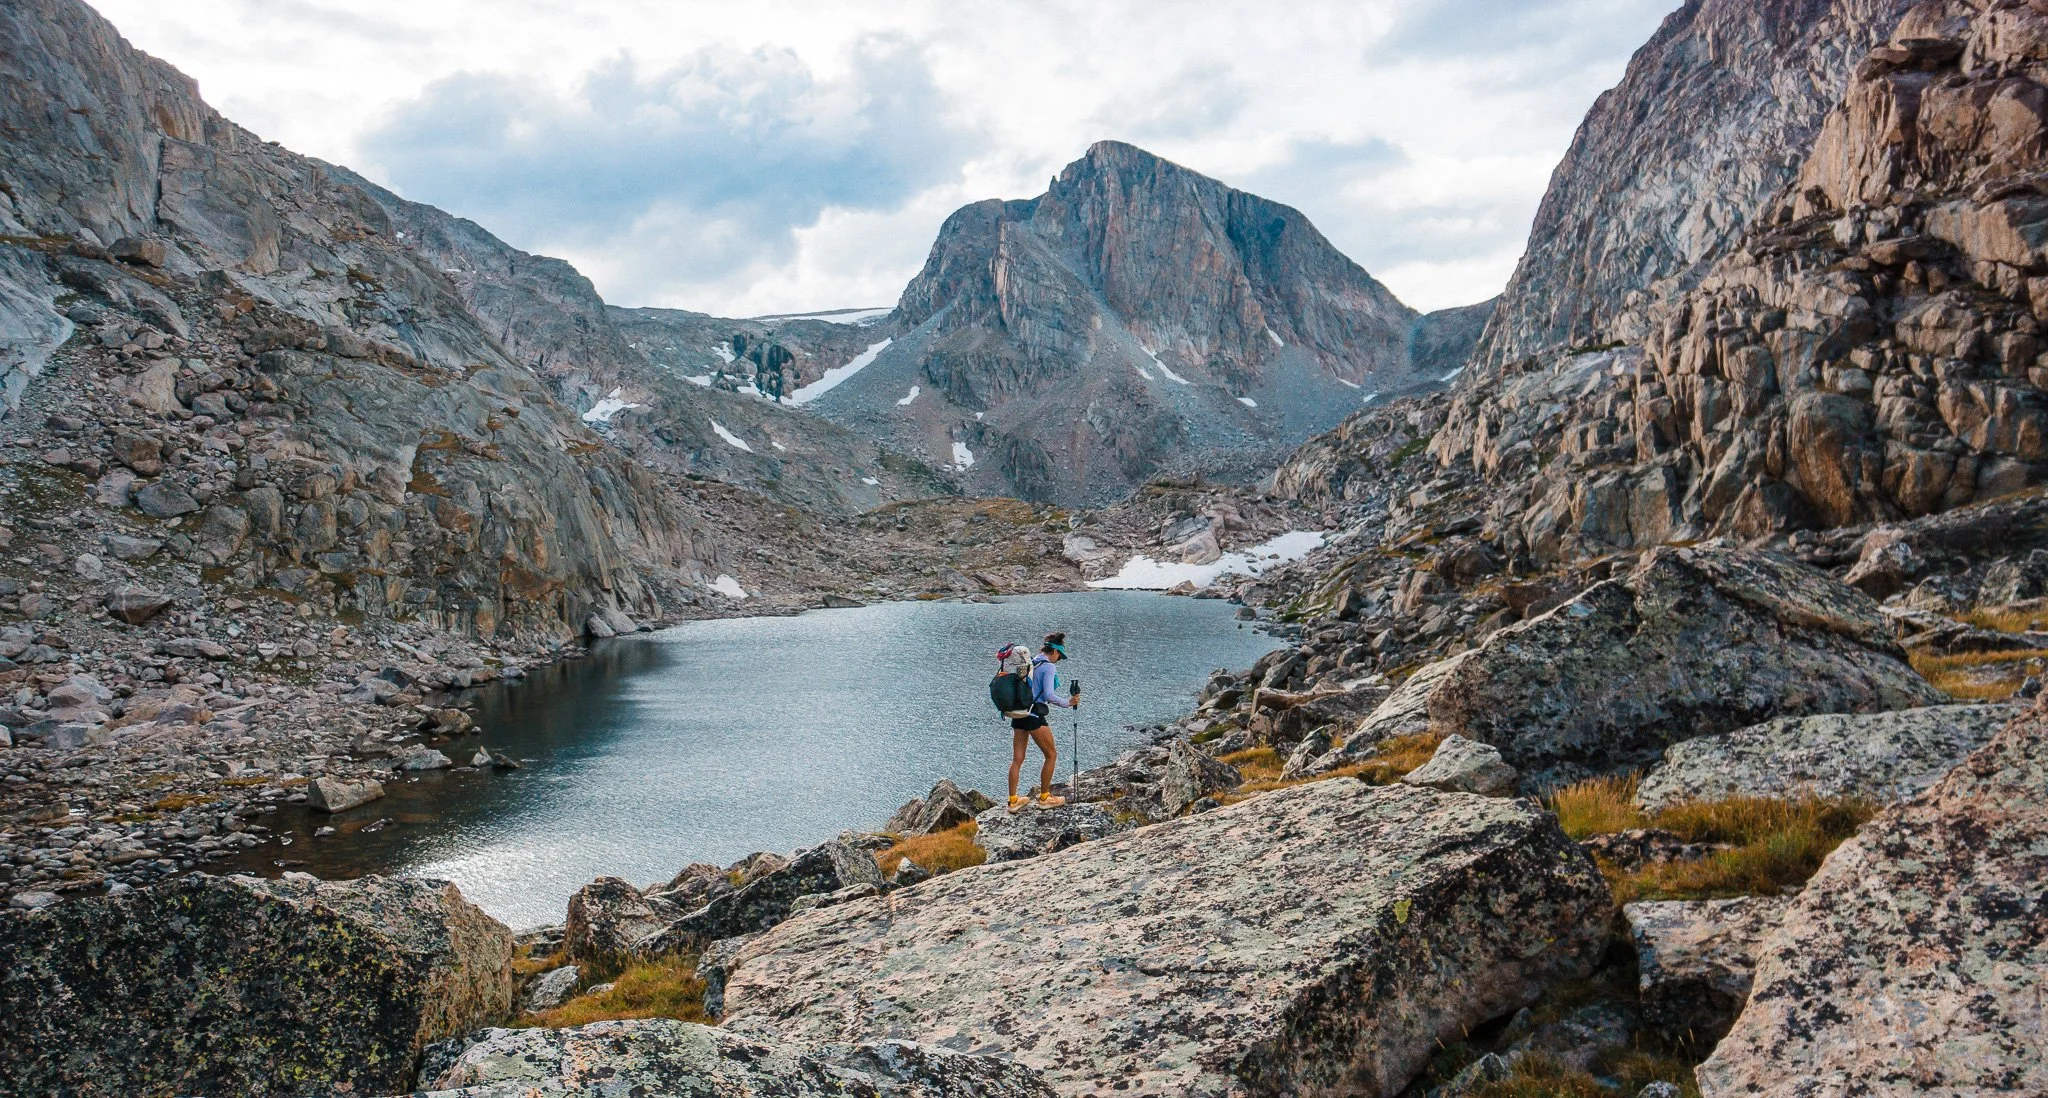
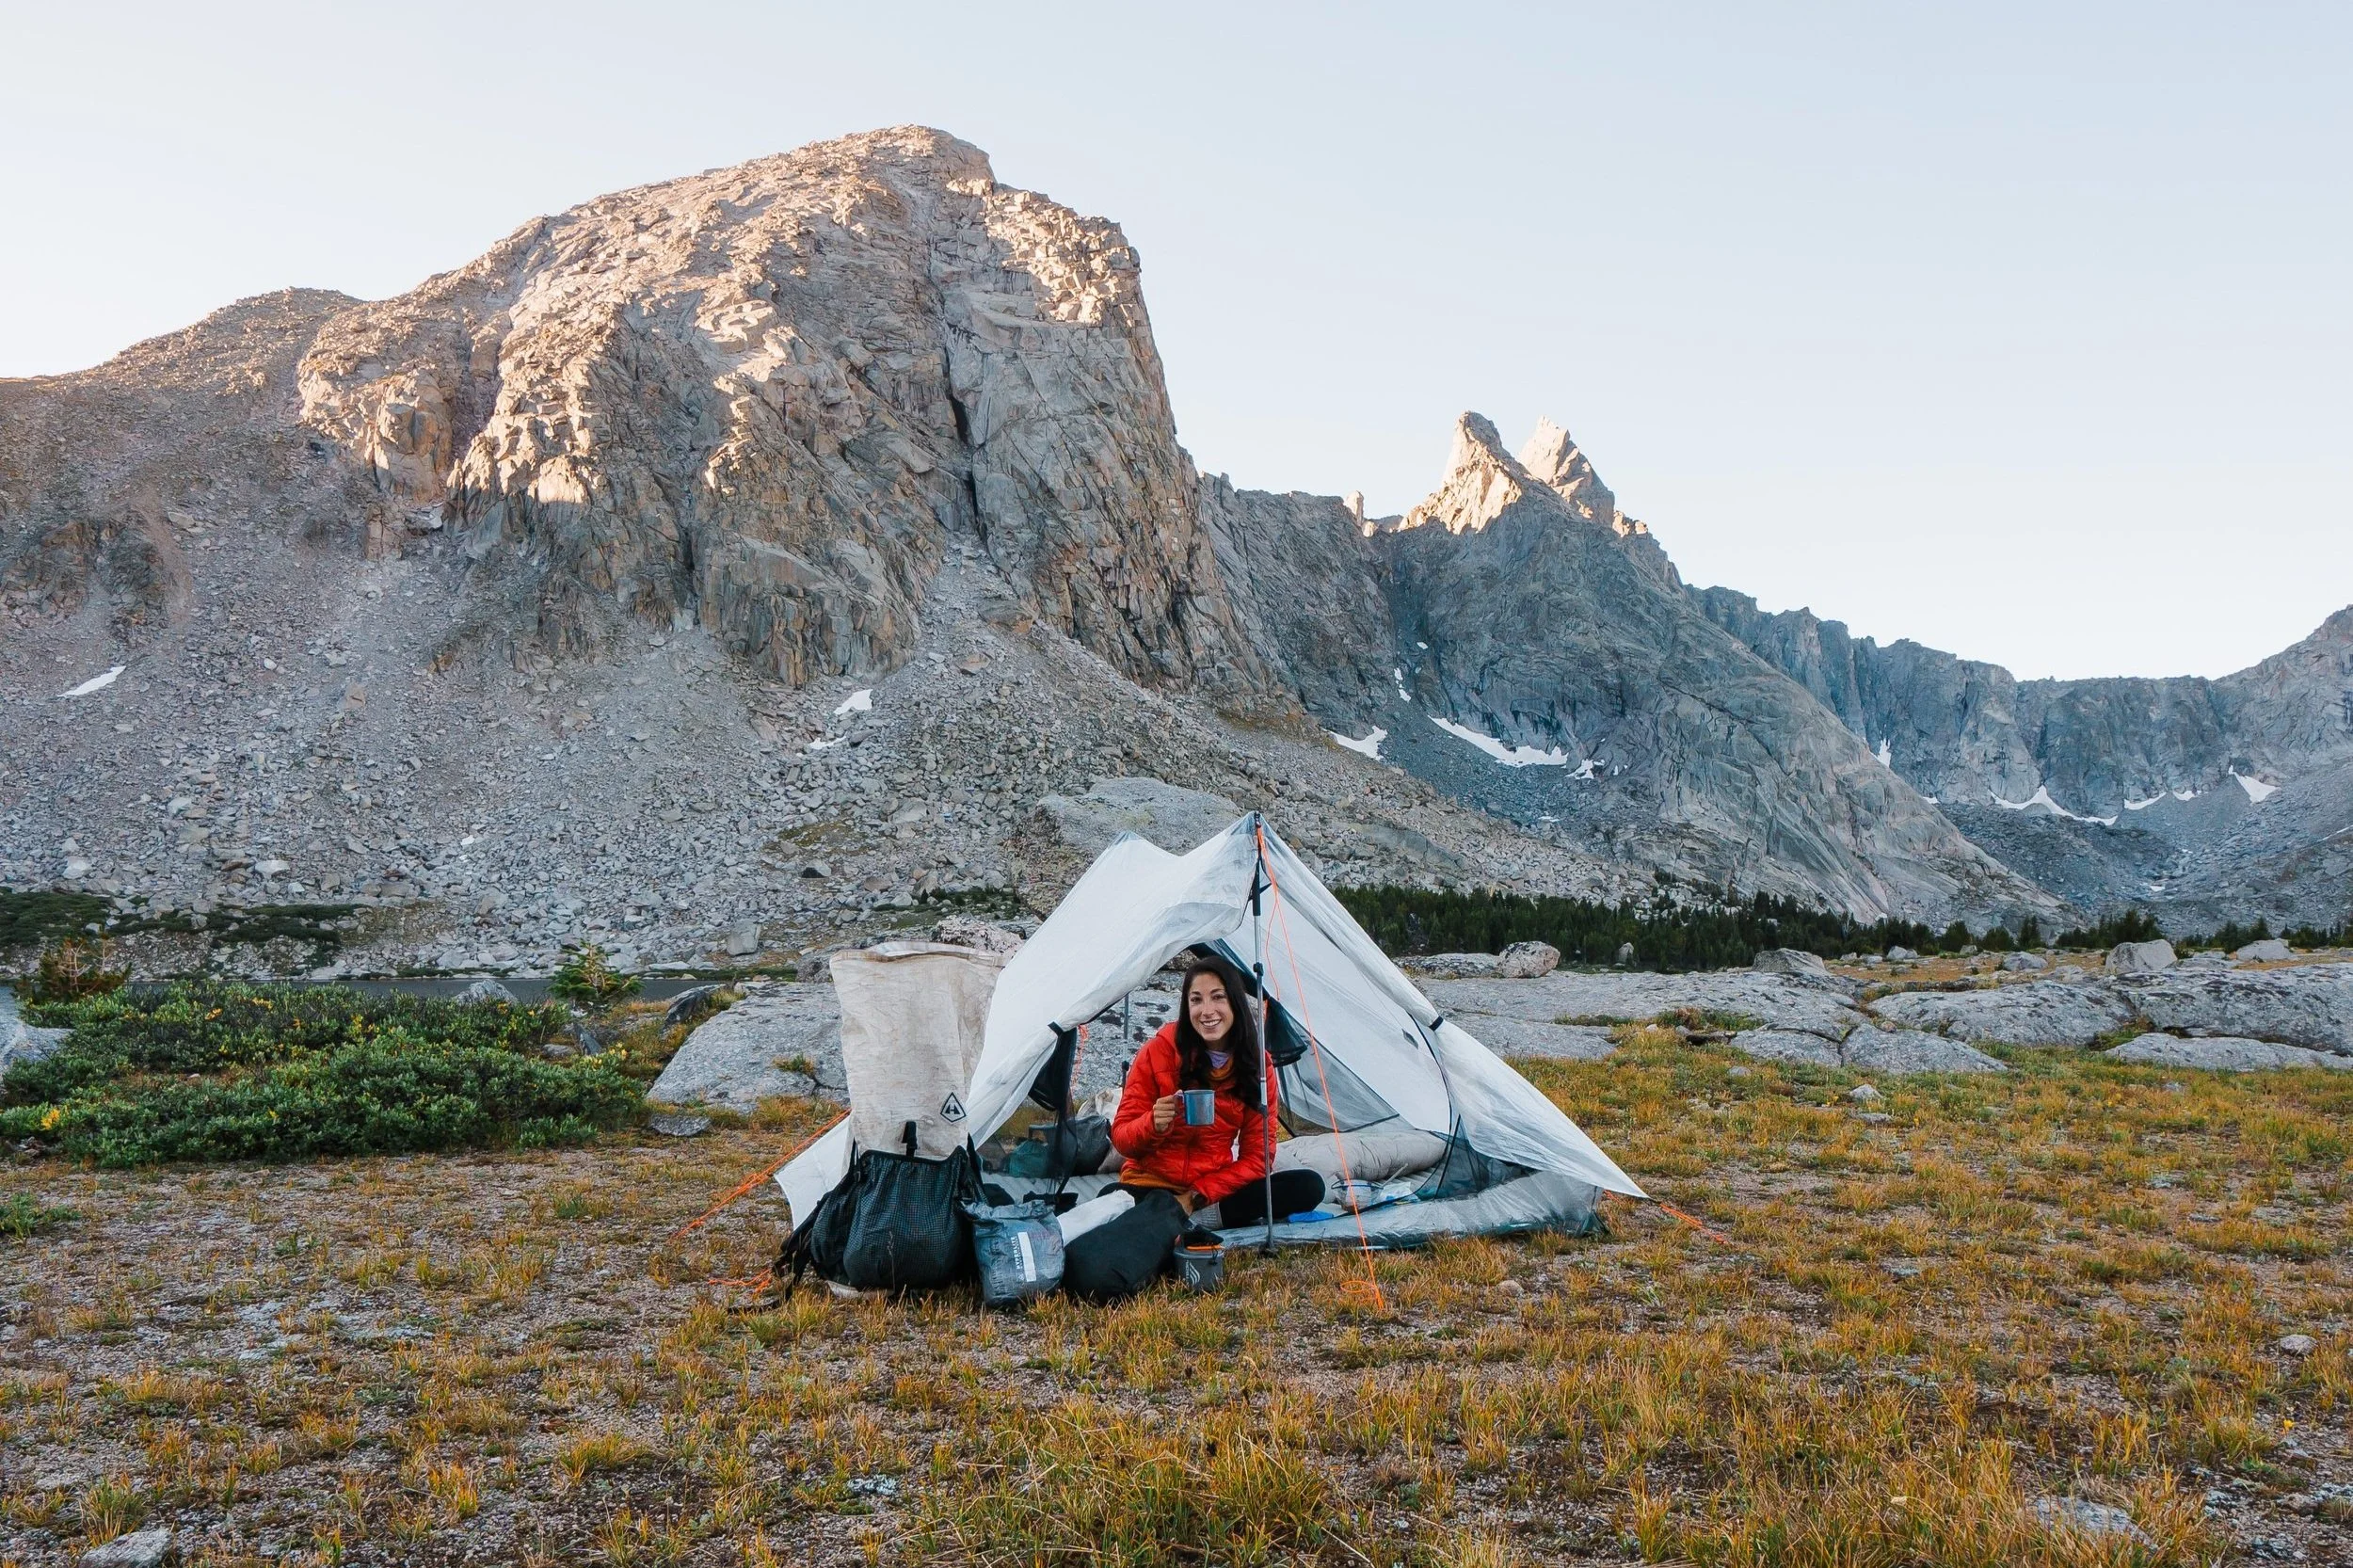
Garrett packing up gear at Campsite 2 in the basin below Gannett Peak
Quick Facts: Backpacking the Wind River High Route
Location: Wind River Range, Bridger-Teton and Shoshone National Forests, Wyoming
Land Management Agency: USFS Bridger-Teton National Forest
Best Time to Go: Mid-July through September (mid-to-late August recommended for optimal conditions)
Permit Required: No permits required—wilderness self-registration at trailheads
Distance: 80-94 mi (128-151 km) depending on the route variation
Elevation Gain: 20,000-26,000+ feet cumulative (6,096-7924 m)
Elevation Range: 10,000-13,810 feet (3048-4209 m)
Duration: 7-10 days; plan for 8-9 days
Difficulty: Very Difficult to Extreme, off-trail, extensive boulder hopping, potential glacier crossings
Main Routes: Skurka Route, Dixon-Wilson Route and Stoury-Arnold Route
Water Availability: Abundant throughout
Cell Service: None
Dogs Allowed: Yes, but definitely not recommended for this route
Resupply Options: None—carried all our food for 7-10 days.
Affiliate Disclaimer: This blog post contains affiliate links, meaning we receive a small commission of every purchase made with our links at no additional cost to you. Sometimes there is even a discount code for our readers which we specify next to the links.
Table of Contents
Wind River High Route Location & Access
The Wind River Range is located in west-central Wyoming, stretching for approximately 100 miles north to south. The range forms part of both the Bridger-Teton National Forest on the western slopes and the Shoshone National Forest on the eastern slopes. This majestic mountain range includes seven of Wyoming's ten highest peaks, including Gannett Peak (13,810 ft / 4209m), the highest point in Wyoming.
The Wind River High Route traverses the highest alpine sections of this range, staying primarily above 10,000 feet (3048 m) and following the spine of the Continental Divide through some of the most remote and spectacular wilderness in the Lower 48.
How to Get to Wind River Range: Driving Directions & Trailhead Access
The primary gateway town for accessing the Wind River High Route trailhead is in Lander, Wyoming. Lander offers lodging, dining, and last-minute gear shopping opportunities.
Driving to Lander, Wyoming from Major Cities with Airports
From Salt Lake City, UT - 4.5 hours 278 mi (447 km): Take I-80 East to Exit 111 (Evanston), then US-189 North to US-287 North.
From Denver, CO - 5.5 hours to Lander, 350 mi (563 km): Take I-25 North to I-80 West, then US-287 North through Laramie and Rawlins to Lander.
From Jackson, WY - 3 hours, 160 mi (257 km): Take US-26 E
From Bozeman, MT - 6 hours, 415 mi (667 km): Take I-90 E to WY-120E.
Important Wind River Trailhead Locations and Distances
The Wind River High Route is a point-to-point through hike requiring a car shuttle. Below are the most popular trailheads used to access the Wind River Range from Lander, WY.
Trail Lake Trailhead: About 80 mi (128 km) NW of Lander along US-287. The last few miles to the trail head are dirt but is suitable for all vehicle clearance.
Sheeps Bridge Trailhead: About 20 mi (32 km) south of Lander via WY-131. The roadway is paved but steep and then dirt with pot-holes. Suitable for all vehicles, just go slow for pothole dodging.
Big Sandy Campground: 77 mi (124 km) drive from Lander via WY-28. Big Sandy is a popular alternative exit point to avoid Wind River Peak at the end of the high route.
Trip from Trail Lake to Sheeps Bridge Trailheads: ~2 hours, 99 mi (157 km)
Car Shuttle Options for the Wind River High Route
The Wind River High Route is a through hike where you start and end at different points and will need transportation to/from trailheads. There is no public transportation to the trailheads but most backpackers arrange their own car shuttle or book with local private shuttle services. Below are the two most popular transportation options.
Two-Vehicle Shuttle: Leave one vehicle at a southern exit trailhead (Sheeps Bridge, Big Sandy or Bruce’s Bridge) then carpool to the northern Trail Lake Trailhead. Most straightforward option. We had one car and paid a friend to drive with us to Worthen Meadow Reservoir where we left our vehicle and then shuttled with our friend to Trail Lake Trailhead.
Commercial Shuttle Services: Private companies in Lander offer seasonal shuttles in the area. Depending on the time of year and your group size, the cost is at least $90+ per person. Book well in advance.
Wind River High Route Variations: Stoury-Arnold, Standard, Dixon-Wilson Routes

Heading out on day 4 in the basin below Gannett Peak
Wind River High Route Overviews
There are a few versions of the Wind River High Route suggested on the internet, the Dixon-Wilson (akaAdventure Alan) route which is about 80 miles (129 km) and 20,000 feet (6096 m) of elevation gain and the Andrew Skurka route, clocking in at 95 miles and over 26,000 feet of gain. We set out to do a combined variation of these two to that avoided all glacier crossings and created our own route that resulted in a 94 mile (151 km) trip with 24,000+ feet (7,315+ m) of gain over 8 days. Much more details below.
Stoury-Arnold Route
Distance: ~94 mi (151 km) | Elevation Gain: 24,000’+ (7,315+ m)
We created our own variation combining elements of both routes based on conditions, our interests, and weather variability. We started on the Skurka route but stayed more on-trail initially to avoid glacier crossings (we didn't have microspikes in our van). Then below Gannett Peak, we rejoined the Skurka High Route. On day four of our trip, incoming weather convinced us to detour to the Continental Divide Trail for a day to avoid wet boulder fields and high mountain weather exposure. We regained the high route before Cirque of the Towers and stayed on it to the finish.
Trailhead Start: Trail Lake Trailhead
Trailhead End: Sheeps Bridge Trailhead
Duration: 7-9 days
Map Details: Full GPX and All Approximate Tracks
All variations of the Wind River High Route are extremely difficult, a lot of off-trail travel, and made for experienced backpackers with a high level of navigation and scrambling skills. If you are not used to off-trail travel and difficult terrain, this is not the trail for you. Garrett and I are both experienced alpine climbers with a lot of mileage off-trail, and this still was a challenge for us. From blogs we researched, most people do the Skurka version of the route in 7-10 days, so we planned for 7 but decided to carry enough food with us for 8-9 days just in case.
Standard Wind River High Route (AKA Skurka Route)
Distance: ~95 mi (153 km) | Elevation Gain: ~30,000’ (9,144 m)
This is considered the definitive Wind River High Route, staying at the highest elevations and following the most challenging terrain along the Continental Divide. Created by long-distance hiking expert Andrew Skurka, this route demands advanced off-trail navigation skills, extensive boulder hopping, and multiple technical pass crossings. This route hugs the upper elevation of the range and doesn’t shy away from the technical glacier/ice crossings along Grasshopper or Gannett glaciers.
Trailhead Start: Trail Lake Trailhead
Trailhead End: Bruce’s Bridge Trailhead
Duration: 7-10 days
Essential Equipment: Ice axe, micro-spikes
Map Details: Full GPX and All Approximate Tracks
Dixon-Wilson Route
Distance: ~80 mi (129 km) | Elevation Gain: ~20,000’ (6,096 m)
A slightly shorter and less technical variation that still captures the essence of high alpine travel in the Winds. This route includes more trail sections and avoids some of the most challenging off-trail segments. ~
Trailhead Start: Green River Lake Trailhead
Trailhead End: Big Sandy Campground
Duration: 5-9 days. Alan Dixon (AKA Adventure Alan) and Don Wilson completed it in just over 5 days as a fast and light thru-hike.
Route Info: https://www.adventurealan.com/
Map Details: Full GPX and All Approximate Tracks
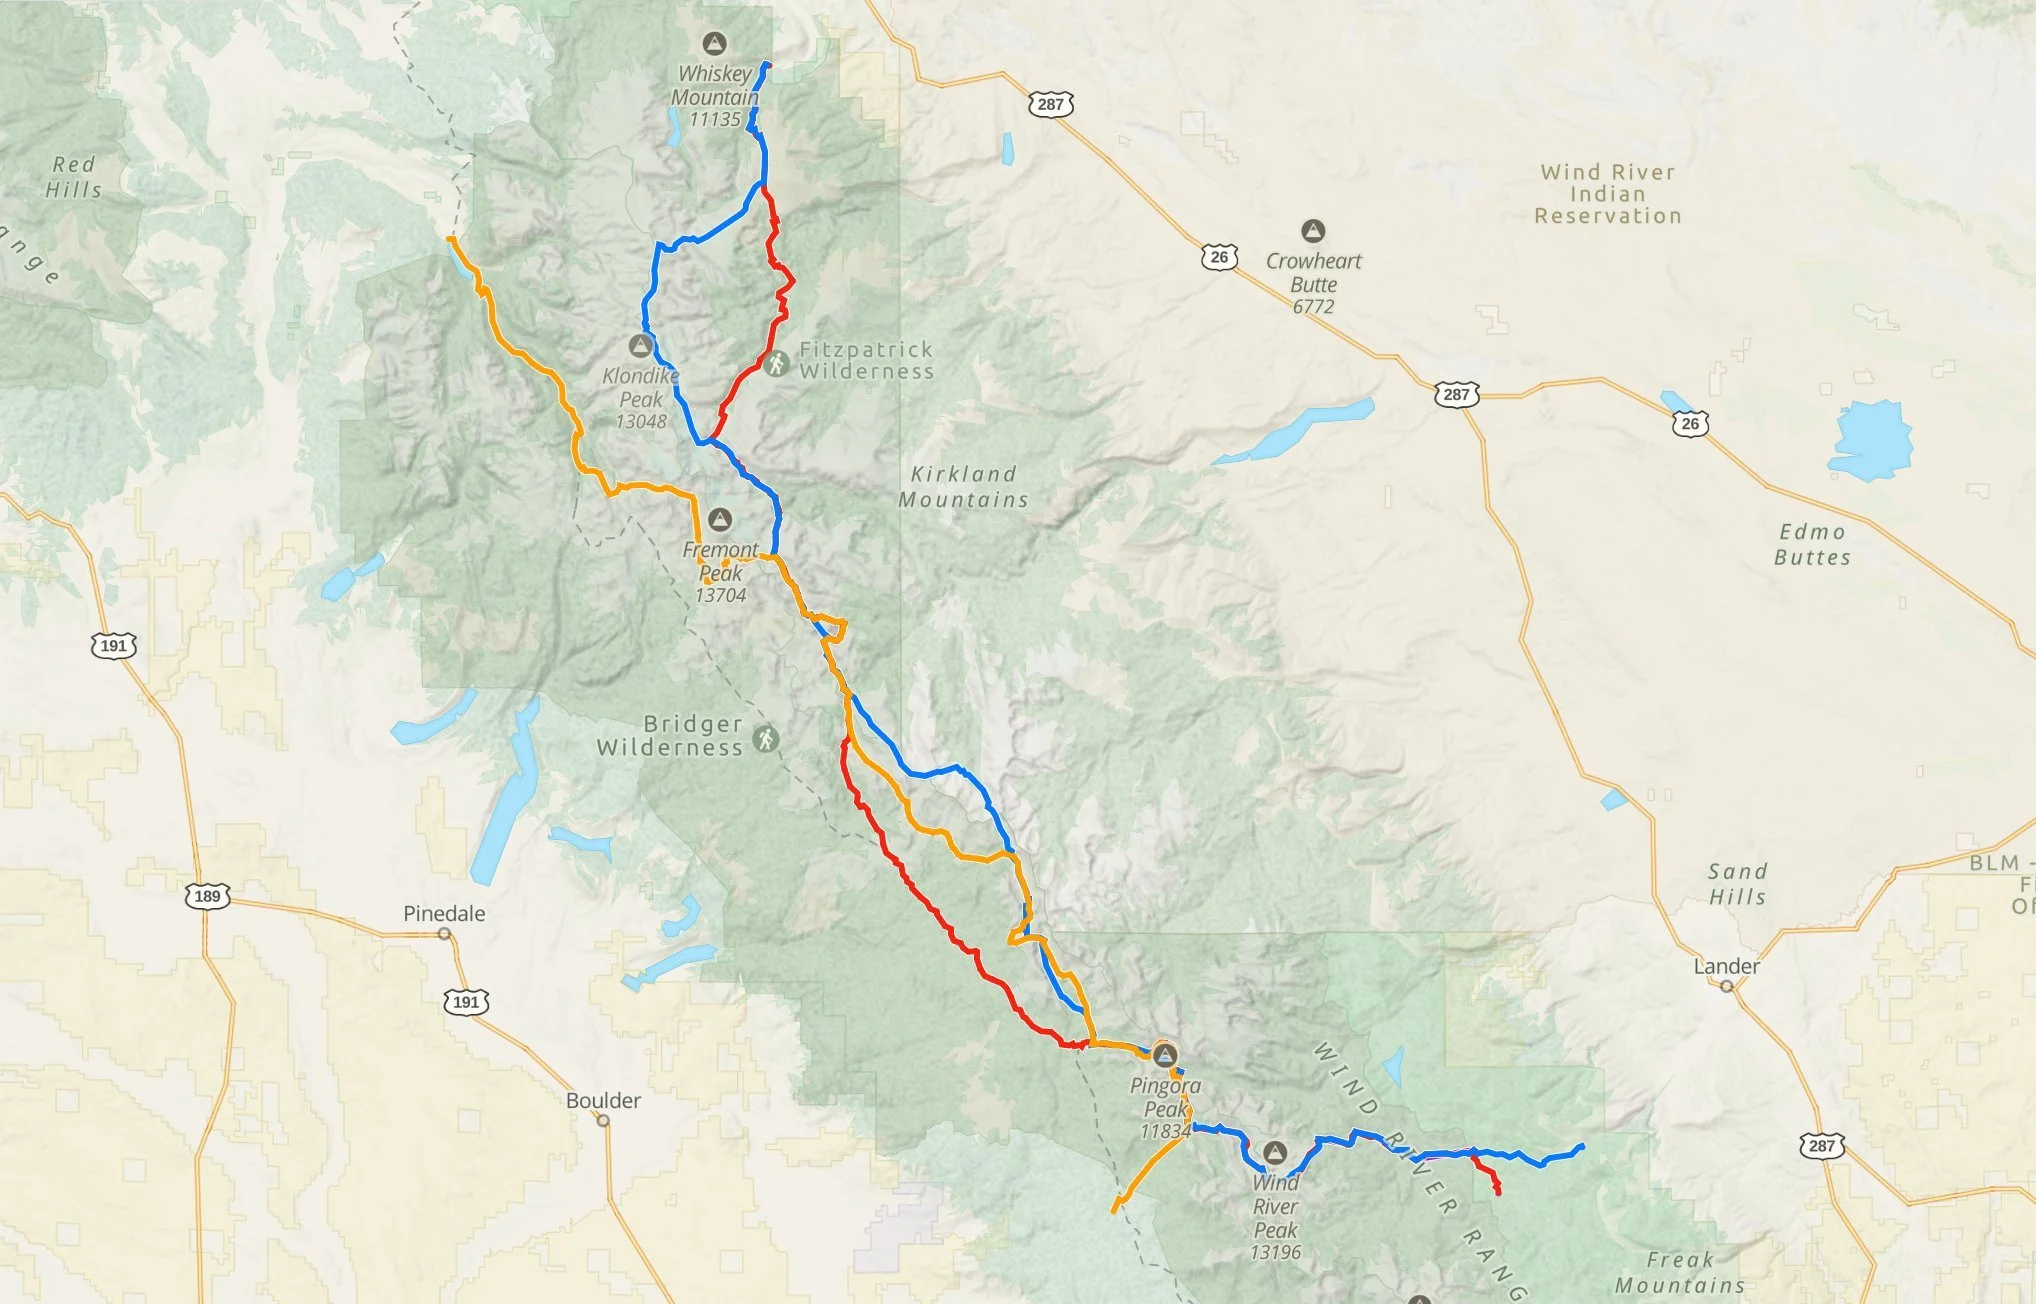
Overview of Wind River High Routes. Red = Stoury-Arnold, Blue = Standard, Orange = Dixon-Wilson
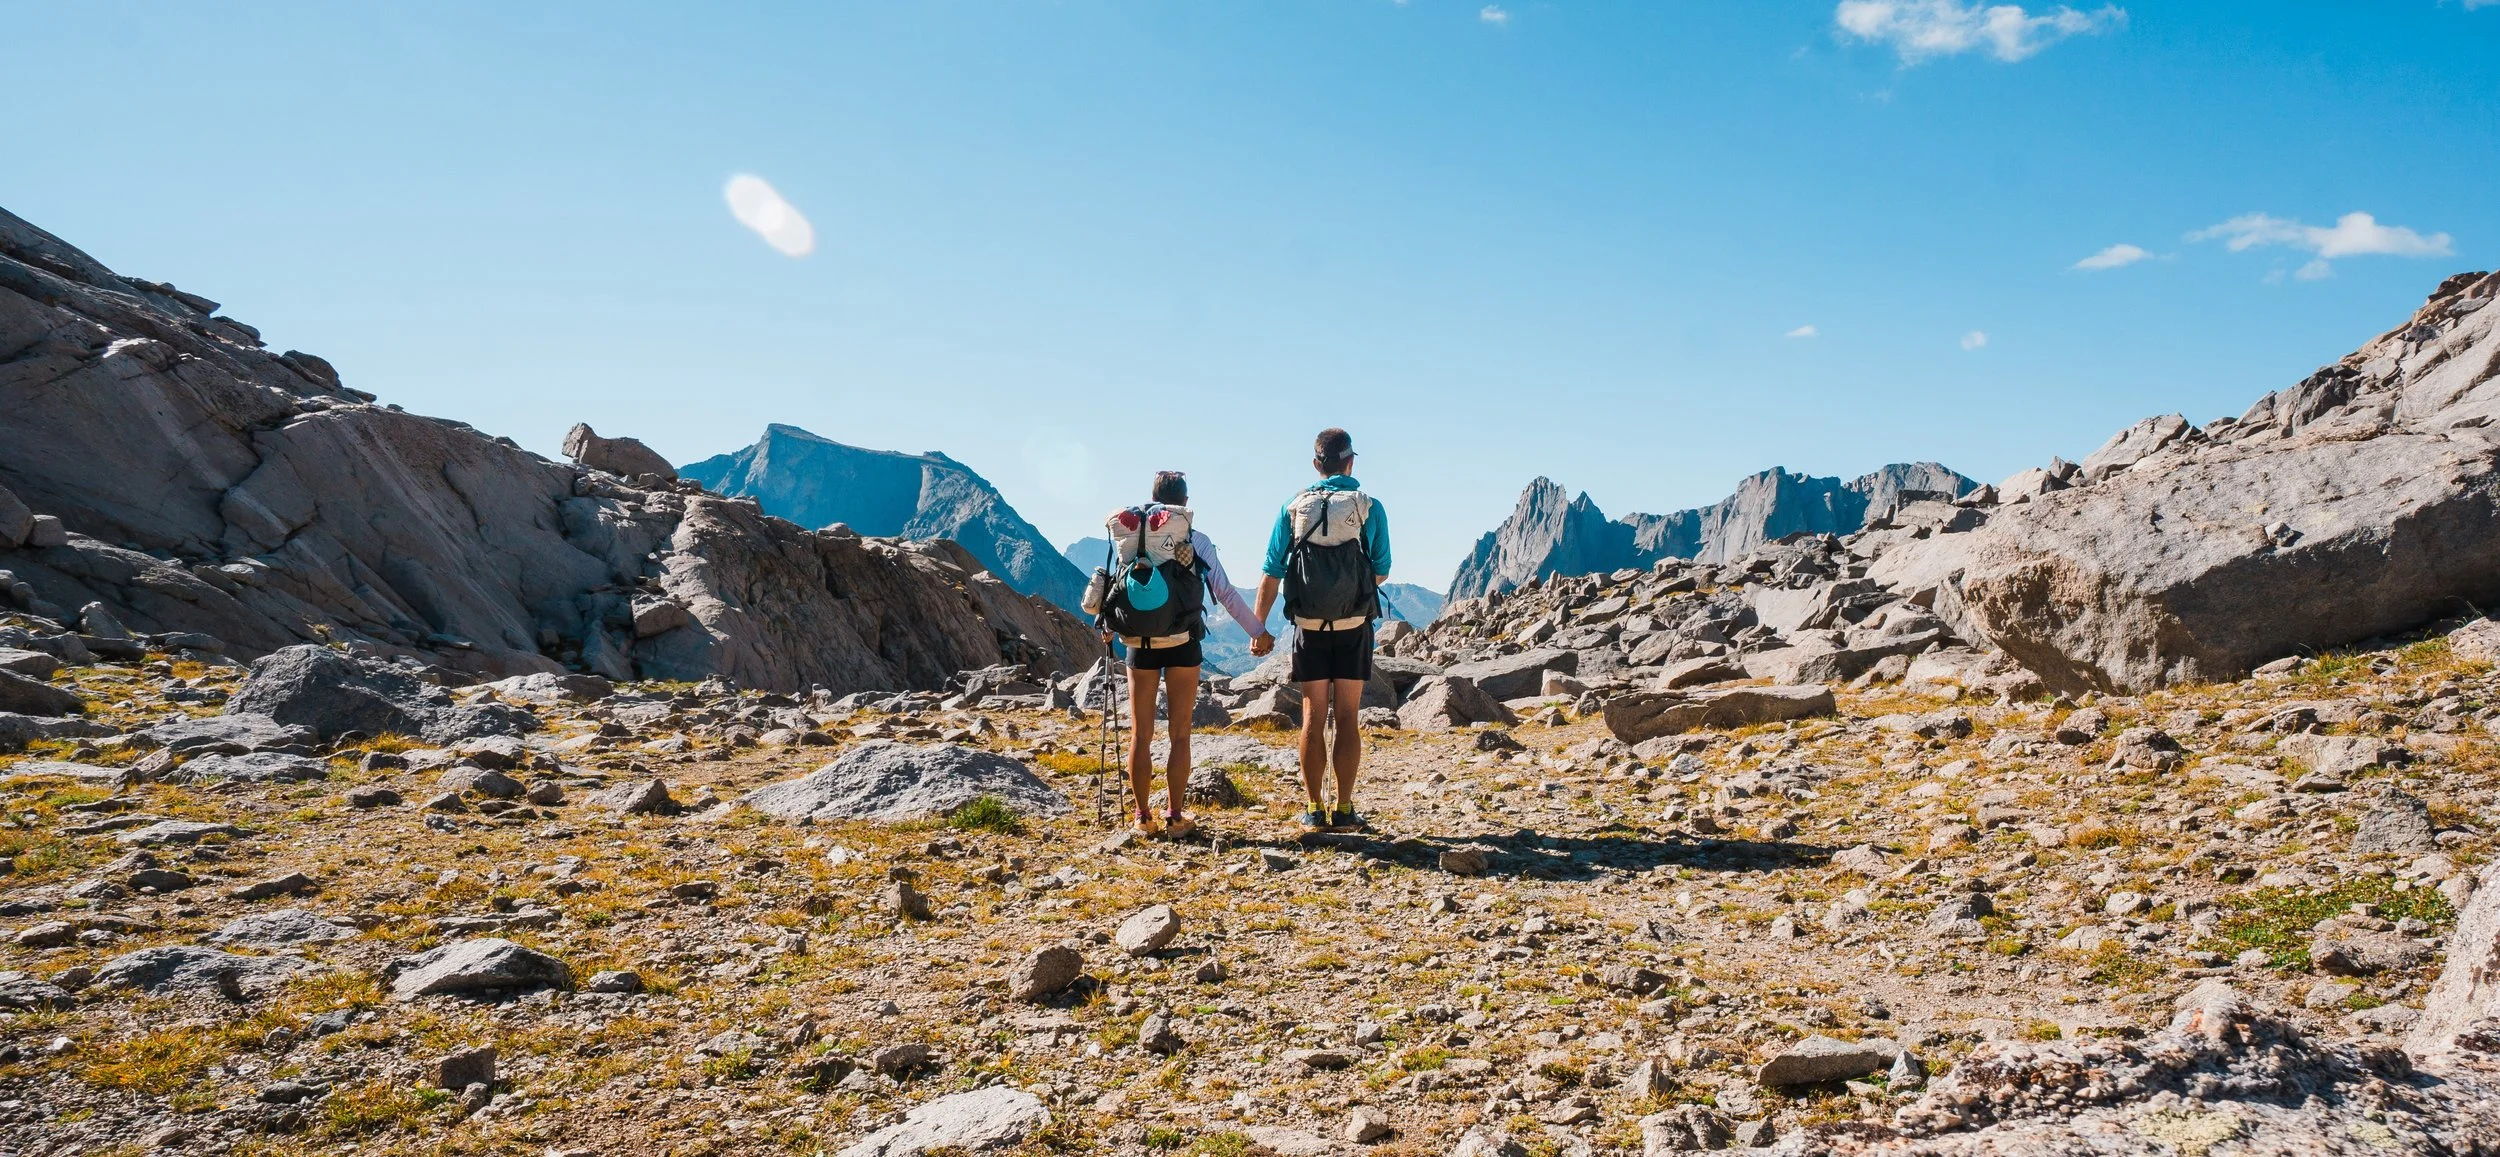
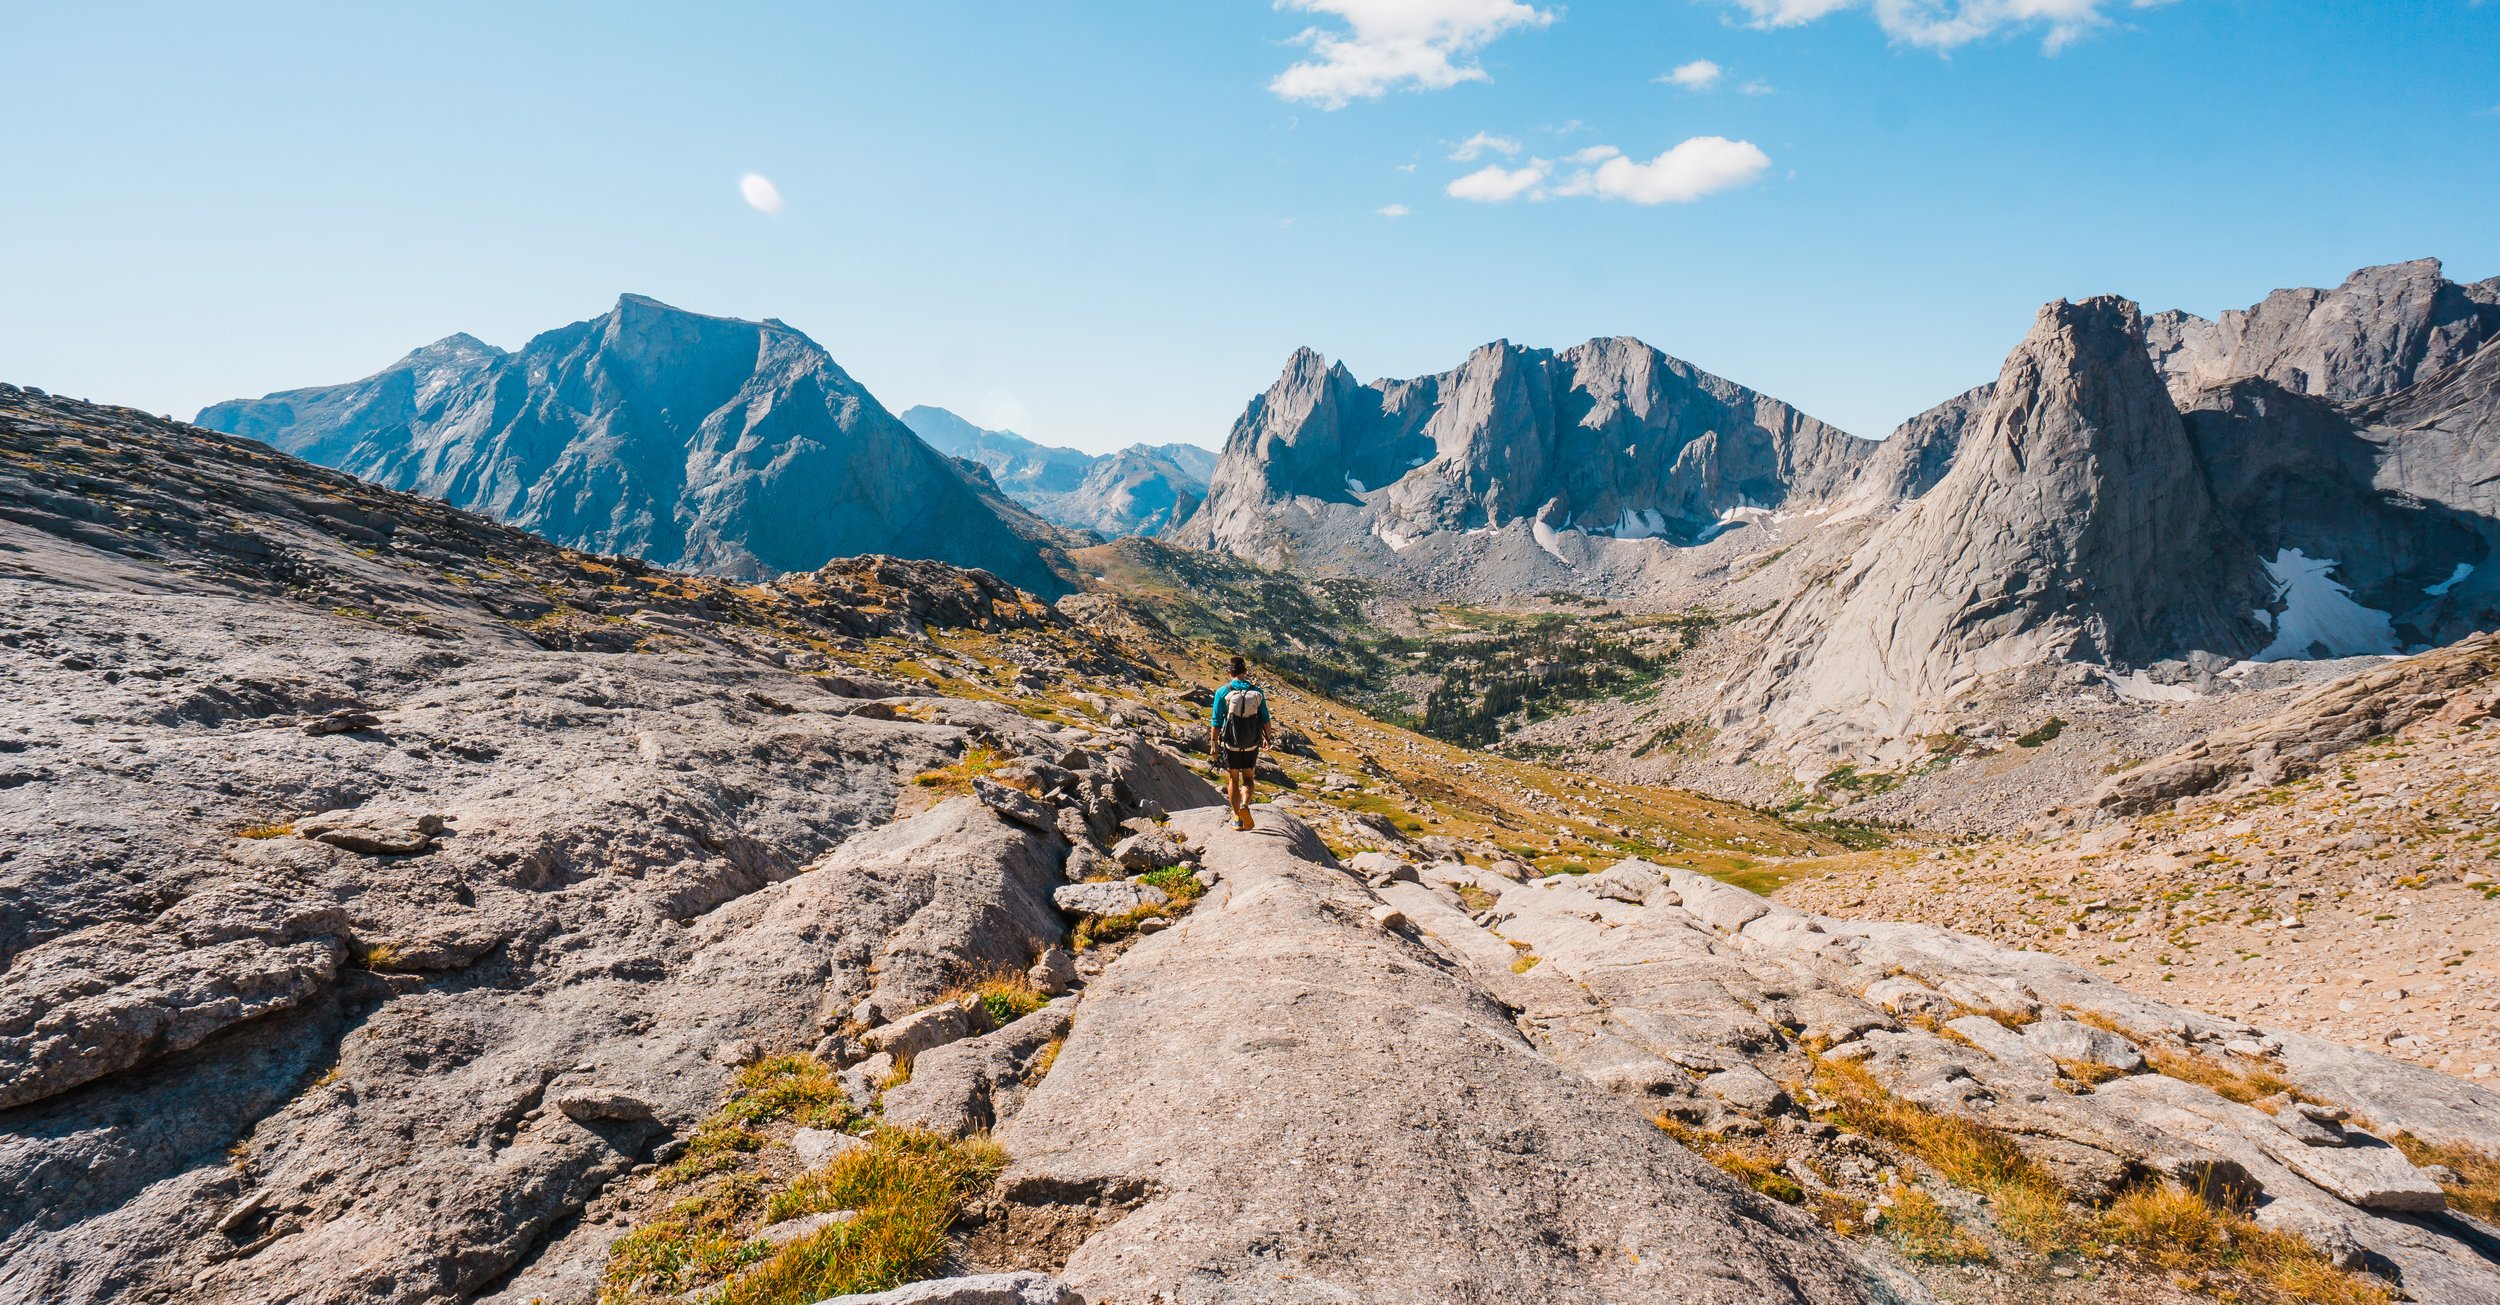
At the top of Texas Pass, day 7
Complete Stoury-Arnold 8-Day Itinerary: Our Wind River High Route Experience
We planned to do the route in seven days, but ended up adding an eighth day due to a lower mileage day when we first got off-trail. As mentioned, the off-trail sections of the route are rugged and can be hard to navigate. Boulder hopping up and down passes for two days straight was draining, and when we checked weather on day four, a storm was rolling in that night through the next day. At that point we decided to detour to the Continental Divide Trail for a day to be able to hike longer miles and stay off of wet, slippery boulder fields in the rain. Because of this deviation from the main route, we created our own version of the Wind River High Route.
Garrett and I are experienced alpine climbers and backpackers, and this was by far the hardest trip we have ever done. It is not a trip to be taken lightly. Being used to hiking 15 mile days while backpacking, I estimated that it would take us seven days to complete. In reality we added an eighth day, and could have added a ninth had we stayed on the High Route the entire time. So in your planning, take the off-trail sections into account as harder and longer days to be able to accurately plan the length of your trip. If I were to do it again, I would plan for nine days to go at a little more leisurely pace and be able to enjoy each campsite. Because we had such long and hard days, we were exhausted each night when we got to camp, and usually made it just before sunset so didn’t have time to explore the area.
Below you will find a complete guide to backpacking through the Wind River Range, our full itinerary, along with all of the food and gear we packed.
***Note the mileage and elevation gains listed on the itinerary below are from Skye’s Garmin watch track which add some variability than the GPX approximations given on GaiaGPS.
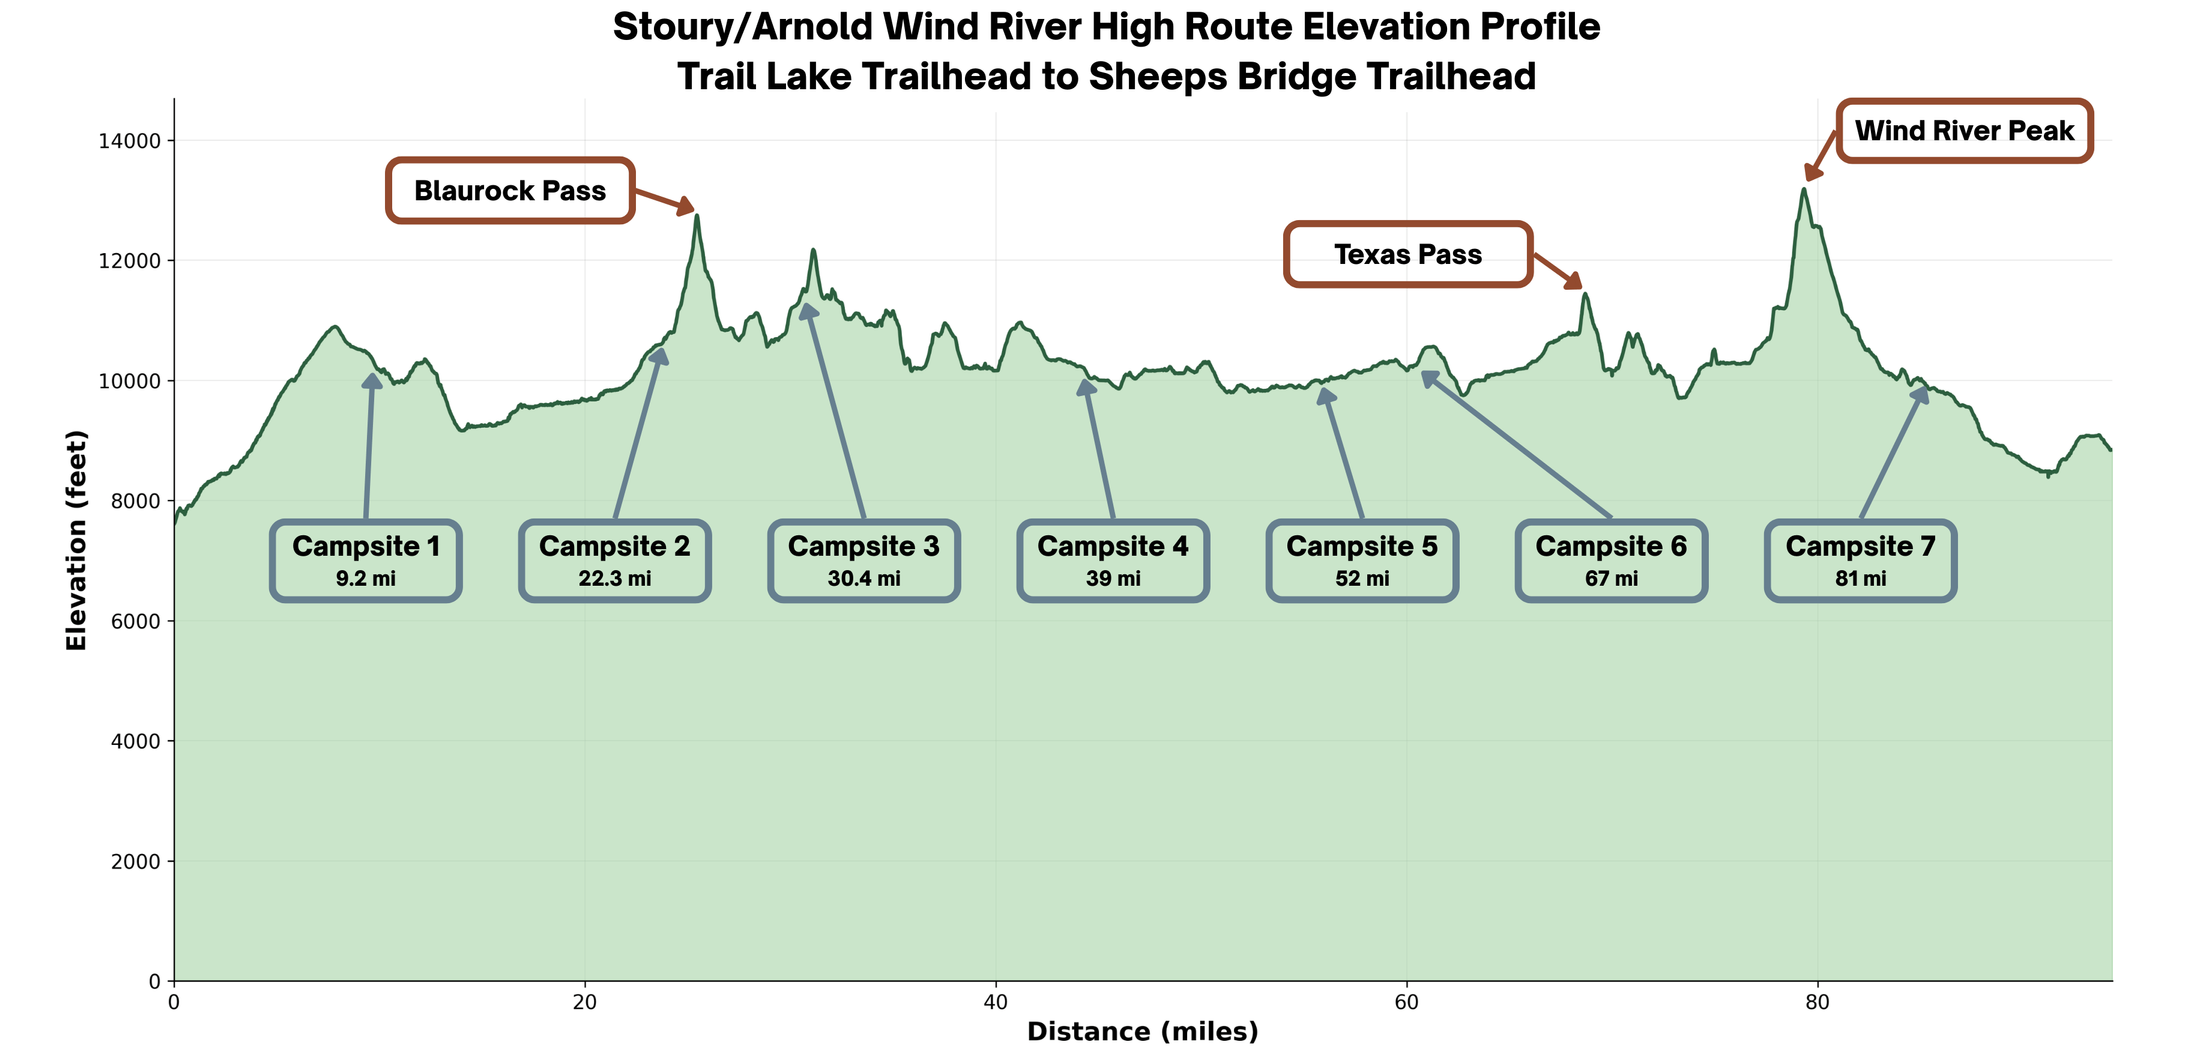
Stoury-Arnold Wind River High Route Elevation Profile
Day 1 - Trail Lake Trailhead (Glacier Trail) to Burro Flat
Distance: 9.2 mi (15 km) | Elevation Gain: 3,736’ (1139 m) | Hiking Time: ~5 hr
Our first day started at noon with our friend picking us up at our end trailhead, the Worthen Meadow Reservoir/Sheeps Bridge Trailhead where our van would be parked, and dropping us off at the Trail Lake Trailhead and start of the Glacier Trail. We started on-trail at 3pm, hiking up a well maintained trail for several miles, gaining about 3,500 feet before coming up to the high alpine meadows of Burro Flat. The upper sections of trail were through grass and were very muddy and wet in spots. We continued just past Burro Flat to where the trail started descending, and found a campsite in a grouping of trees next to the trail.
Day 2 - Glacier Trail to Gannett Peak Junction
Distance: 15.3 mi (25 km) | Elevation Gain: 3,034' (924 m) | Time: ~9.5 hr
Garrett Hiking next to Dinwoody Creek
Day 2 was our first longer day, still on-trail so we pounded out miles. This was a beautiful section of trail, we followed Dinwoody Creek the majority of the day with a big crossing late in the day. When we reached our creek crossing we didn’t see a way across so we spent time hiking upstream trying to find an easier spot. The creek was running extremely high and the water was deep and swift. After not finding a way around it, we forded the creek in our trail runners. The water was thigh deep on me in the middle and with how swift it was, I was worried I’d be pushed over with my heavy pack, so Garrett crossed first and carried the packs across. After the crossing we were cold and wet but still had a couple of miles to get into the basin below Gannett Peak to make camp. We remained on a trail through the high alpine basin, and found a flat spot to camp just above the trail.
Day 3 - Blaurock Pass to Knife Point Glacier Camp (First Off-Trail Day)
Distance: 6.6 mi (11 km) | Elevation Gain: 3,335' (1017 m) | Time: 5.25 hr
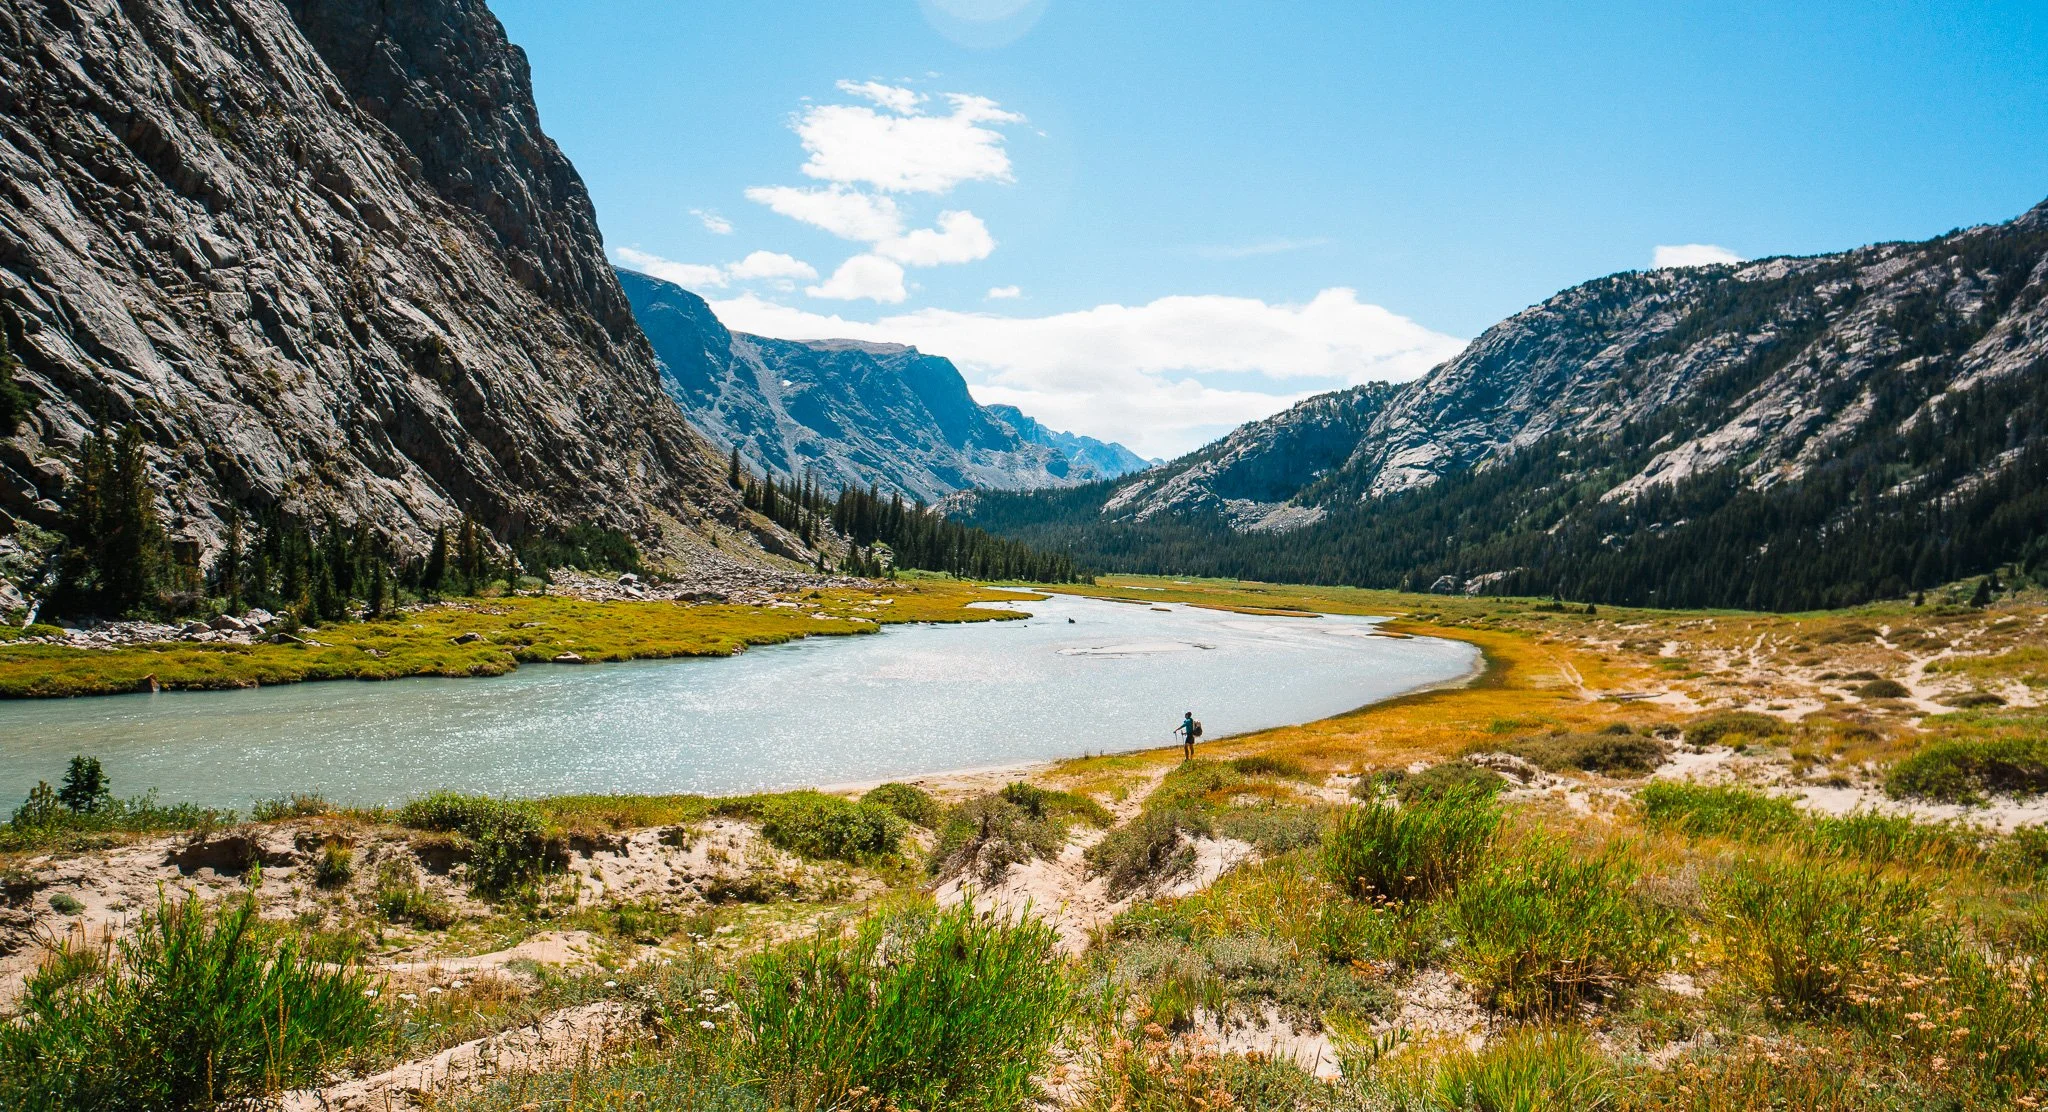
Warren and Turret Peaks in the background above the floodplains
Our first off-trail day! Though we only went five miles, this day felt long and tough. We started out from camp strong, but I almost immediately got us off route and heading up to Gannett Peak instead of turning left and ascending our first pass. We quickly realized we were off and luckily hadn’t gone too far, but it did cost us about an hour of travel. Once on track, we ascended our first pass of the trip, heading up a meadow at first, then some snow and a boulder field. We knew we were behind schedule so didn’t stay at the top of the pass, and quickly descended down into the most beautiful basin, seen above. From the flood plains we continued with rock-hopping and stream crossings, then gaining in elevation to get up near the Knife Point Glacier where we made camp at 11,300 feet. We were supposed to go 15 miles this day, so it was very eye opening to us how slow we went, and we knew we were going to have to add a day to get back on track with mileage. We set up our tent and started cooking dinner just as another storm hit.
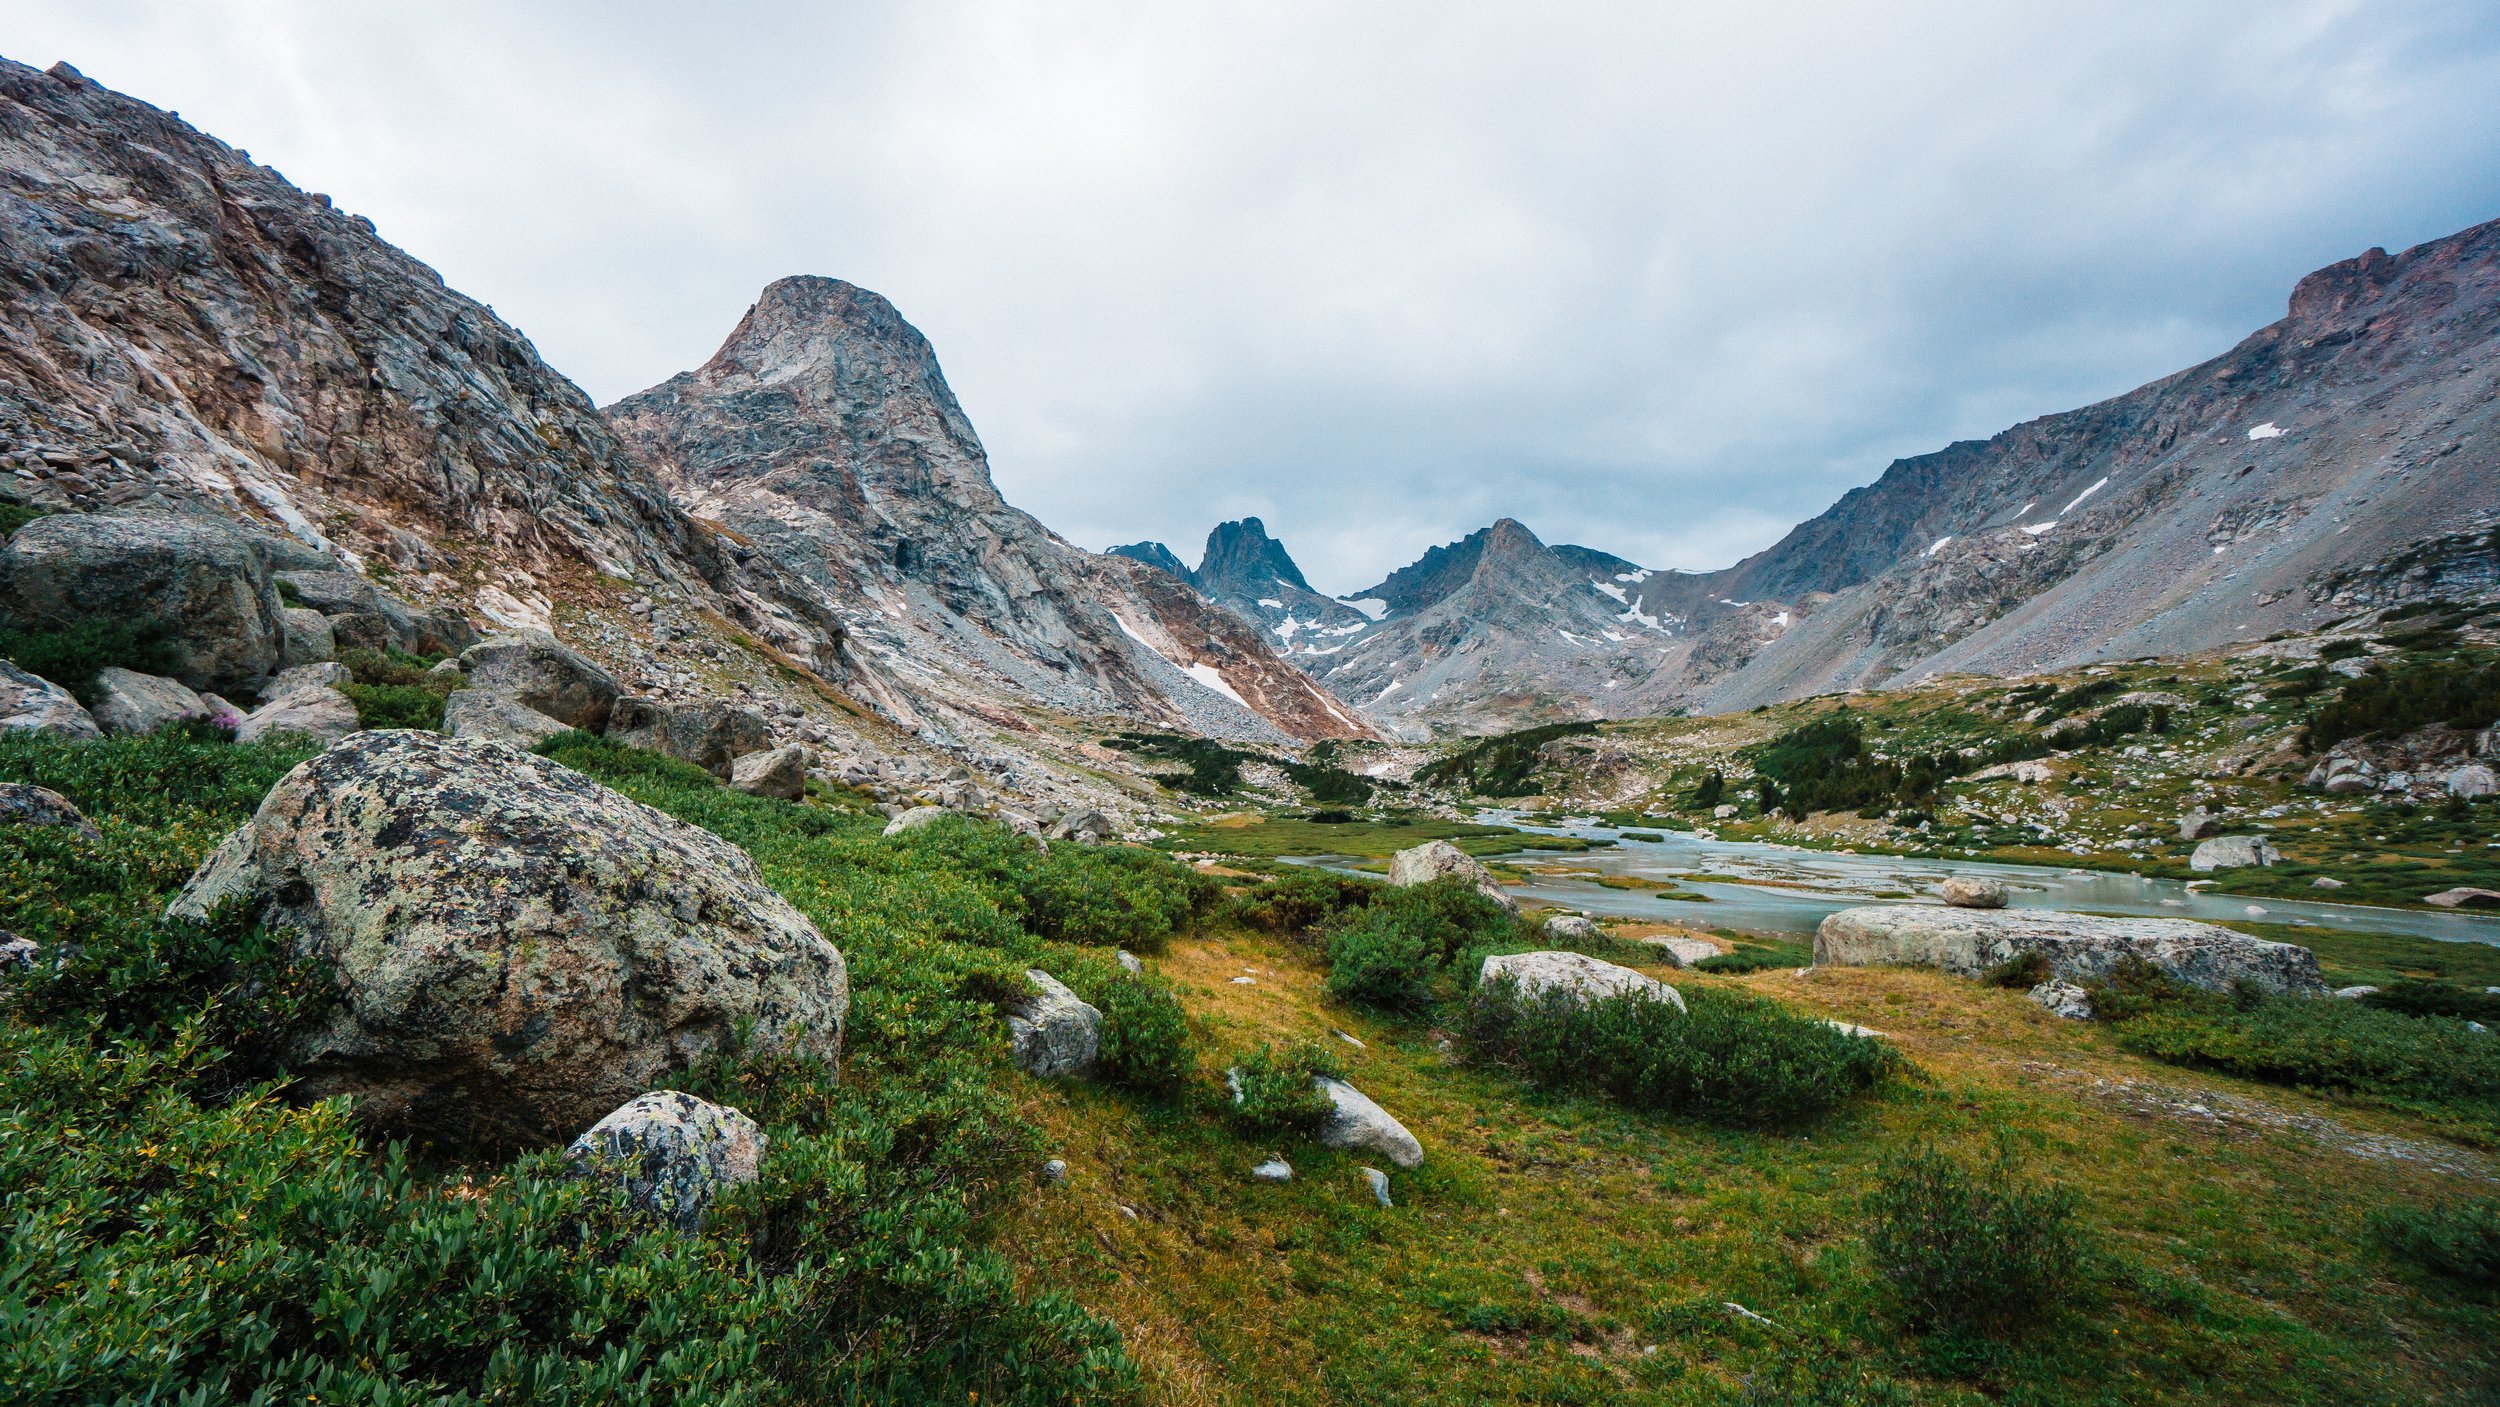
Day 4 - Camp Pass and Upper Golden Lake
Distance: 8.5 mi (14 km) | Elevation Gain: 2,689' (820 m) | Time: 10 hr
Looking down from the first pass of the day
Another day of off-trail travel, day four started off with a bang, heading up our first pass of the day first thing in the morning. We took a more direct route from our camp which was all boulder hopping on giant boulders, some of which moved. Had we stuck to the track, we may have had an easier ascent, it looked like there was more of a scree field next to us that could have been faster. After descending into the basin below, we had a lot of navigating to get around two lakes. There was some elevation gain and 4th class scrambling. More boulder hopping took us a few miles to skirt around a large unnamed lake under The Fortress, and then gained another small pass before descending down to Camp Lake. The boulder hopping wore on me mentally as there were huge spider webs throughout that created an obstacle course to navigate through (spiders are my worst fear so I had some moments of not wanting to move forward and got Garrett to slow down and show me the best way).
Once down to Camp Lake, we picked up a faint trail around the lake and followed it up to Camp Pass. The lakes we passed along the way were stunning and it felt good to be back on a trail again, even if it was faint and hard to follow at times. We followed this trail, the Hay Pass Trail, down to Upper Golden Lake where we made camp for the night. Once again, as soon as we pitched our tent, it started raining, but this time with thunder and lightning that lasted all night. We checked the weather forecast on our InReach Mini and saw that the next day was supposed to rain as well. At this point we knew we wouldn’t be able to do my planned 15 miles (24 km) of all off-trail travel in the rain, the wet boulder fields would be slippery and dangerous and make slow progress. We looked at our Gaia app and decided that we would continue on the Hay Pass Trail in the morning and bypass the rest off-trail section by getting onto the Continental Divide Trail (CDT) for a day.
Day 5 - Hay Pass to the Continental Divide Trail (CDT) and Sandpoint Lake
Distance: 13.8 mi (22 km) | Elevation Gain: 2,105' (642 m) | Time: 8 hr
Looking back at Golden Lake from Hay Pass
We woke up to wet gear from condensation and a rainy night and tried to dry it out before the rain started. After a slower start to the morning, we packed up and I put on my rain jacket just because I was cold in the breeze. As we started hiking, the rain started, and we were glad we had already made the decision to get onto the CDT. We followed the Hay Pass Trail up to Hay Pass and continued on it past a few lakes to then gain the CDT. Hay Pass was cold and very wet, this was one of the times I felt most miserable on the trip, my feet were wet and cold, and I felt damp under my rain jacket. But once we got towards the CDT the rain stopped and the sun came out for the rest of the day. Hiking on-trail again was so easy and we knocked out over 15 miles while feeling good. My feet actually dried out most of the way while hiking, and we found a nice campsite by Sandpoint Lake and even had time to rinse off in the lake before making dinner. Spirits were up, we dried out all of our gear, and were happy we were back to 15 mile days.
Day 6 - CDT to Cirque of the Towers
Distance: 14.2 mi (23 km) | Elevation Gain: 2,190' (668 m) | Time: 7.5 hrs
Camp in Cirque of the Towers
We woke up to a dry and beautiful morning, though after a still night, we had condensation in the tent and still needed to lay our quilts out to dry. We took our time, had a breakfast scramble, and then headed out on the CDT again. At this point, we were both feeling good, our bodies getting used to all the mileage, and our packs slowly feeling lighter as we ate more food. We made easy time and broke for lunch after seven miles. From there we continued on the CDT for a few more miles until we broke off and got back on the High Route heading into Cirque of the Towers. We hiked past Shadow Lake which was stunning and busy with other campers, and set up camp above Billys Lake which was absolutely beautiful and a must camp spot.
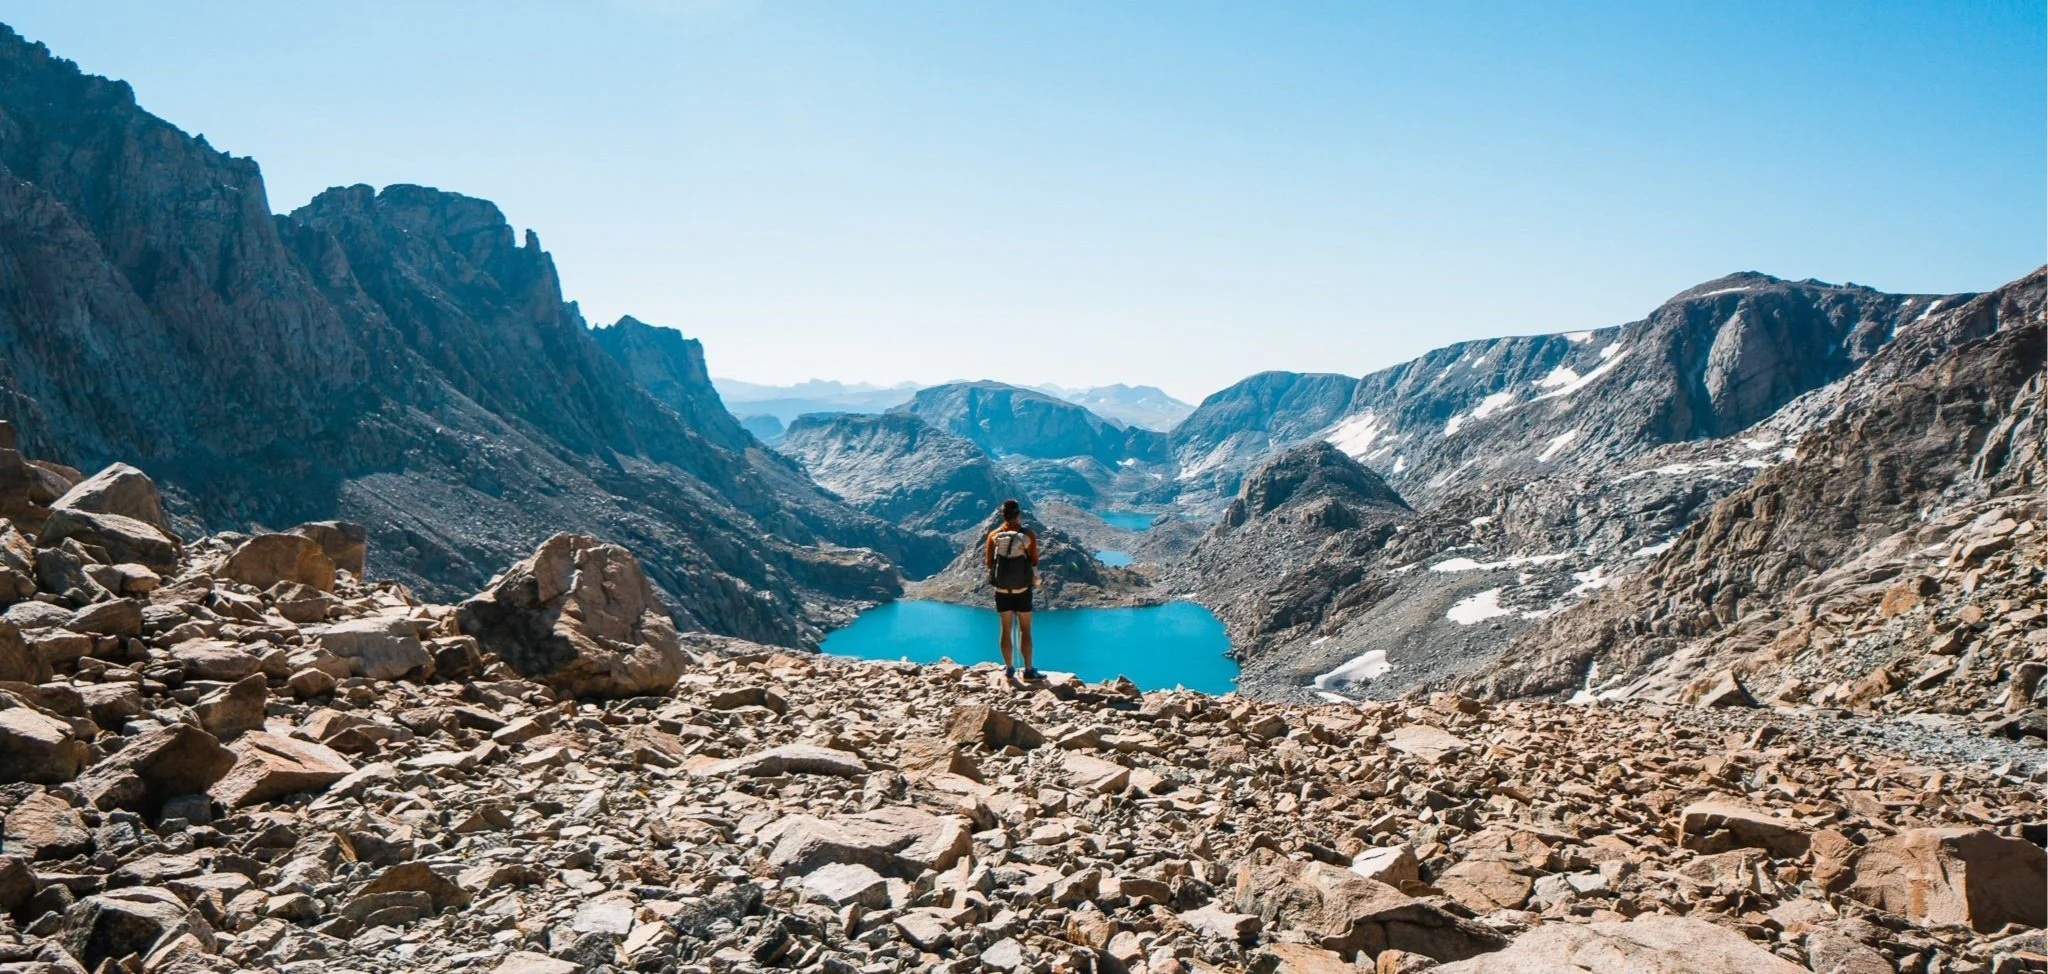
Day 7 - Texas Pass, Jackass Pass, Wind River Peak
Distance: 14.8 mi (24 km) | Elevation Gain: 5,757’ (1,755 m) | Hiking Time: 14 hrs
Garrett descending into the Cirque of the Towers
Day seven was our longest and hardest day in mileage, elevation gain, and hiking time. We knew this was going to be a long day and discussed breaking it into two, but we really didn’t want to add a ninth day to our itinerary. So on we went, starting hiking around 8:30am, skirting around Barren and Texas Lakes and heading straight up Texas Pass. To our pleasant surprise, Texas Pass had a climbers trail up it and we made it up to the top in about 20 minutes from the bottom of the pass. The other side was stunning and had a trail down. We entered the most beautiful area of the entire trip, and as we hiked down to Lonesome Lake, we watched climbers on Pingora Peak. We will definitely be back to this area to climb another time. From there we headed up Jackass Pass which was on-trail, short, and very easy. Down the other side was all on-trail and we made great progress and felt great, breaking for lunch just above Big Sandy Lake, where the Adventure Alan track makes it’s exit. From there we headed up to Black Joe Lake, on-trail, and then followed a climbers trail with a short scramble to get up and over a hump and to the north side of the lake. At that point the “trail” that was on GaiaGPS was primitive at best, hard to follow, and quite muddy and wet. This section took us a little longer, but we finally made it to the other end of the lake and were completely alone again, back off-trail.
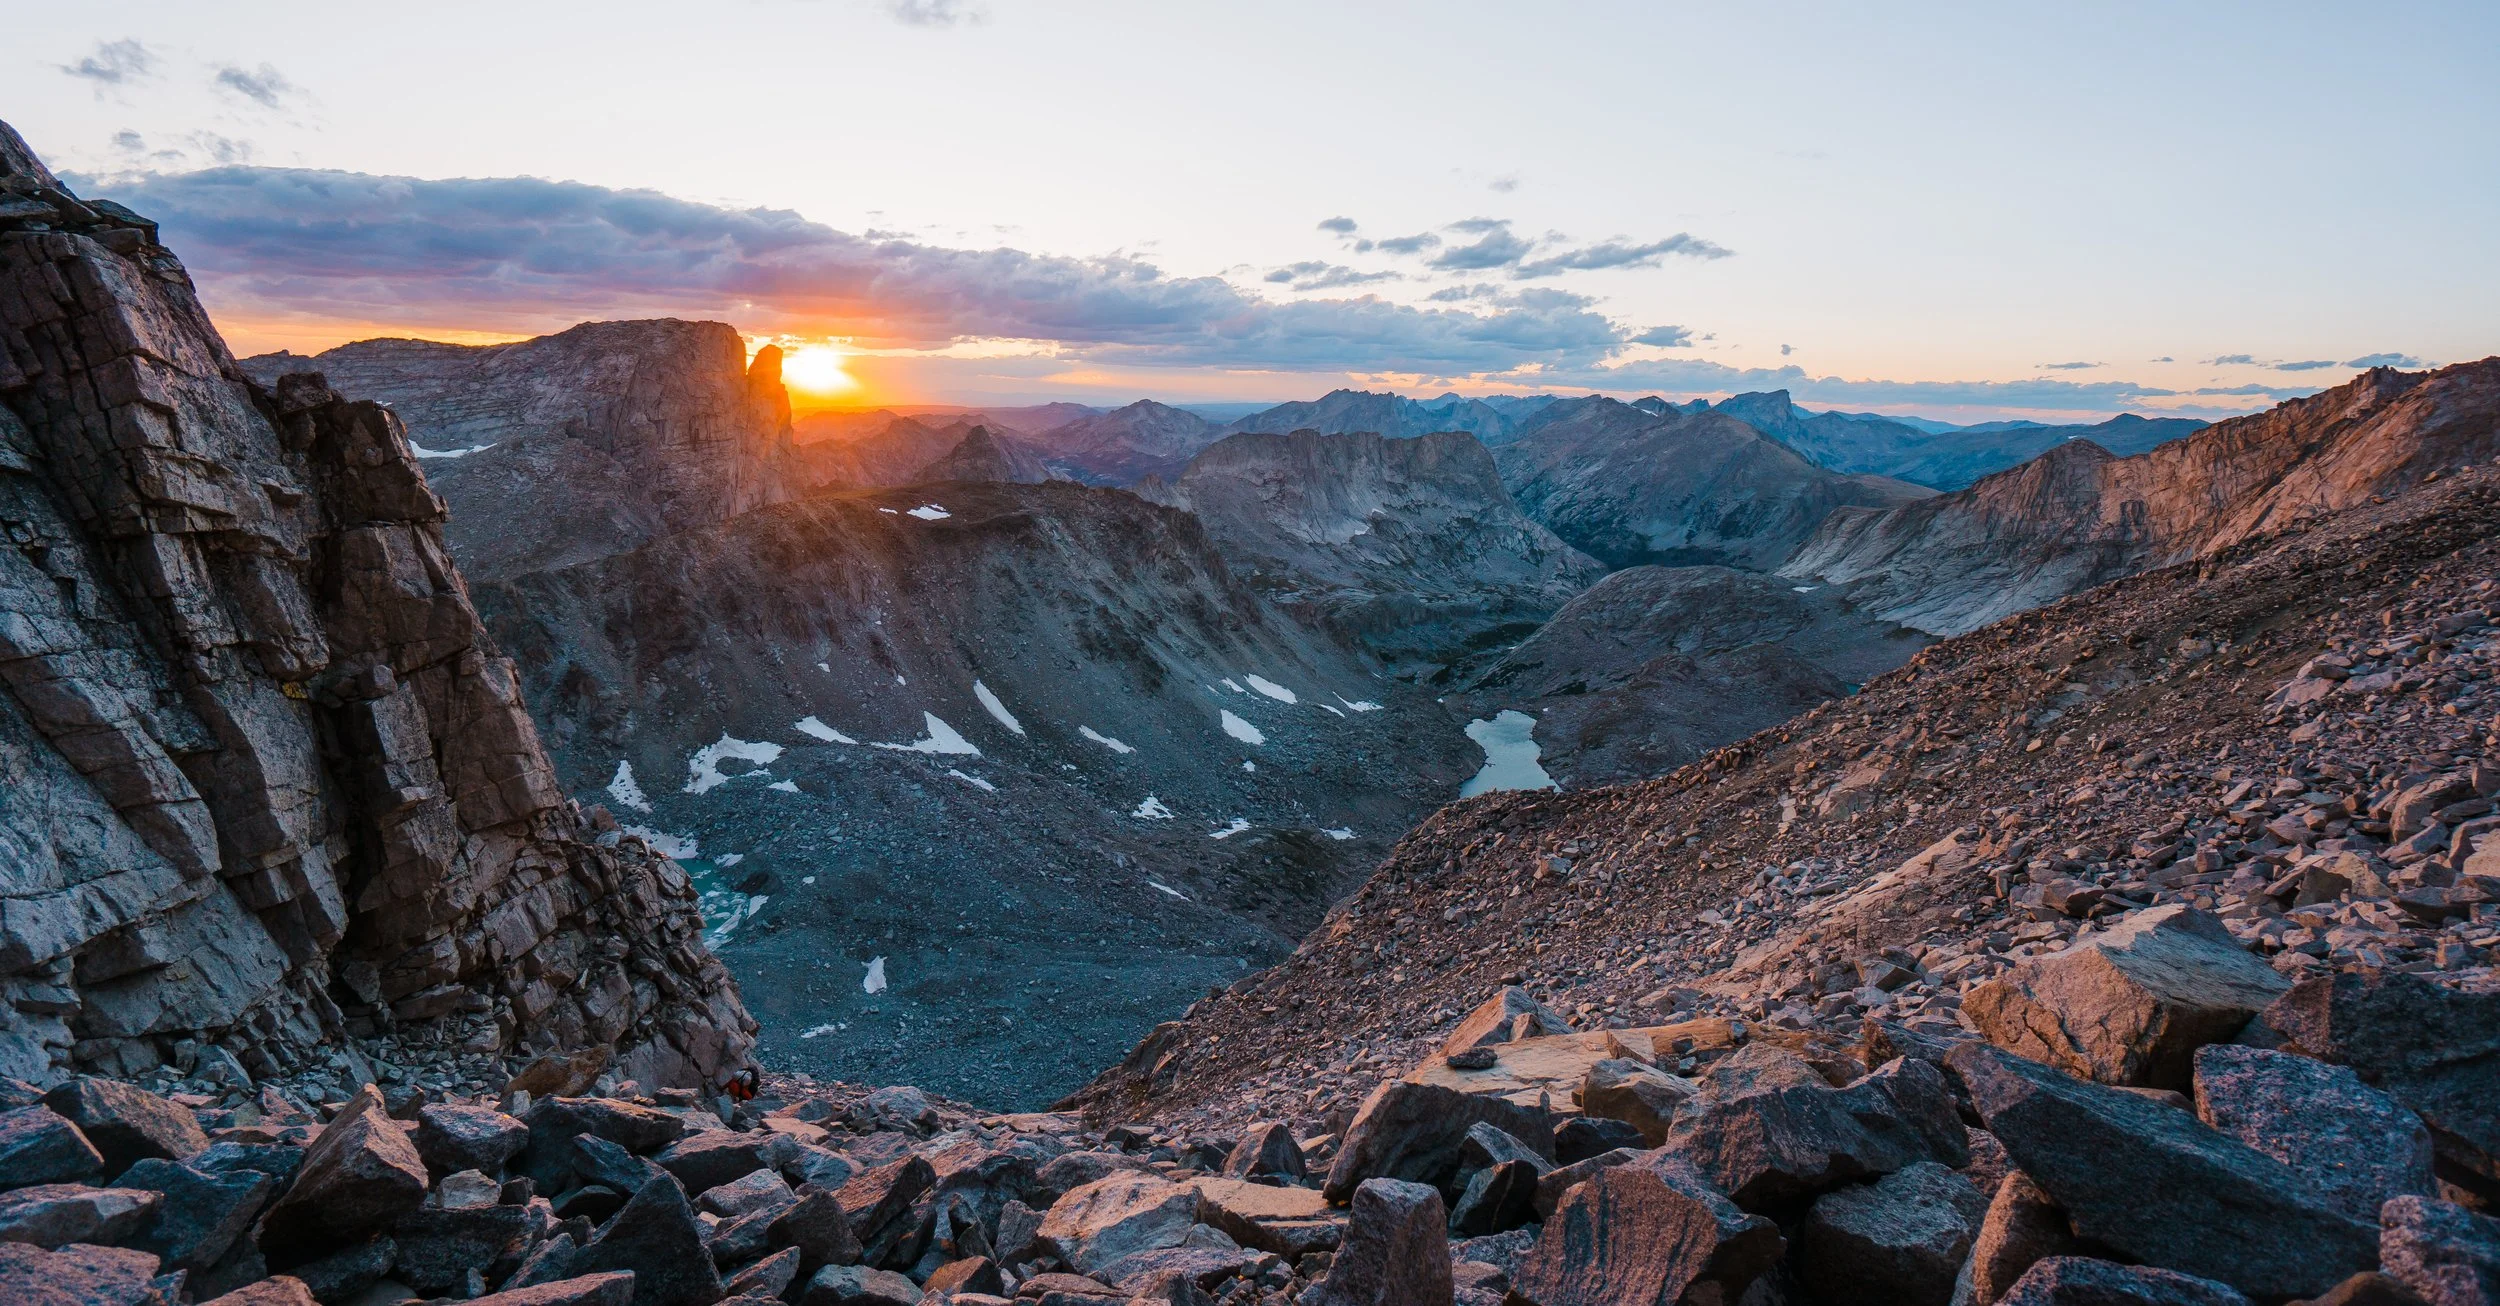
Sunset from about 13,000 feet up on Wind River Peak
The next section got harder and harder as we navigated through alpine meadows, more boulder fields, and eventually up to a very high alpine lake below Wind River Peak. By this point we were tired, but knew we had to keep going. After stopping for a large snack, we boulder hopped, re-filled our water, and began our ascent of the steep boulder field and gully leading up to the summit of Wind River Peak. From the east there is a hiking trail (actually a lower angle boulder field) heading up to the summit, but from the west, where we were coming from, it is a very sketchy scramble on steep, loose boulders that move as you move. This section was scary since we were worried about knocking boulders onto each other. And no, a helmet is not necessary since it wouldn’t help at all. These are leg and body crushing boulders that could do real damage. These few thousand feet felt like they took forever, and I was so focused on moving up that Garrett had to tell me to look up at the sunset, which was stunning! He had my camera on him and took the picture above of the sunset while we were just a few hundred feet below the summit. We summited Wind River Peak (13,197’) at 8:45pm, in the dark. It was crazy windy at the summit and on the east side, and we navigated in the dark to descend a large boulder field until we found a flat enough spot to camp. We ended up camping at around 11,000 feet. We set up our tent and just started cooking dinner when another storm hit. High winds had us holding our tent up (it really does do well in the wind but we were on moist soil and a stake popped out) for almost half an hour before we fixed a stake. We ate dinner around 11:30pm. There was crazy thunder and lightning along with the wind all night, so we barely slept.
Day 8 - Sheeps Bridge/Worthen Meadow Reservoir Exit
Distance: 12 mi (19.3 km) | Elevation Gain: 1,239’ (338 m) | Hiking Time: 5.5 hrs
After the worst nights sleep, we woke up early and packed up camp, excited to finish the trip and get back to the van. We couldn’t find the trail that GaiaGPS showed was there, but we made our way down to a main trail near a few lakes and hiked out the rest of the 12 miles on-trail. It went fast and we got to Worthen Meadow Reservoir shortly after 1:30pm, where our van had been parked for the past eight days. After that, we treated ourselves to a night in a hotel in Lander, WY and it was amazing to get a shower, hot tub, pizza, and a big and comfy bed.
Wind River High Route: What to Know Before You Go
The Wind River High Route is not a traditional backpacking trail. It is a high-alpine, mostly off-trail route that requires strong navigation skills, route-finding confidence, and comfort moving through steep, rocky terrain for days on end. Before committing to this trip, you should be completely comfortable reading topographic maps, using GPS apps like GaiaGPS, and making on-the-fly decisions when conditions change.
Unlike well-established long-distance trails, there are no signs, no blazes, and often no defined path at all. You’ll spend long stretches hopping across unstable talus, weaving through boulder fields, navigating around alpine lakes, and climbing steep passes. Mileage was deceiving for us. We normally cover 15 miles easily in a day on-trail but we found five off-trail miles can take as long as ten or more miles on maintained trail.
You also need to be prepared for heavy packs at the start. With 7–10 days of food, we began with pack weights between 35–45 pounds (we share all our food and packing list below). Combine that with high elevation, steep climbs, and uneven terrain, and this became as much a strength and durability challenge as it is an endurance one. Below we’ve outlined some of the key friction points you should be prepared for to help you have a successful trip.
Best Time to Backpack the Wind River High Route
Timing your Wind River High Route adventure is crucial for both safety and enjoyment. The high elevation and Wyoming's mountain weather create a relatively short season for attempting this route.
| Season | Pros | Cons | Trail Notes |
|---|---|---|---|
| Late June – Late July |
|
|
Experienced mountaineers only. Snow travel and self-arrest skills essential. Creek crossings from snowmelt can be the most serious hazard of the trip. |
| Mid–Late August Best Time |
|
|
Most snow melted from passes and high basins. Best window for covering difficult terrain safely. Bugs typically diminish by mid-August. |
| September – Early October |
|
|
Beautiful and uncrowded, but demands solid cold-weather gear and flexibility. Weather windows can close fast. Have a bail-out plan ready. |
Trail Safety: Weather, Alpine Risks, Wilderness Isolation
Backpacking the Wind River High Route is a true alpine wilderness experience. We didn’t see anyone else for days when we went in the end of August. You should be prepared for all the alpine variables.
Weather Variability
Weather in the Wind River Range changes quickly and often without warning. Afternoon thunderstorms are common in July and August, and lightning exposure is a real concern when you’re traveling above 11,000 feet (3352 m) with little cover. We experienced several days of rain and one night of intense thunder, heavy rain, and high winds near the summit of Wind River Peak after a 15 hour day. Check forecasts before leaving, carry a satellite communicator for weather updates, and plan your day to cross high passes earlier rather than later.
Navigation Challenges
The majority of the route is off-trail, depending on variation. There are few cairns guiding the way, and faint climbers' trails appear and disappear. Snowfields may obscure key landmarks earlier in the season.
You should be confident with:
Reading map contour lines and using natural visual rails to keep you on track
Identifying pass entrances and exits
Navigating around cliff bands and lakes
Adjusting your route when conditions demand it
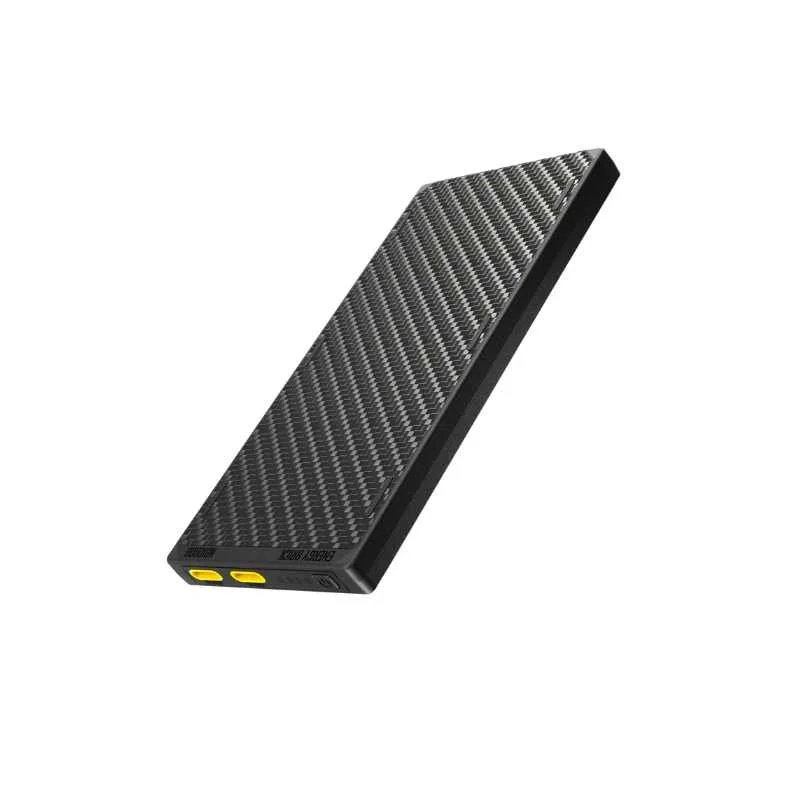
We carried 2 Nitecore 10000 battery banks to keep our phones charged as well as a backup map/compass.
Altitude and Physical Demands
You’ll spend most of the trip between 10,000 (3352 m) and 12,500 feet (3810 m), with multiple passes over 11,000 feet (3352 m). If you’re not acclimated, altitude can significantly slow you down. Headaches, nausea, and fatigue are common if you ascend too quickly. We always tried to camp at lower altitudes to ease our acclimation and minimize our exposure to night time storms. Plan your first day conservatively, hydrate consistently, and don’t underestimate how much slower you’ll move at elevation.
Wilderness Isolation
There is no cell service anywhere along the route. There aren’t any easy options for self-evacuation along the heart of the route. Outside rescue would be complicated and slow. Injuries in boulder fields are a real risk — a rolled ankle or knee injury could become serious quickly. We always carry our Garmin InReach Mini 3 and left a detailed trip itinerary with a trusted friend that we kept updated on our progress. Have a well stocked backcountry first aid kit and be familiar with at least basic wilderness first aid skills.
Creek and River Crossings
Creek crossings are one of the most underestimated hazards on the Wind River High Route. For example, on day 2, Dinwoody Creek was running thigh-deep and fast enough that I was worried about being swept off my feet, Garrett crossed first and carried our packs across. Earlier in the season, expect crossings like this on nearly every significant drainage.
Always unbuckle your hip belt before entering moving water so you can ditch your pack if you fall. Use trekking poles for stability and cross at the widest, shallowest point rather than the narrowest, wider braided sections move slower than tight chutes. Time major crossings for morning if you can, as snowmelt peaks in the afternoon and water levels rise significantly through the day.
Responsible Hiking and Leave No Trace in the Wind River Range
The alpine ecosystems of the Wind River Range are incredibly fragile. Plants grow slowly at elevation, and damage can last decades. Because so much of the High Route travels off-trail, your impact matters even more.
Key Guidelines for Responsible Recreation in The Wind River Range
Plan ahead and prepare: Check weather forecasts, know your route, understand permit regulations, and be ready for alpine conditions.
Travel and camp on durable surfaces: There are really no designated camp sites along the route. We have recommended stopping points on ourWind River High Route GPX Track but it will be up to you to decide when and where to setup camp. That said, try to only camp only on rock, gravel, or sand to minimize your impact on the delicate alpine flora. Never camp on vegetation or meadows.
Dispose of waste properly: Pack out all trash, food scraps, and toilet paper. Use forest service provided pit toilets (trailheads only) or human waste must be buried in a cat hole 6-8 inches deep, at least 200 feet from water sources and campsites.
Leave what you find: Don't pick flowers or remove any natural objects.
Minimize campfire impact: Do not cut down trees limbs or gather wood for a campfire, instead use a lightweight backpacking stove for cooking.
Respect wildlife: Do not feed animals. Store all food in your bear-proof containers, never leave food out open and unattended. Store ALL scented items inside (food, toiletries, sunscreen, bug spray). Even small critters like marmots and chipmunks will chew through packs to get to food.
Be considerate of others: Camp away from trails and other groups when possible. Keep noise down, sound carries in the alpine. Yield to uphill hikers on steep sections.
Permits and Regulations for the Wind River Range
One of the major appeals of the Wind River High Route compared to other premier backpacking destinations is the lack of a permit lottery. The Wind River Range still has plenty of backpacker traffic but the traffic is mostly contained to the sections of the CDT and near the Cirque of the Towers.
Overnight Backpacking Permits
No advance permits required: The Wind River Range operates on a self-registration system at trailheads.
Self-registration at trailheads: Fill out a wilderness permit at the trailhead before you start your hike. These are free and available on a first-come, first-served basis.
Group size limits: Maximum group size is 15 people, though smaller groups (2-6 people) are recommended for Leave No Trace principles and better wilderness experience.
Day 2 in the basin below Gannett Peak
Essential Gear List for the Wind River High Route
Packing the right gear is critical for a route this long and demanding. Unlike a typical backpacking trip where you might get away with some sub-optimal choices, the Wind River High Route demands reliable, lightweight, and durable equipment. If you’re considering doing this route, you should have plenty of off-trail experience and experience with your gear. We went as light as possible for this trip, but still ended up with pretty heavy packs at the beginning because of all of the food. I will highlight the big items below, but check out our other extensive blogs on the best backpacking gear:
Backpack
Hyperlite Mountain Gear Southwest 55L - This is the perfect ultralight pack for trips ranging from 1 to 8+ nights, and it is my go to pack for longer trips. I have loved this pack for years and cannot recommend it enough as the perfect all around backpacking pack.
Weight of pack: 2.0 lbs | 31.6 oz
Load capacity: up to 40 lbs
Sleep System
Tent - Hyperlite Mountain Gear Unbound 2, This is an amazing tent that is ultralight, weighing just 1.5 lbs and sets up with two trekking poles. Even in wind and rain storms, the Unbound held up great each night. Being a single walled tent, if there is no breeze, you will end up with some condensation inside the tent, but for the weight and size, we are willing to deal with that.
Footprint: Hyperlite Ground Cloth
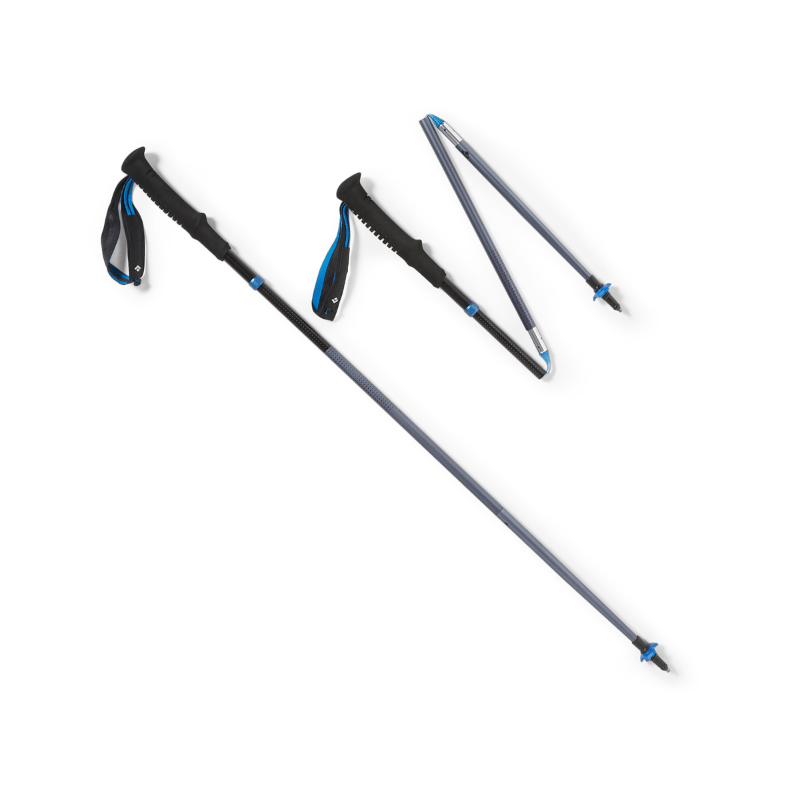
Trekking Poles (for setting up tent): Black Diamond Trail Trekking Poles
Stakes: Zpacks 6" Sonic Stake
Quilt - We prefer ultralight quilts to sleeping bags, Skye has theTherm-A-Rest Vesper 20 (no longer made unfortunately) and Garrett has theHyperlite 20 Degree Quilt. Both being 20 degree ratings were more than enough for this trip. We even were hot a few of the nights even at and above 10,000 feet.
Sleeping Pad - We both have the Therm-A-Rest Xtherm air pads and love them, they have an R value of 7.3 (that’s really high) so keep us warm even in the high alpine on chilly nights.
Pillows - Garrett uses the Hyperlite Stuff Sack Pillow with a down jacket inside, and Skye uses theSea to Summit Aeros Premium Pillow along with the Hyperlite Stuff Sack Pillow for a little extra neck support.
Additional Essential Gear We Love
Backpacking in alpine terrain is different from forest trails. The Wind River High Route requires sun protection, warm layers for cold mornings and evenings, and gear that can handle rocky scrambling. For a full guide on typical backpacking clothing, check out our What to Wear for Backpacking and Best Ultralight Gearguides, which covers some of our favorite gear picks.
Essential Gear to Pack for Alpine Backpacking:
Trekking Poles: Essential for climbing steep sections and stability with a heavy pack
Sun Protection: High-SPF sunscreen (Dermatone Sport SPF 50)
Anti-Chafe Stick: High mileage in hot conditions can make for some gnarly chaffing situations. Love putting a Dermatone travel size body stick in our hip belts.
Sunglasses: Love our Ombraz for their compact size, adjustable cord and eco conscious business practices.
Water Filter: Katadyn BeFree 1L is compact and easy to filter and drink extra on-the-go.
Bear Cannister or Bear Bag:There are no formal bear hangs or bear boxes in the wind river range, proper food storage is essential. The compact Ursack is our go-to for this area, but a bear canister also works if you prefer that.
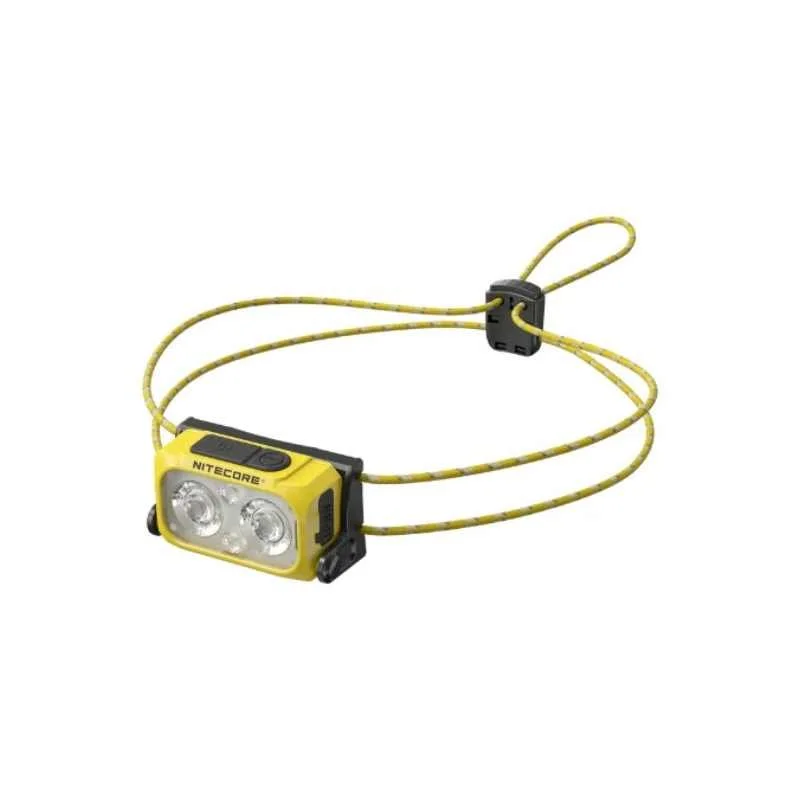
Headlamp:Nitecore NU25 400 is one of the lightest and brightest rechargeable headlamps out there.
Navigation: GaiaGPS or similar with downloaded maps. Cell service is unreliable.
Power Bank: For recharging phone/GPS, the UL Nitecore 10000 powerbank is one of the lightest and gives ~2 iPhone charges. We each carried one for this trip and kept our phones in low-power/airplane mode the entire trip.
Garmin InReach Mini 3: A small lightweight locator and satellite messenger for emergencies, we never go into the backcountry without it.
Micro Spikes(seasonal and route specific): Lightweight essential for summer glacier crossings
Ice Axe (seasonal and route specific): Know how use and to self arrest and stow your axe on your pack safely before heading out.
For a full packing list for backpacking, see our What to Pack for Backpackingand our Best Ultralight Gearguides.
Hiking Clothing to Wear and Pack:
Sun Hoodie or Sun Shirt: The UV rays are no joke in the alpine, so wearing a lightweight sun shirt while hiking is key.
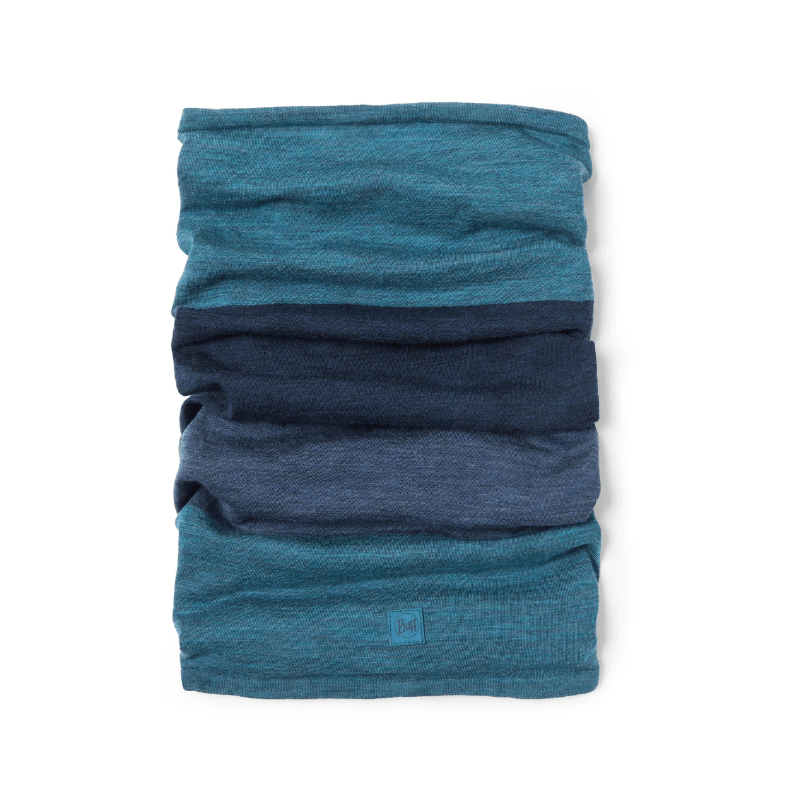
Buff:Great for additional face protection, improvised headband or night time sleep mask.
Fleece Mid-Layer: For breathable warmth while moving through windy or cold conditions and to wear at camp.
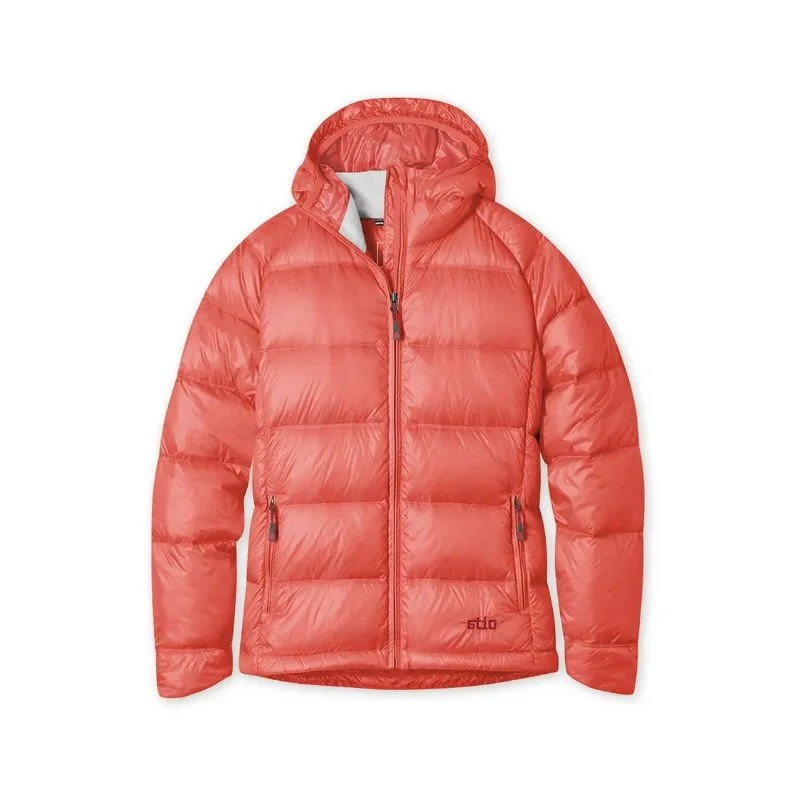
Insulated Puffy Jacket: Nights are cold, we bring our Stio Hometown down jackets.
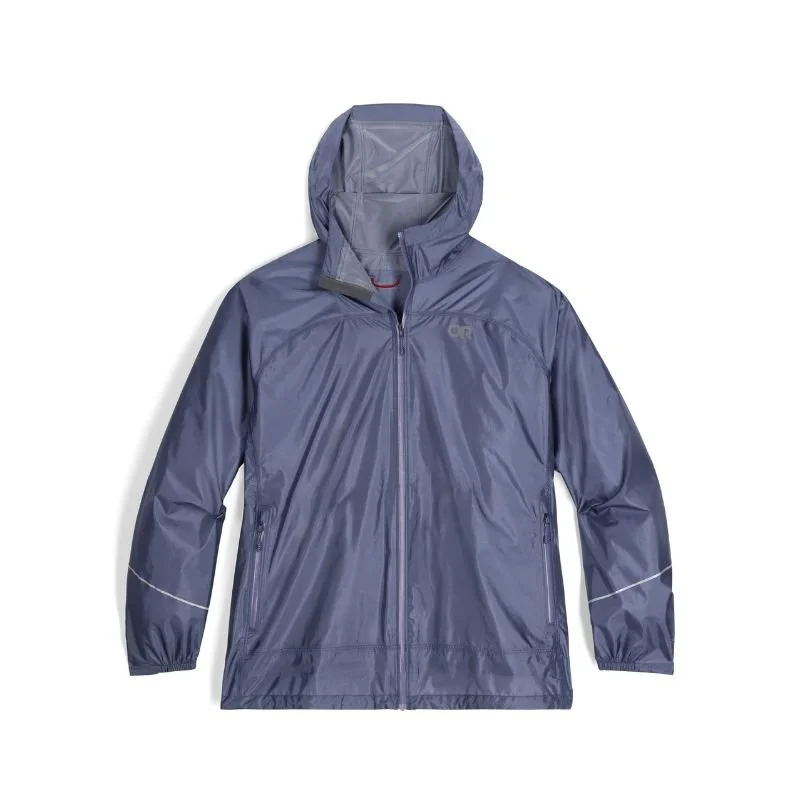
Rain Jacket:Windy days and alpine storms are common, the lightweight OR Helium is easy to tuck into your pack.
For a full packing list for backpacking, see our What to Wear for Hiking & Backpacking guide. We also have gear reviews on Sun Hoodies and Mid-Layers for hiking and backpacking that are based on years of gear testing and trial and error with different brands.


Nutrition and Hydration Along The Wind River High Route
Yes, we carried eight days of food with us! That is the question we get the most when I talk about the trip. Everyone was wondering if we had to carry all of our food or if we were able to resupply. This track is through the middle of the Wind River Range, so there is no way to get out and back on-trail again to resupply. We decided to carry two extra dinners and an extra lunch, in case we had to extend our trip, which we did by a day. We could have made it nine days with the amount of food we had, but we didn’t need to.
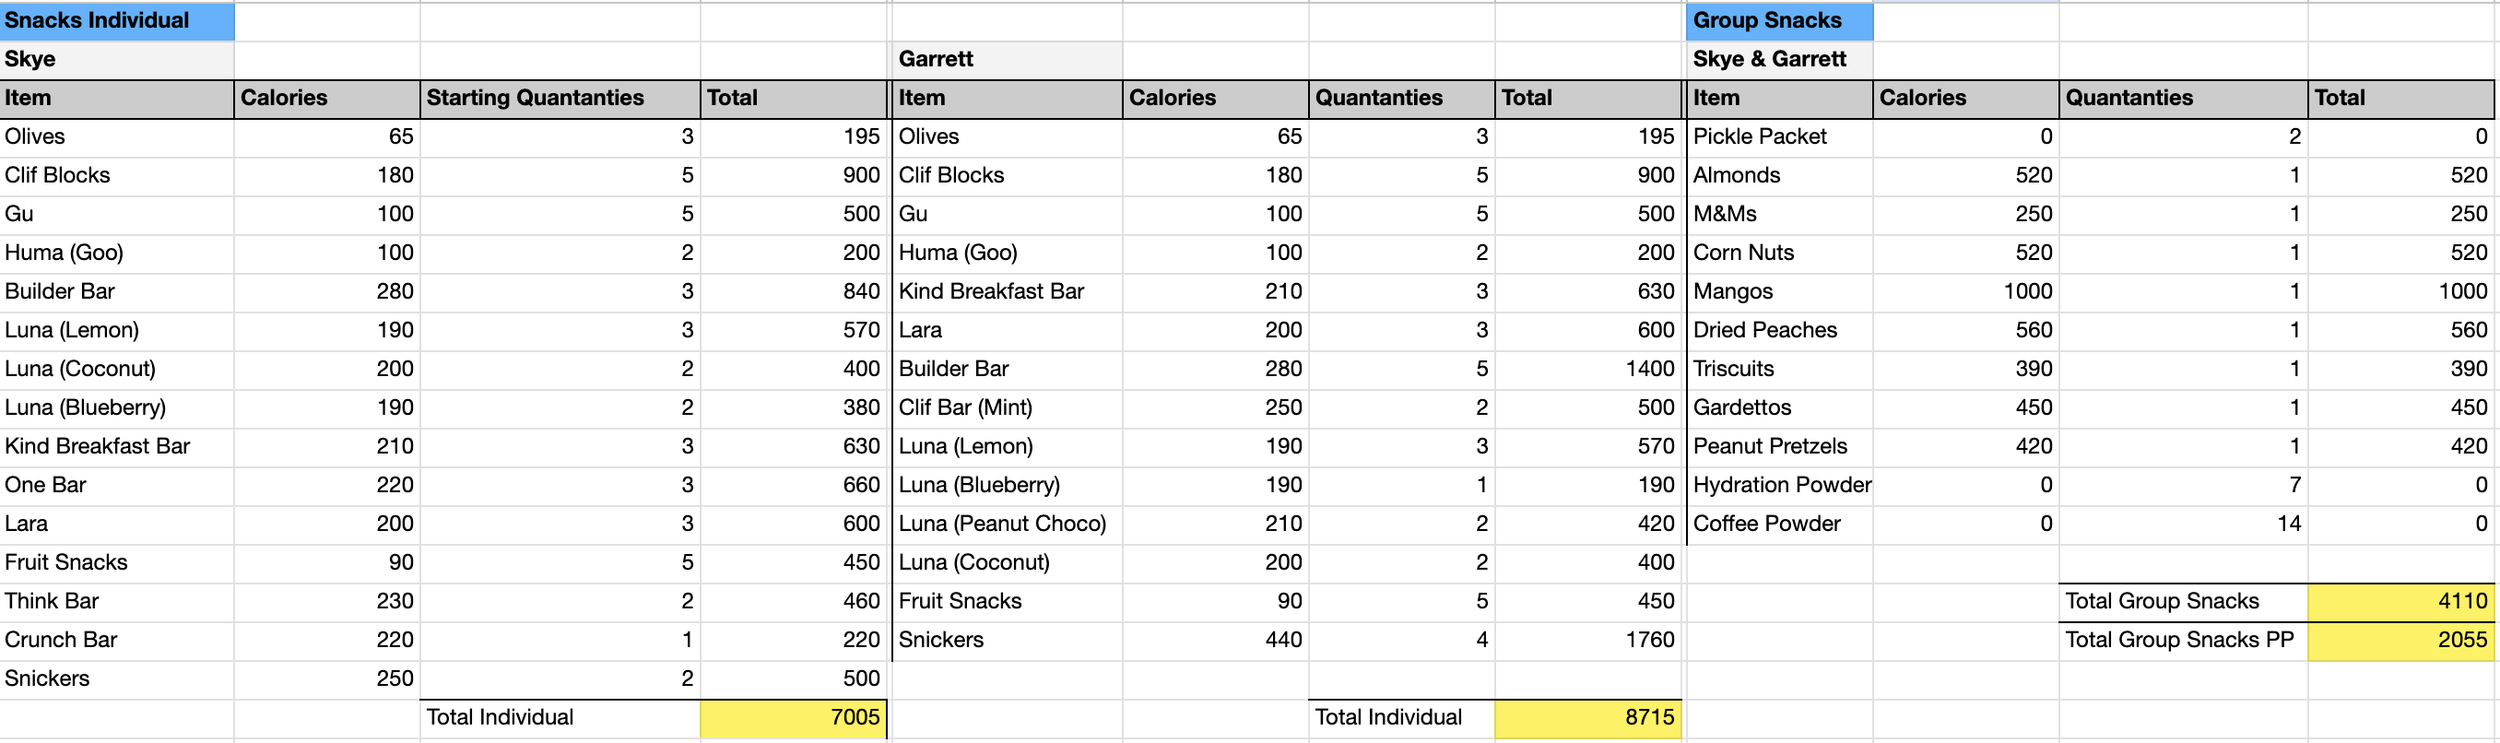
We created a table to calculate out how many calories each meal and snack had in it. We then decided on a calorie count per day that we would need to eat for the amount of travel we were doing. We realize there are more efficient calorie to weight ratios plans out there but we tried to make a balance between lightweight calorie dense foods with some tasty variety.
I tend to eat less snacks in the backcountry so we each carried our own snack bag with all of our personal bars and snacks so we could each track how much we were eating on the trail and then we were carrying food weight in proportion to our body weight. Then we split up the group meals (breakfast, lunch, and dinner) amongst us both, with Garrett carrying a little more than me. We did have to purchase a second Ursack bear bag to accommodate all of the food we needed to pack. Two 10 liter bear bags fit everything, and when we checked in at a local ranger station before the route, the ranger told us Ursack bags were acceptable for food storage along the route and we really enjoyed the ability to compress them as the trip went on.
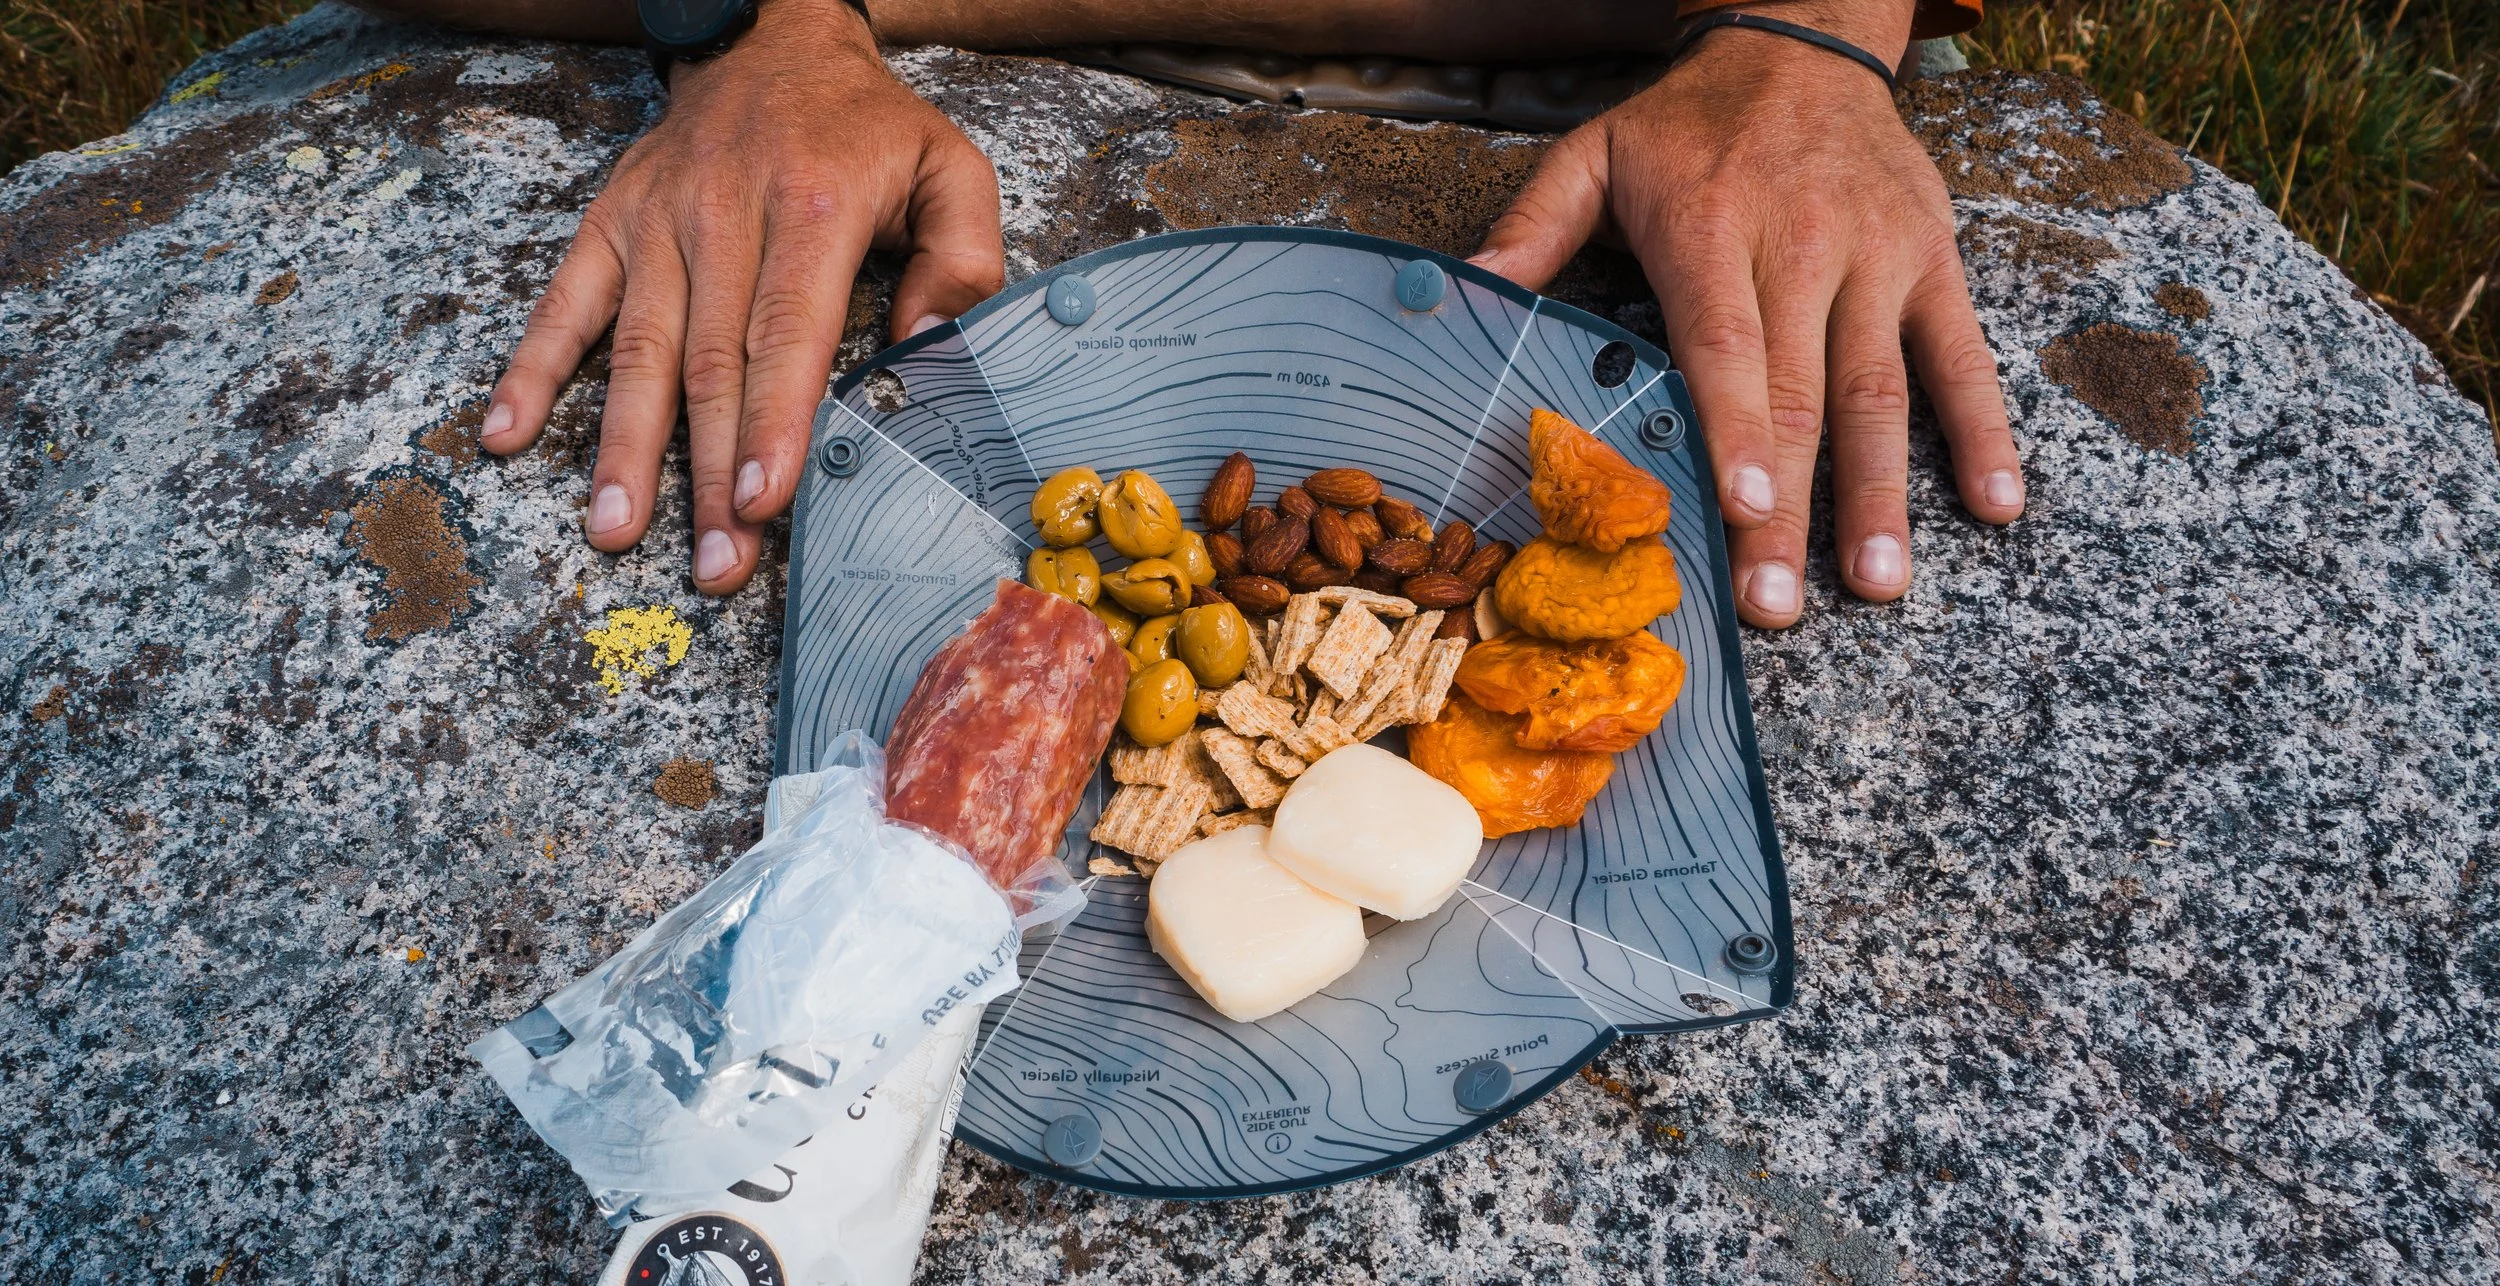
Backcountry charcuterie board (our lunch most days)
Calorie Tables For Nine Days of Backpacking in Wind River Range
Snacks - Individual + Group
Group Meals - Breakfast, Lunch, Dinner
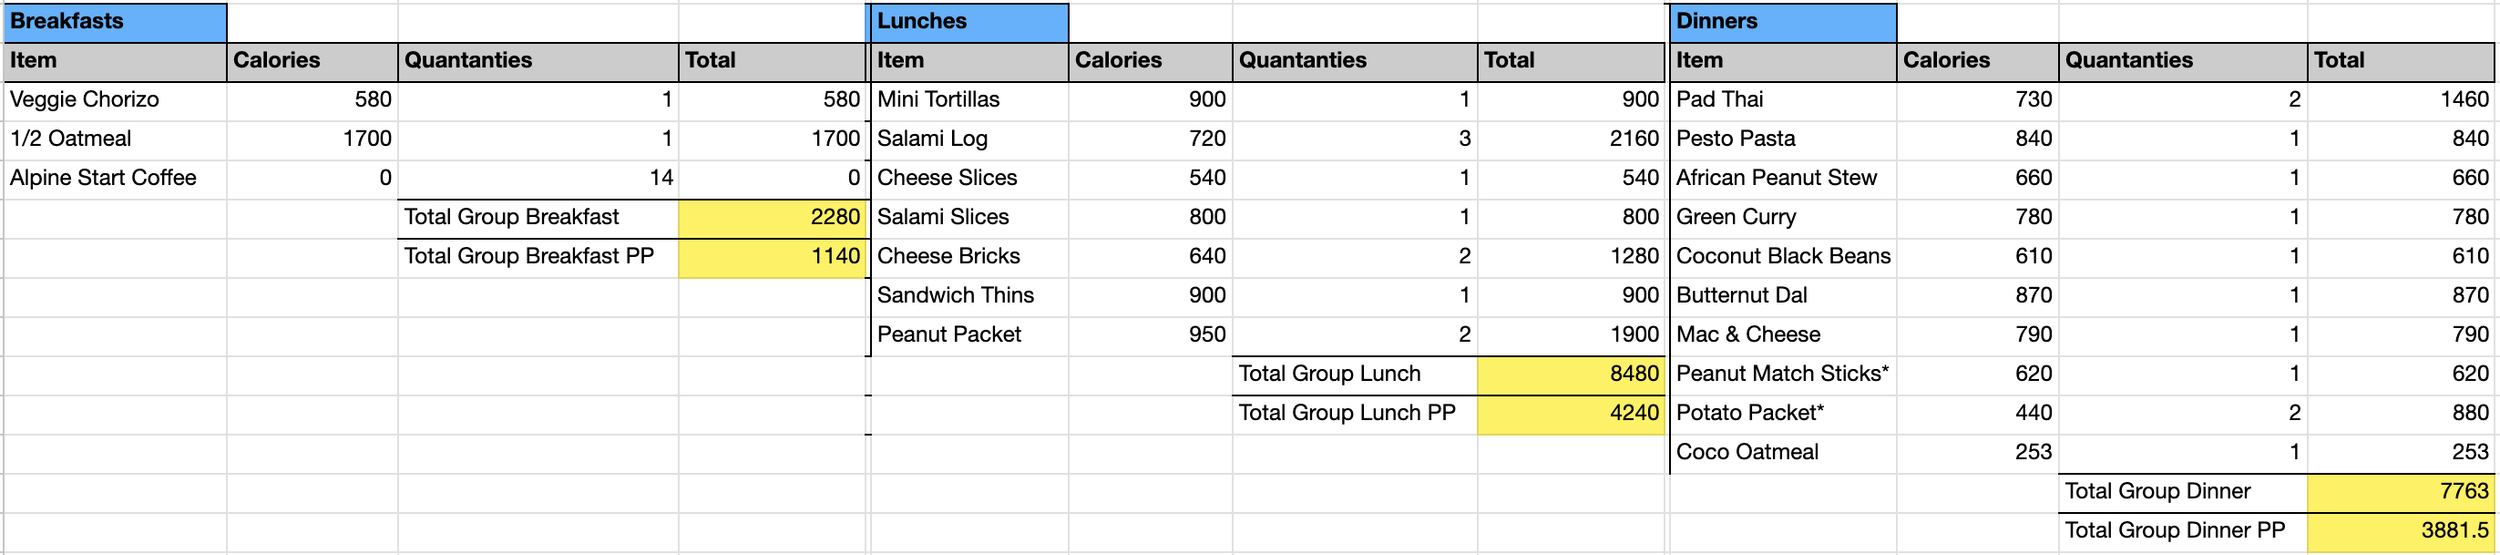
A big surprise was the overall amount of food/calories we needed to carry. Garrett was worried that we would require 3000+ calories per person per day with the 8 to 13 hour days we were on the move. Actually though on average we only ate 2100 calories per person per day. This would not be sustainable for a longer trip, but for the 8 days we were hiking, it felt like enough for us but adjust according to your past calorie needs and ability to carry the food weight. We would NOT recommend carrying less based on our experience.
Percent of Calories by Category
Snacks - 51% | Breakfast - 6% | Lunch - 23% | Dinner - 20%
Total Calories Carried - 34,800 (2,400 per person * 8 days * 2 people)
Total Calories Used - 32,838 or 2,052 pp/pd
Water
There is water all along the route, so we only carried up to one liter at a time. We refilled every 5 miles or so in rivers, creeks, and lakes, and made sure to refill before ascending a pass. For filtering we used our Katadyn BeFree squeeze filter and it worked great for the clear streams.
Wind River High Route Common Mistakes & How to Avoid Them
After completing our own Wind River High Route journey, we've identified the mistakes that matter most on a trip this demanding. Here's what to watch out for and how to set yourself up for success.
Underestimating Off-Trail Mileage
The Mistake: Planning your itinerary based on standard on-trail hiking speeds. Many backpackers see "80-110 miles" and think "I can do 15-mile days, so I'll finish in 6-7 days easy."
Why It's a Problem: Off-trail miles are not created equal. What looks like 5 miles on your GPS can take as long as 10-12 miles on a maintained trail. Boulder hopping, route-finding, creek crossings, and navigating around obstacles slow your pace dramatically. We typically cover 15+ miles easily on-trail, but during some off-trail sections on the Wind River High Route, we barely managed 5 miles in an entire day due to rock hopping, loose scree fields and route finding.
How to Avoid It:
Plan for a significant reduction in your normal hiking pace during off-trail sections and have a plan if you fall behind
Budget extra food and time for the full route, even if you're fast and fit.
Look at your route variation and identify which sections are off-trail vs. on-trail, and plan daily mileage accordingly
Don't be afraid to bail to the CDT or established trails if you're falling behind schedule or bad weather—we did on Day 5 and it probably saved our trip.
Not Carrying Enough Food
The Mistake: Packing 7 days of food for a "7-day trip" with no margin for error, or underestimating caloric needs at high elevation.
Why It's a Problem: As we just covered, off-trail travel takes longer than expected. Weather can force you to add rest days or take longer alternate routes. Running out of food deep in the Wind River Range is dangerous.
How to Avoid It:
We packed 2 extra days of food beyond our planned itinerary (we planned 7 days, packed for 9)
Calculate calories deliberately, we used a spreadsheet to track exactly how many calories per day we carried and could ration
We averaged 2,400 calories per person per day, but some people need significantly more, know your own needs
We carried a total of 34,800 calories for two people over 8 days, which gave us buffer for a 9th day. Check out our detailed food planning spreadsheet linked above in the Nutrition and Hydration section.
Wrong Footwear Choices
The Mistake: Wearing brand new boots, choosing heavy mountaineering boots when trail runners would work, or bringing footwear you haven't tested extensively.
Why It's a Problem: You'll be boulder hopping for hours each day. Heavy, stiff boots will exhaust your legs and feet. New boots will destroy your feet with blisters. Inadequate ankle support or traction can lead to rolled ankles on unstable talus. The terrain demands footwear that's nimble, broken-in, and grippy.
How to Avoid It:
Wear and train in trail runners or lightweight hiking boots that you've tested for at least 20 miles
Prioritize grip and agility over heavy ankle support, you need to feel the rocks beneath you and adjust your traction to various surfaces.
Expect your shoes to get wet from creek crossings and morning dew, choose footwear that drains and dries quickly
Consider short gaiters to keep rocks and debris out of your shoes during talus sections
What We Used: We both wore well-broken-in trail runners with good grip. They got soaked on Day 2 crossing Dinwoody Creek but dried while hiking. The lighter weight made a huge difference on steep passes and endless boulder fields.
Inadequate Navigation Skills
The Mistake: Relying solely on following a GPX track and assuming there will be cairns and trails to follow.
Why It's a Problem: GPX tracks on the Wind River High Route are approximate routes, not step-by-step turn-by-turn directions. Battery dies, screens crack, weather obscures landmarks, and you need to make real-time route decisions.
How to Avoid It:
Practice reading topographic contour lines and identifying terrain features
Download offline maps to multiple devices (both partners should have phones with the route)
Carry printed maps as backup, we had 9 pages of our GaiaGPS route in a ziplock bag
Study the route thoroughly before you go; memorize key passes, landmarks, and bail-out points
Learn to identify "handrails" (ridgelines, creeks, valleys) that keep you oriented
Bring a backup battery bank (or two)—we each carried a Nitecore 10000 powerbank and kept phones in battery-saving and airplane mode
Don't just blindly follow the GPS line, constantly cross-reference with what you see around you
Ignoring Weather Forecasts
The Mistake: Not checking weather before you leave or failing to monitor conditions during your trip.
Why It's a Problem: Mountain weather changes fast. Afternoon thunderstorms are common, and getting caught above treeline in lightning is life-threatening. We experienced intense thunder, lightning, heavy rain, and high winds near the summit of Wind River Peak. If we hadn't been monitoring weather with our InReach, we might have pushed higher into more dangerous conditions.
How to Avoid It:
Check 10-day forecasts before you leave and be willing to postpone or deviate from the plan if severe weather is predicted
Carry a satellite communicator (e.g. Garmin InReach Mini) to download weather updates mid-trip
Plan to cross high passes and exposed ridges in early morning before afternoon storms build
Have bail-out plans if weather turns severe
Don't summit peaks or cross passes if storms are building
Resources for Trip Planning
When researching the trip, we used a few different blogs, GaiaGPS for trail and route planning, and the FKT (fastest known time) website which had the GPX track. We want to give credit to these other committed backpackers as we couldn’t have attempted the route without their information. The two best blogs in our opinion were the Adventure Alan blog for food, trip, and gear lists, and Climber Kyle’s blog that had amazing pictures of the Skurka route. I hope you will also find this blog as a resource for future trip planning.
Where to Stay in and near Lander
Lander is the primary gateway town for the Wind River High Route and your best base camp for trip preparation and post-hike recovery. Situated on the eastern edge of the Wind River Range, Lander has everything you need: familiar chain hotels, local motels with character, a few grocery stores, an outdoor gear shop, and restaurants.
Most accommodations are clustered along Main Street or within easy walking distance, making it convenient to grab last-minute supplies, fuel up at restaurants, or visit Wild Iris Mountain Sports for last minute supplies. If you prefer camping, there are also beautiful options just outside town.
Lodging Mid-Range Comfort
The Lander Motel- A quiet boutique style hotel on the doorstep of main street with basic kitchenette rooms.
Holiday Inn Express Lander - Reliable chain hotel comfort with free breakfast. Located right next to Safeway, making last-minute grocery runs incredibly convenient.
Rodeway Inn Pronghorn Lodge - An affordable option with more country western vibes and character than typical chain hotels. Easy walk to Main Street for visits to restaurants and local gear shops.
Budget-Friendly Options
The Inn at Lander, Travelodge- A more budget option on the edge of town also with an easy walk to main street for visits to restaurants and the local gear shops.
Camping Options
Sinks Canyon State Park - About 6 miles southwest of Lander. Beautiful series of campgrounds within the Sinks Canyon State Park. Book in advance and the cost is $20.16 per vehicle per night for non-residents.
Worthen Meadow Reservoir - At the southern terminus for the Stoury-Arnold route, this campground is a very convenient location if you’re finishing up your backpacking trip or preparing for a car shuttle. First come-first serve sites with a $20 per night fee (unclear per person or per vehicle on the official website)
Pro Tips for Your Lander Stay
Book accommodations in advance during peak summer season (July-August). Lander is small and rooms and campgrounds fill up during the high season.
Stop at Wild Iris Mountain Sports when you arrive to get any last minute gear or chat with staff for any trail info.
Plan for at least one night pre-trip and one night post-trip in Lander. You'll want time to organize gear, handle the shuttle logistics, and recover properly before driving home.
The drive from Lander to the trailheads takes 1-2+ hours, so factor that into your shuttle timing.
Frequently Asked Questions: Wind River High Route
How difficult is the Wind River High Route?
Very difficult to extreme. This is one of the most challenging backpacking routes in the Lower 48. You need strong off-trail navigation skills, comfort with Class 2-3 scrambling, ability to carry a 40+ pound pack over boulder fields and steep passes, and excellent physical fitness. Newer backpackers with only on-trail experience should not attempt this route.
Do I need permits?
No advance permits required. Just fill out a free wilderness self-registration form at the trailhead.
How long does it take?
Most experienced backpackers take 7-10 days. We completed our 94-mile variation in 8 days and could have used 9. Plan for 8-9 days to have a reasonable pace.
What's the hardest part?
The extensive boulder hopping and off-trail navigation. Days of hopping between house-sized boulders, with some that move underfoot, is physically and mentally exhausting. The passes are steep but manageable—it's the cumulative effect of day after day of difficult terrain that wears you down.
Do I need mountaineering gear?
This depends on the route. Our Stoury-Arnold route avoids any glaciated areas and we recommend going late season to avoid the need for ice axes or microspikes. If you plan to cross any glaciered areas or go earlier in the summer then at least an ice axe and microspikes are recommended.
Can beginners do this route?
No. This is not a route for beginner backpackers. You should have extensive off-trail experience, strong navigation skills, comfort with Class 2-3 scrambling, and multiple multi-day backpacking trips under your belt before attempting the Wind River High Route.
What about grizzly bears?
Grizzly bears are present in the Wind River Range but encounters are rare. Practice proper food storage (use bear bags or canisters), make noise while hiking in thick forested areas, and know how to respond to bear encounters.
Is there cell service?
No. Zero cell service once you're in the wilderness. Bring a satellite communicator like Garmin InReach for emergencies and weather updates.
Can I do this trip solo?
It's possible but not recommended. The remote nature, difficult terrain, and potential for injury make this route much safer with a partner. If something goes wrong, having another person could be the difference between an inconvenience and a life-threatening situation.
What's the best direction to hike?
North to south (Trail Lake to Sheeps Bridge Trailhead) is most common and what we did. This direction follows the natural flow of the high route and ends closer to Lander which has better post-trip amenities.
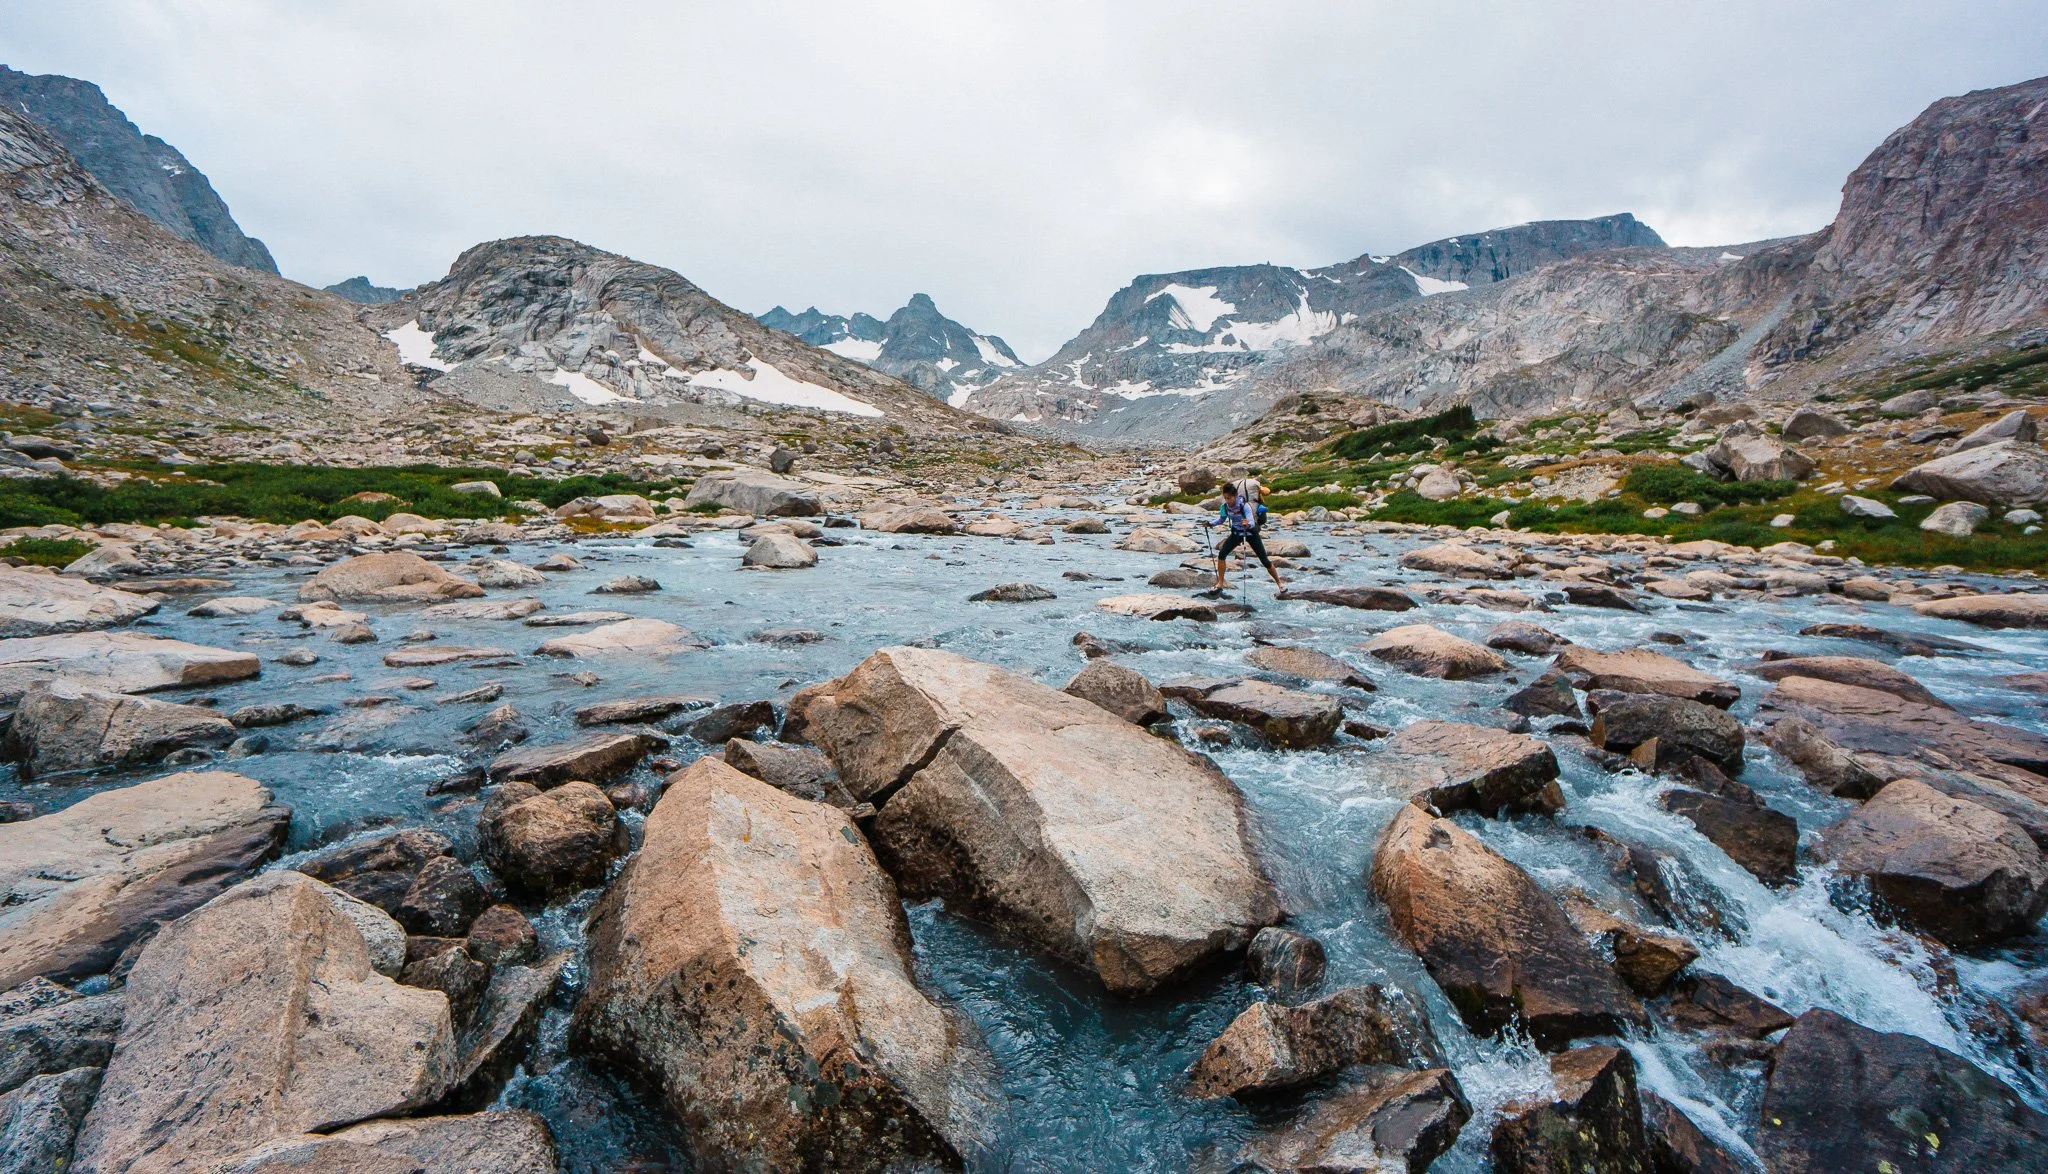
River crossing and rock hopping on day 3
Final Thoughts
I still can’t believe we hiked nearly 100 miles, it feels like such an accomplishment since it was our longest trip together yet. I’ve had a few friends ask if I would do it again to fully complete the Skurka High Route and not deviate from it, and I’m still not sure. If you asked me the next day, I would have said no, but now a week later when I’ve had time to write all of this out and re-live some of the moments, I may want to… in the future if there was ever a time that we could make a 9-10 day trip happen. I think for this trip to really be fun, you would need 9-10 days, and that is for very fit people who move fast in the backcountry. Eight days felt very fast and like we didn’t get to experience specific areas and campsites to the fullest. We were exhausted every night and usually just made dinner and went to bed. I would have loved to be able to explore some of the areas we camped, and there are some specific areas like Cirque of the Towers that I definitely plan to go back to.
If you are planning to do this hike, make sure you train sufficiently for it. Be able to carry a 40 pound pack on the first few days while boulder hopping and crossing creeks on slippery rocks, make sure you can keep at least a 2.5 mph pace while carrying an overnight pack, 2.7 mph would be even better (that was our pace on-trail) have scrambling skills, and be very proficient in off-trail navigation and travel. This is not a trip for the faint of heart and not a trip to be taken lightly. Average backpackers with only on-trail experience should not attempt this route. Garrett and I have years of alpine climbing, multiple off-trail backpacking trips and scrambles under our belts and this route still pushed us to our limits. But if you are prepared for it, it is absolutely amazing.
Tips for a Successful Trip
Get your pack base weight (pack, tent, sleep system, clothes) down to 15 lbs, food will add another 10-20 lbs to that so you need to be as light as possible before that.
Be ready to hike in the rain, make sure to pack a good rain jacket. We didn’t pack rain pants to cut weight/bulk, but if you like them, pack them too.
Pack 1-2 extra days worth of food, you will most likely extend your trip. We planned for 7 days and ended up at 8, which was fine because we had 9 days worth of food with us. We did come across a hiker on his way out who was on day 10! and who almost ran out of food because of it. Don’t underestimate this route.
Set goals and expectations with your partner or group in advance, and have a backup plan or two if you need to escape the trail or change your trip.
Download a navigation app like GaiaGPS in advance, but also carry paper maps. We printed out our track from GaiaGPS and had 9 pages with us in a ziplock bag in case both of our phones died.
Pack a good battery pack, you will need to recharge your phone, watch if you track that way, and camera. My favorite is the NB10000 Gen 3 Power Bank by Nitecore, it can charge an iphone two times to full power. It worked well charging my iphone 14 pro a few times and my Garmin Fenix 7s Sapphire watch many times.
More Related Posts and Gear Guides to Check Out Next
Gear Discount Codes and Links
We’ve partnered with a few of my favorite outdoor brands to hook you up with exclusive discounts on trail-tested gear. These are companies we actually use and love, and when you shop through the links below, you’ll get a deal and help support our blog. Win-win!
20% off SkyGOAT (grid fleece) - Click the link and add code SKYEGOAT to your cart at checkout to get 20% off your order.
15% off LUNA Sandals - Click the link and the discount will be added to your cart automatically.
15% off Stio with code SKYE15 - Click the link and enter the code in your cart.
10% off Will and Bear hats with code SKYESTOURY - Click the link and the discount will be added to your cart automatically.
20% off Wild Deodorant with code SKYESTOURY- Must enter the promo code at checkout to receive discount. They make a deodorant mini that is perfect for backpacking, it’s the size of a lip balm.
10% off Loop Earplugs with code SKYE10 - Enter the promo code at checkout. I use their Dream earplugs for sleeping both backpacking and car camping.
The Complete Guide to Backpacking Mount Assiniboine in the Canadian Rockies
What to Pack for Your Next Backpacking Trip: A Complete Backpacking Packing List
This image is copyrighted and owned by Skye Stoury Photography and skyestoury.com, if you would like to licence any images on this site, please email us at hello@skyestoury.com