
Backpacking The O-Circuit in Torres del Paine, Patagonia: A Complete Patagonia Hiking Guide

Your Complete Patagonia Backpacking Guide: Planning the O Circuit and W Trek in Torres del Paine
Patagonia had been on my bucket list for years and it was a trip that always felt out of reach. But when my partner Garrett and I decided to take a year off to travel, we knew it was our chance to explore as much of Patagonia as we could. The O-Circuit in Torres del Paine, Chile was our first stop in Patagonia, and one of my favorite backpacking trips we have done to date. Below you will find everything you need to know about the trek, the planning we did, and what I packed.
Disclaimer: This blog post contains affiliate links, meaning I receive a small commission of every purchase made with my links at no additional cost to you. Sometimes there is even a discount code for my readers which I specify next to the links.
Table of Contents
What is the O-Circuit?
The O-Circuit is a 75-mile (120 km) loop trail around the Cordillera del Paine in Torres del Paine National Park, Chilean Patagonia. It combines the popular W Trek on the front side of the park (4–5 days) with a more remote trail around the backside, completing the full O.
Distance: 75 miles (120 km)
Total Elevation Gain: 18,000+ feet (5,486 m)
Days to Complete: 6–11 (we did 8)
Difficulty: Moderate on the W | Hard/Remote on the back side of the O
Best Time to Hike: January–February
Typical Weather: Sun, rain, high winds; snow possible at higher elevations
You can hike fully self-supported, camping with your own gear and food, or stay in refugios that provide meals each night. For long-distance backpackers with their own gear, self-supported trekking is the ideal option.

Permits & Planning
You need to make camping reservations in advance for each campsite, along with purchasing entry into the park and securing transportation to and from Puerto Natales (the town to fly into and stay at before and after the trek). The campsites in the park are run by three different agencies, both private and government run, so you either have to navigate three different websites (Las Torres, Vertice, CONAF) or use a site like Booking Patagonia Travel to book everything all at once. We booked the entire trek through Booking Patagonia two months in advance and were able to secure all of our sites. If you go this route, there is a booking fee, but we thought it was worth it to save time and make sure everything was booked correctly. In total, we spent about $550 USD on the booking which included all of our camping, the park entrance fee, and our busses to and from the park.
*Note that as of 2024, El Paso and Italiano campsites operated by CONAF have been closed. These sites aren’t necessary to complete the W or O trek.
Our 8 Day O-Circuit Itinerary in Torres del Paine
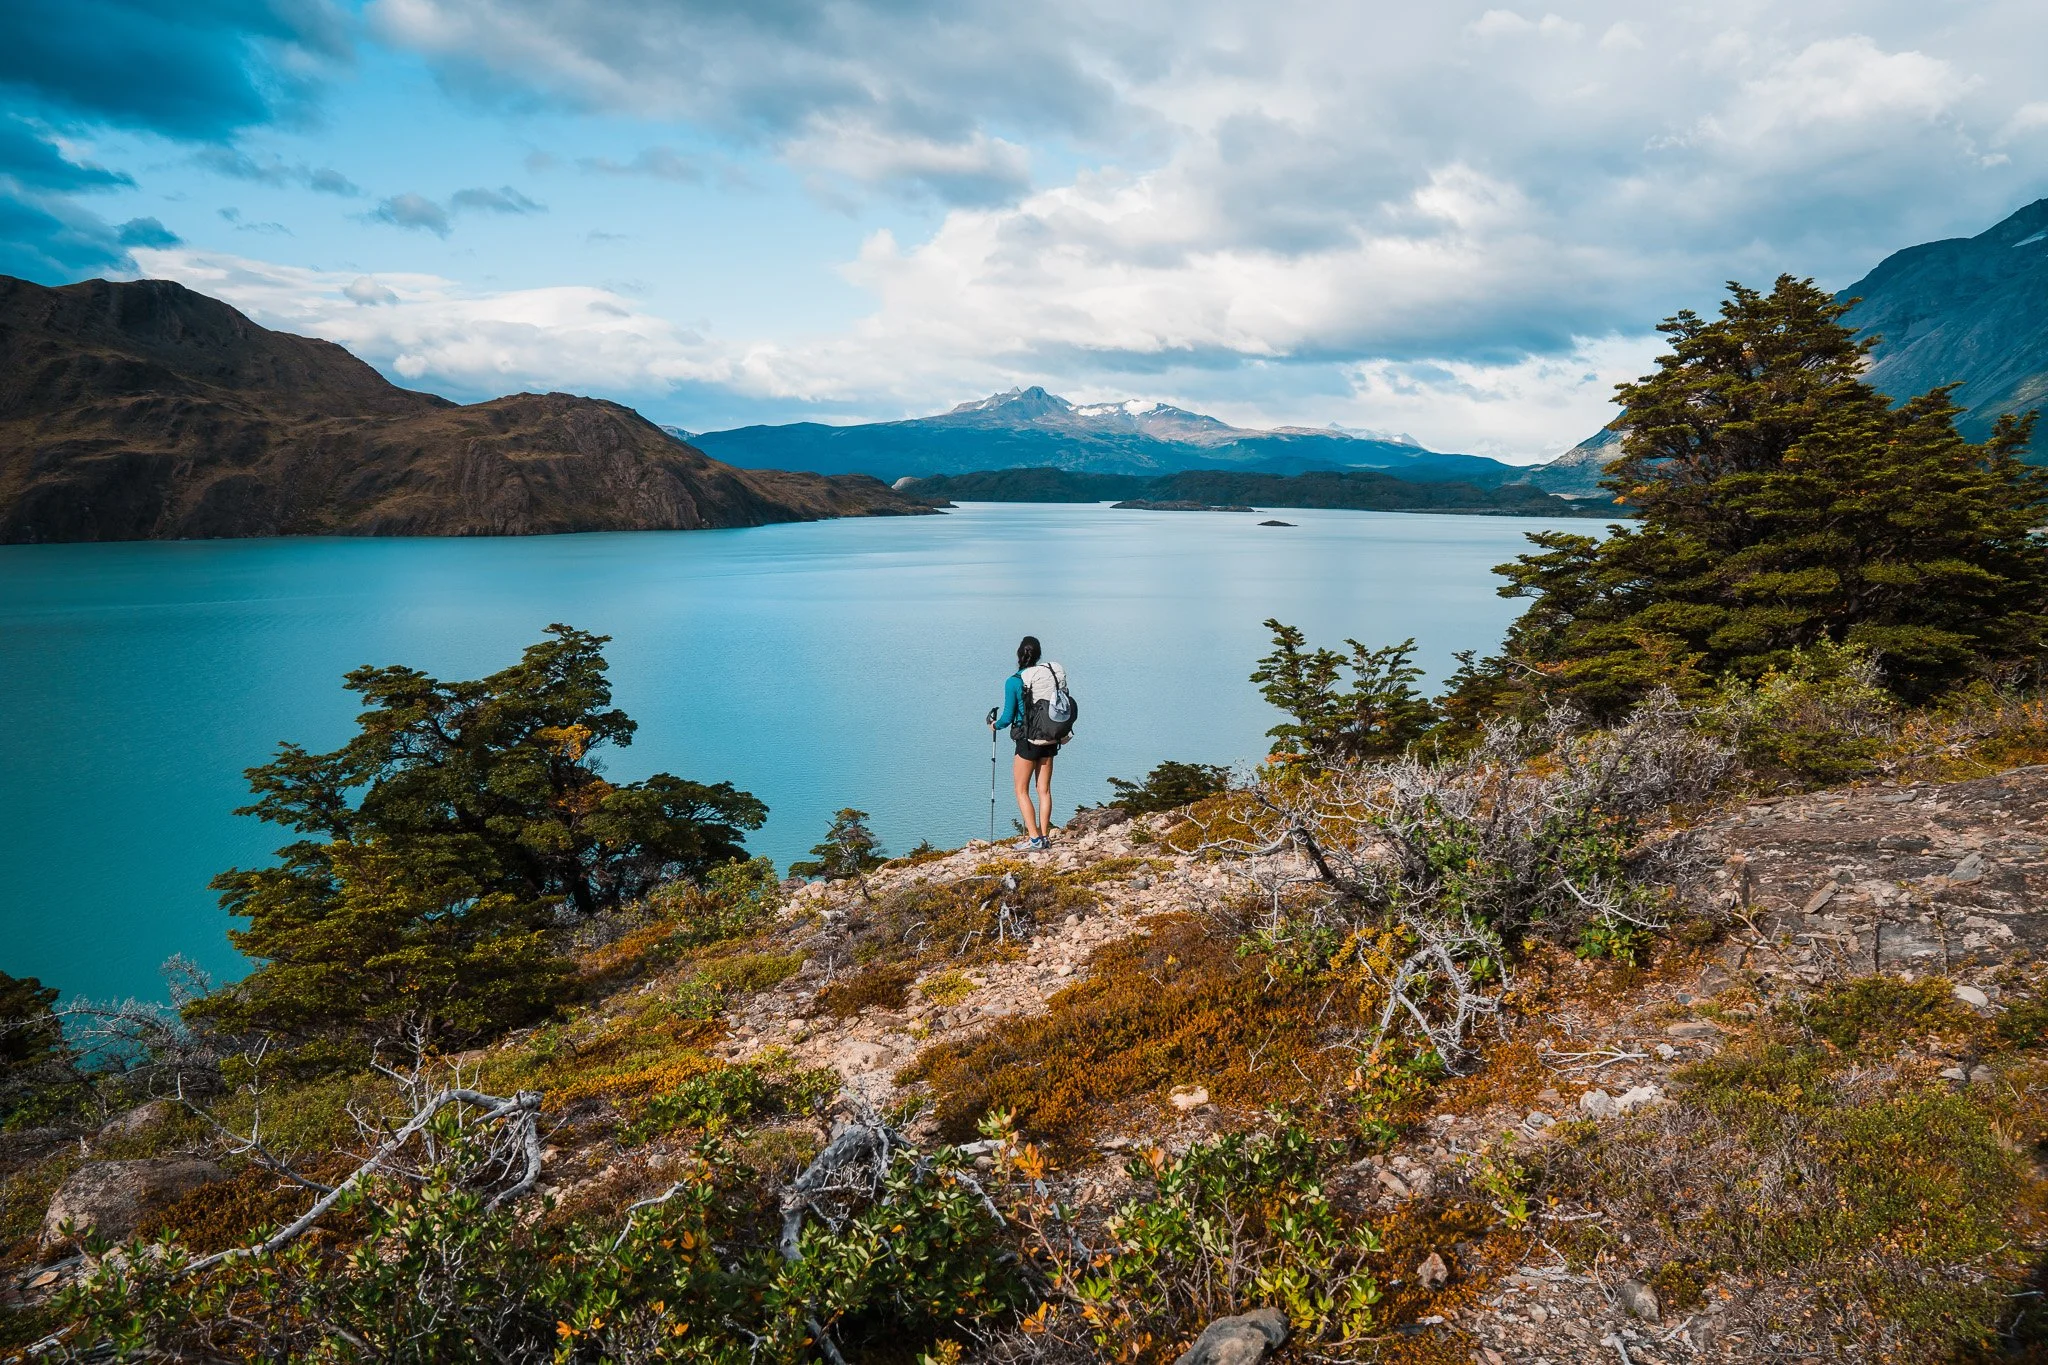
We decided to do the O in 8 days based on the campsites we could get a few months in advance. You can start the trek one of two ways, from Central (what most people were doing), or by taking the catamaran (ferry) from Pudeto to Paine Grande and starting with the W portion of the circuit (what we did). We wanted to get to take the catamaran so starting at Paine Grande made the most sense to us, and I’m glad we did it that way.
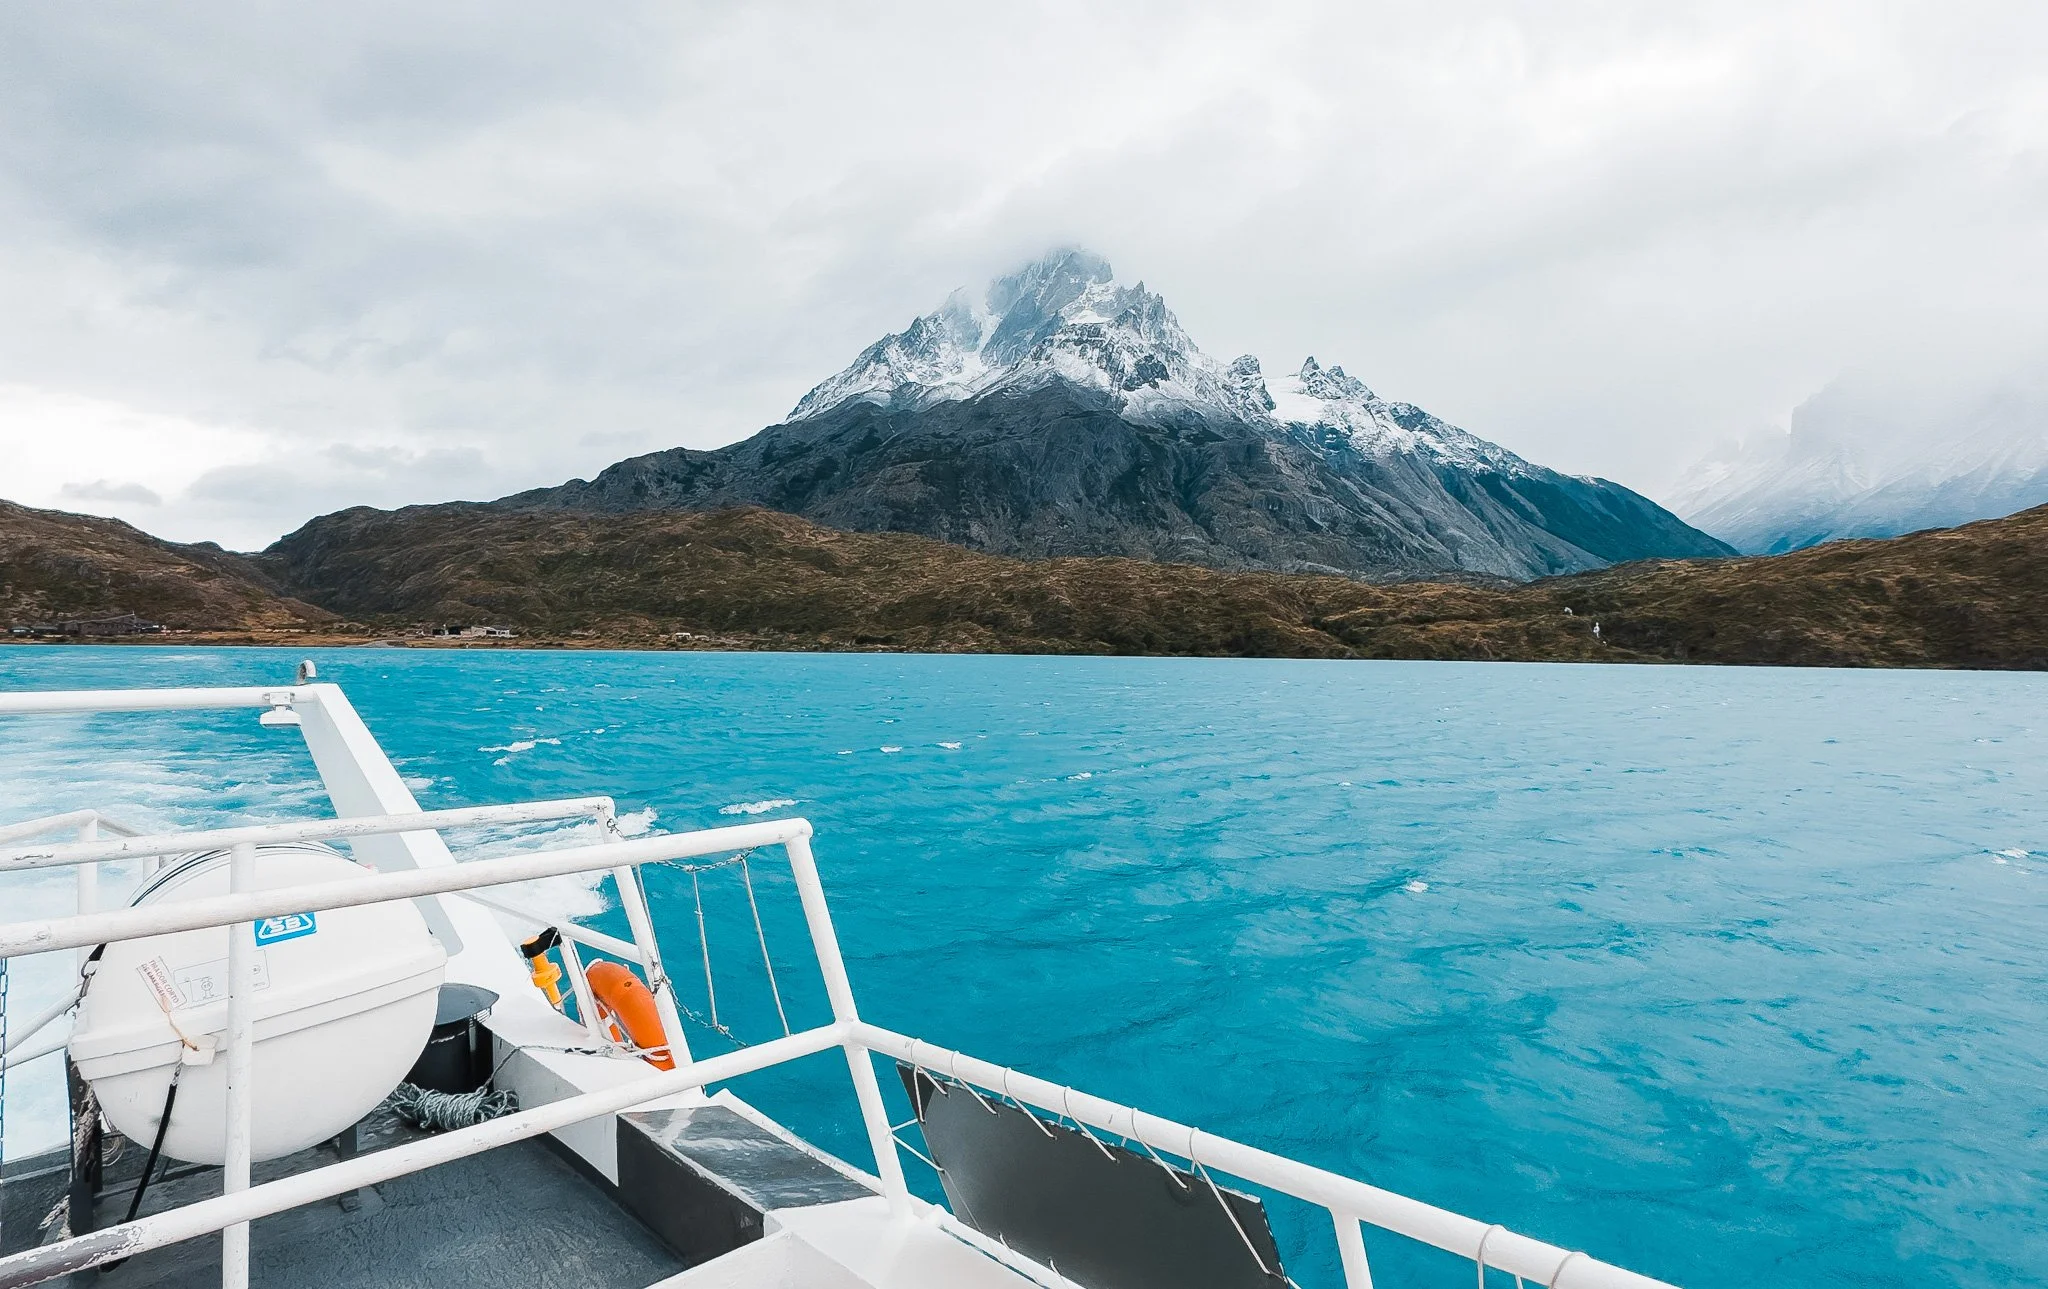
Day 1 - Enter the Park: Catamaran to Paine Grande
No hiking, just getting into the park and camping our first night. We took a bus (Bus Sur) from Puerto Natales to Pudeto that morning and then took the catamaran across Lago Pehoe to Refugio and camping Paine Grande. The catamaran can be booked in advance or paid upon arrival. It cost $30 USD cash per person one way, and they took both USD and Chilean pesos. When we reached Paine Grande, we checked into our campsite and set up camp. Every campsite had you check in with your passport, so make sure you have that on you. Paine Grande was a very windy camp and we were sand blasted all night while inside our tent. Camping at Paine Grande was crowded and very sandy/dusty.
Day 2 - Paine Grande to Cuernos
7.3 miles (11.7 km), 1,241 feet (378 m) of gain
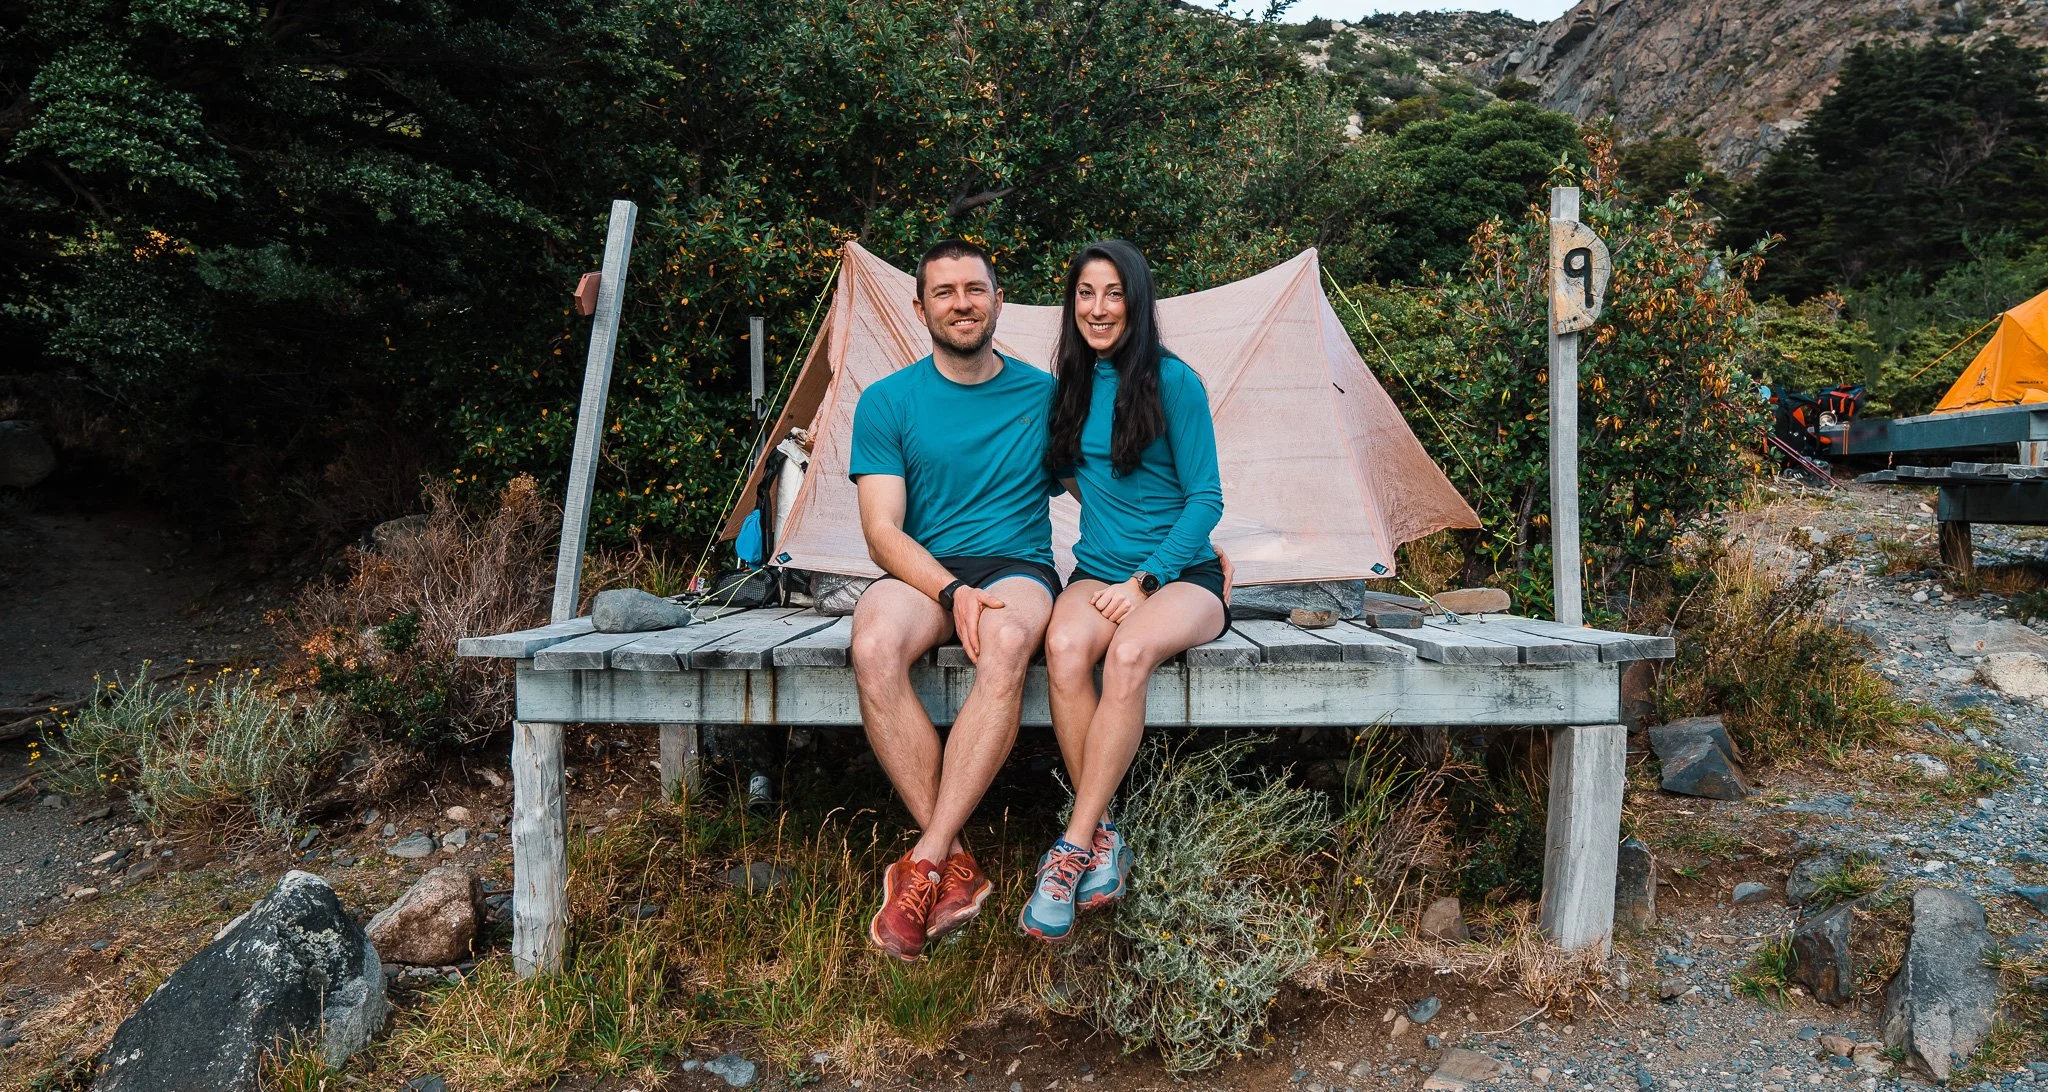
We hiked straight from Paine Grande to Cuernos, deciding to bypass a side trip up to Britanico. If you head up to that glacier view point, it adds about 7 more miles (11.2 km) to the day. This was our first real day on the trail and it was windy but beautiful. The majority of the trail looks out at both Cerro Paine Grande and Lago Skottsberg. This section felt easy and was a great warm up for what was to come. The Refugio at Cuernos was so cute and the camping overlooked Lago Nordenskjold. This is the most scenic campsite of the trek. Campsites are on wooden platforms here, which was really nice to have our own space and a flat spot.
Day 3 - Cuernos to Chileno
7.58 miles (12 km), 2,350 feet (716 m) of gain
The first part of this section is stunning taking you above the lake and keeping it in view the entire time. Then we dropped down into grasslands and the only very short muddy section of the circuit. After that we gained elevation hiking up to Windy Pass and then down to Refugio Chileno which is next to Rio Ascencio. Chileno was one of the more rustic and run down refugios. The bathrooms and showers were dirty, and they only allowed cooking on one small table in the crowded refugio. It poured rain after we set up camp, so we spent most of the night in our tent playing cards. The campsites here were also on wooden platforms in the woods and were sheltered from the wind.
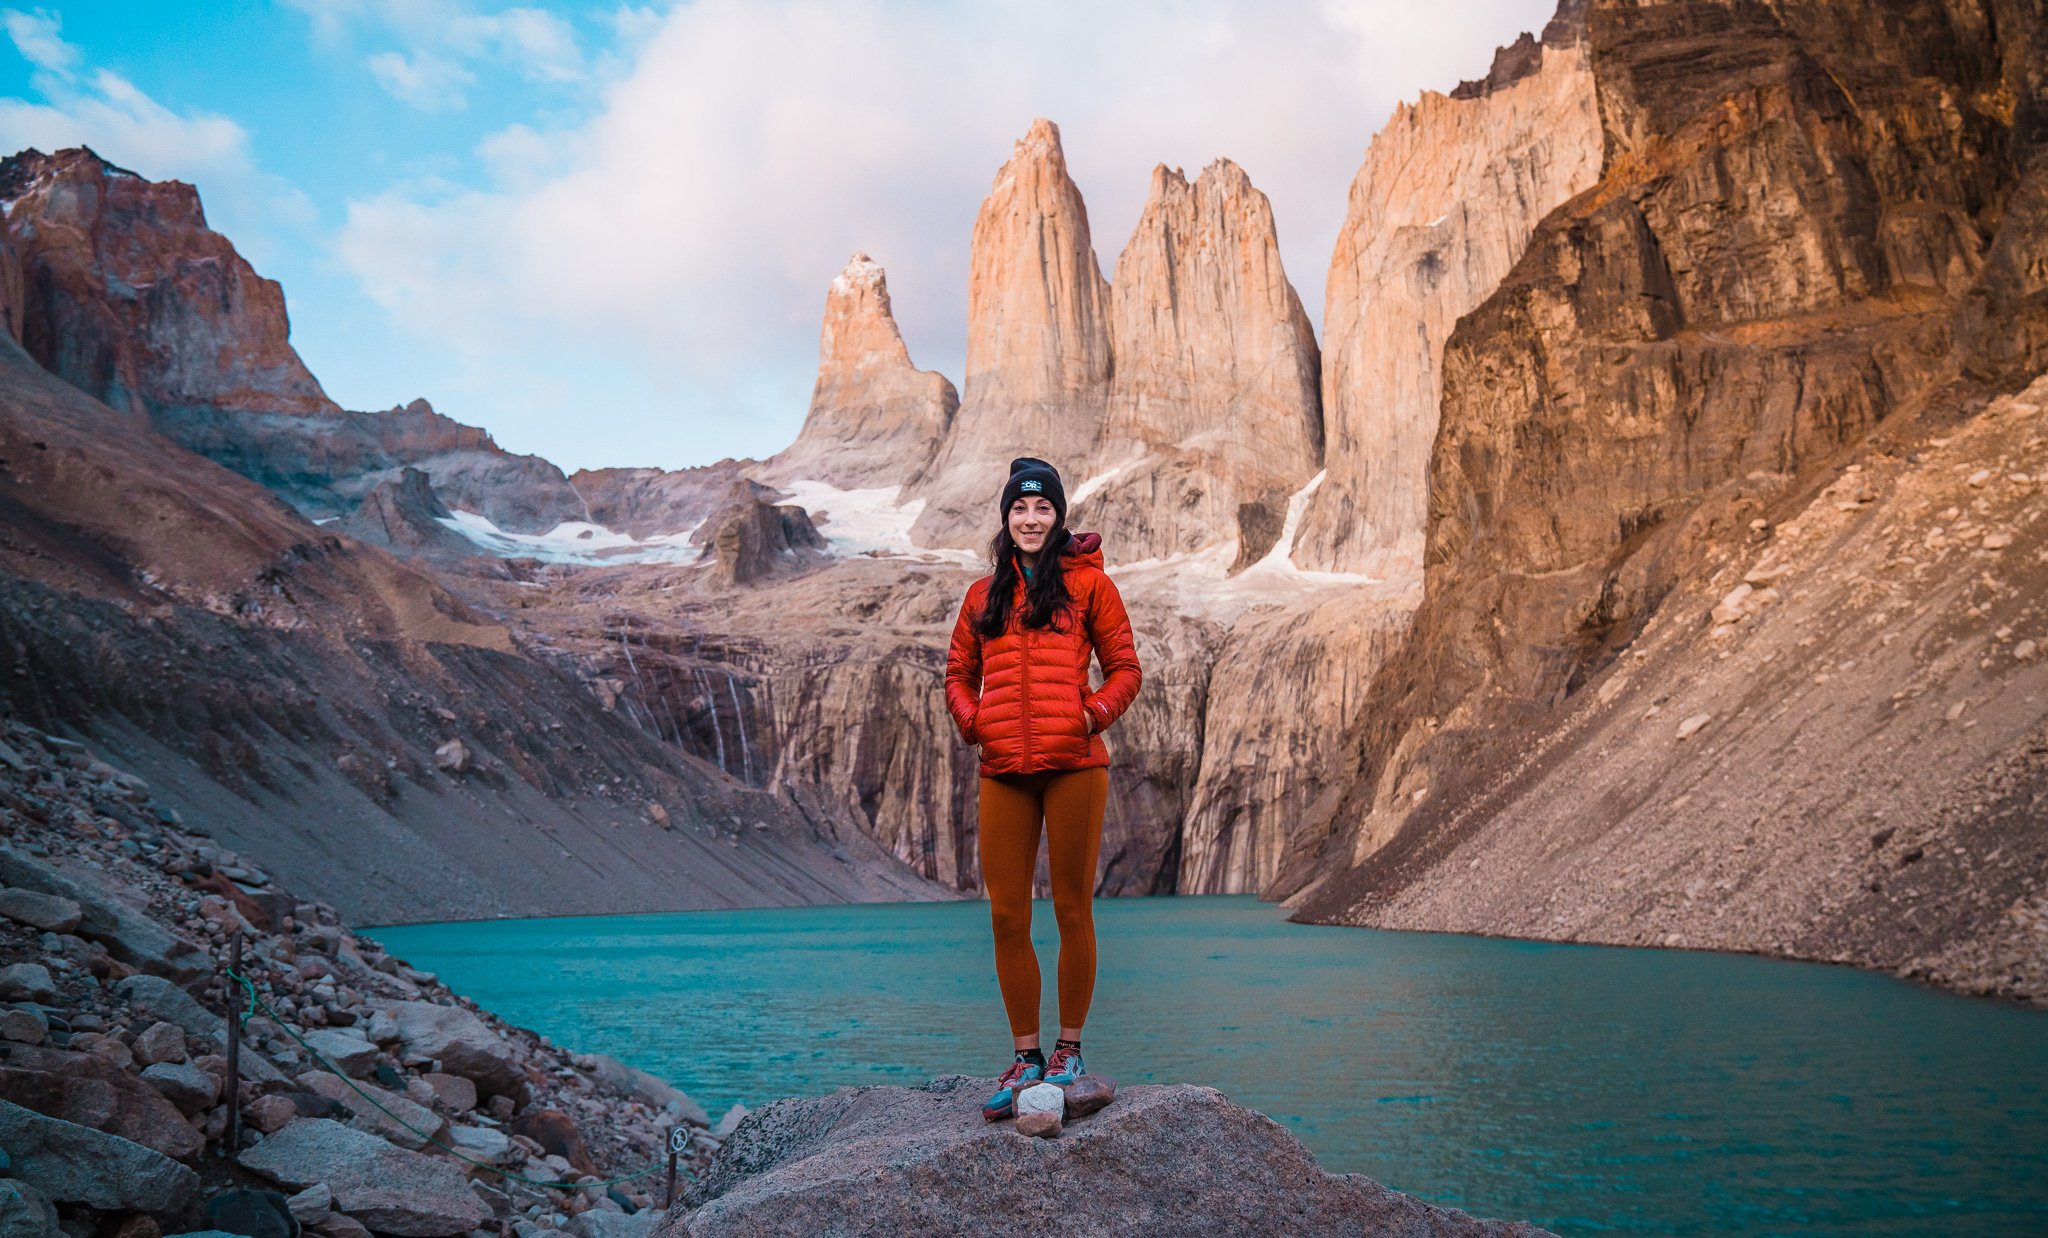
Day 4 - Lago Torres & Chileno to Central
8.62 miles (13.9 km), 2,667 feet (813 m) of gain
We woke up at 4:45am to start hiking at 5am for sunrise at Lago Torres. We timed it perfectly and reached Lago Torres right before sunrise. This was one of the best views of the entire trek and it was so worth the early wakeup. After sunrise, we hiked back down to camp and packed up. From there we hiked down to Central. On our way down, there were hundreds of people hiking up, so I was glad we caught Lago Torres at sunrise with a lot less people. The Central campground is very open and you can camp wherever you want in a large field. We found a shady and secluded spot next to some trees. Though we packed our own food, at this point we realized we were going to purchase more snacks to make it through the back side, so we went to the store at the bus station (a five minute walk from the campground) to purchase some bars, cookies, and sandwiches for lunch. We also decided that we would buy dinner at Refugio Central that night so we could save one of our freeze dried dinners for our long day. The refugio was nice, but the kitchen was slow and we waited over an hour for an undercooked pizza and potato wedges. In retrospect, I would not buy food there, but we felt like treating ourselves.
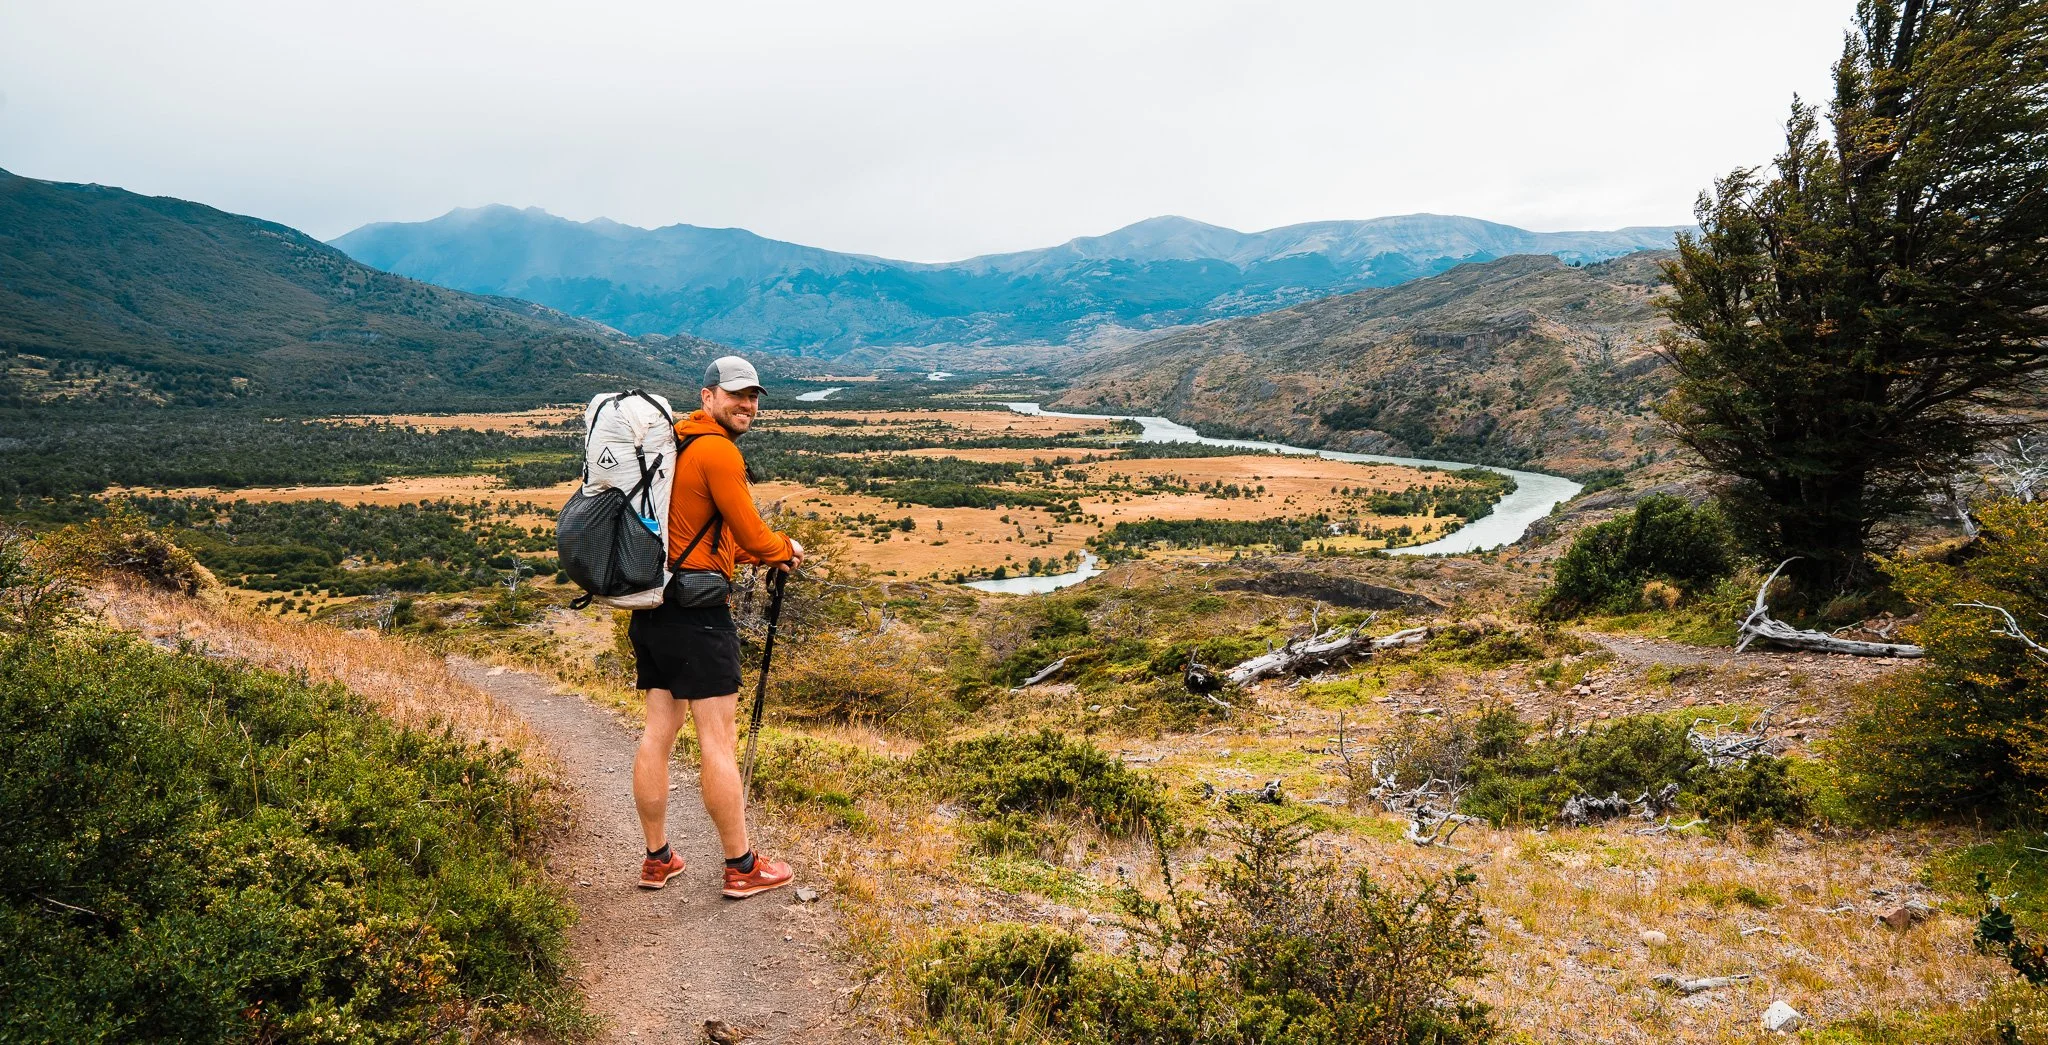
Day 5 - Central to Seron
8.15 miles (13.1 km), 1,105 feet (336 m) of gain
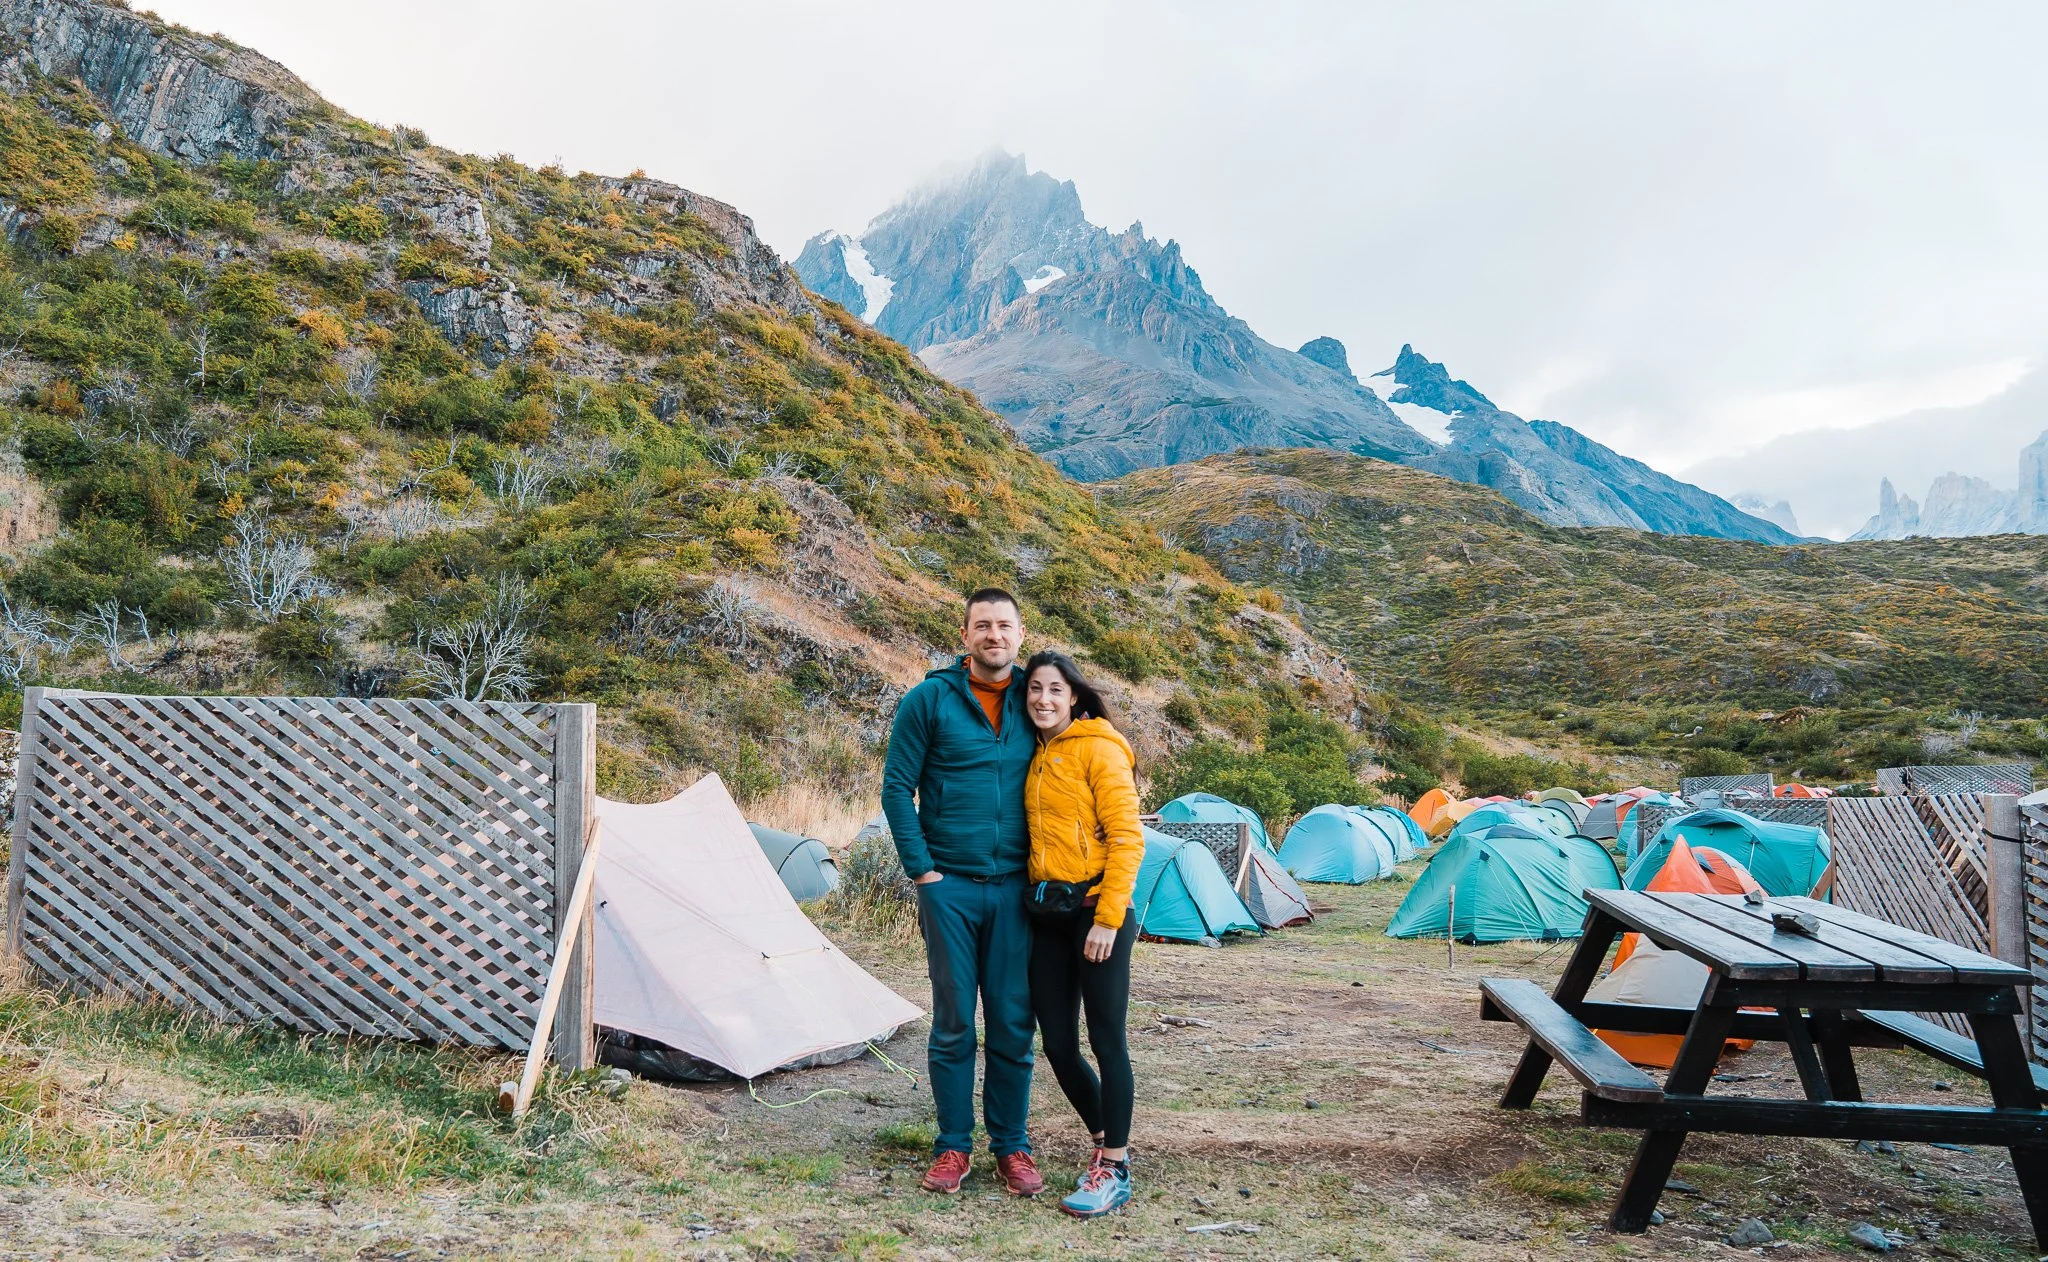
This was probably the easiest day of the trek since it was very flat, and this is the first part of the “back side” of the O, after finishing the W at Central. We hiked on an old road for several miles, before dropping down into the river valley and hiking next to Rio Paine. This was the first and really only day that it rained hard enough while hiking for us to put on our rain jackets. We arrived at Refugio Seron a little wet, but the sun and wind quickly dried us out while we set up camp in a field near the refugio. There was only one toilet for each gender, so be ready to wait in line to use the bathroom. I did not shower here so can’t speak to what the showers were like, but they only had two in total. This was the only camp that had any mosquitos, and though they were not bad (only a few flying around), I still put on DEET just in case. The cooking tent here was too small for the number of people, so we cooked quickly and then ate in our tent.
Day 6 - Seron to Los Perros (our longest day)
20 miles (32 km), 3,541 feet (1,079 m) of gain
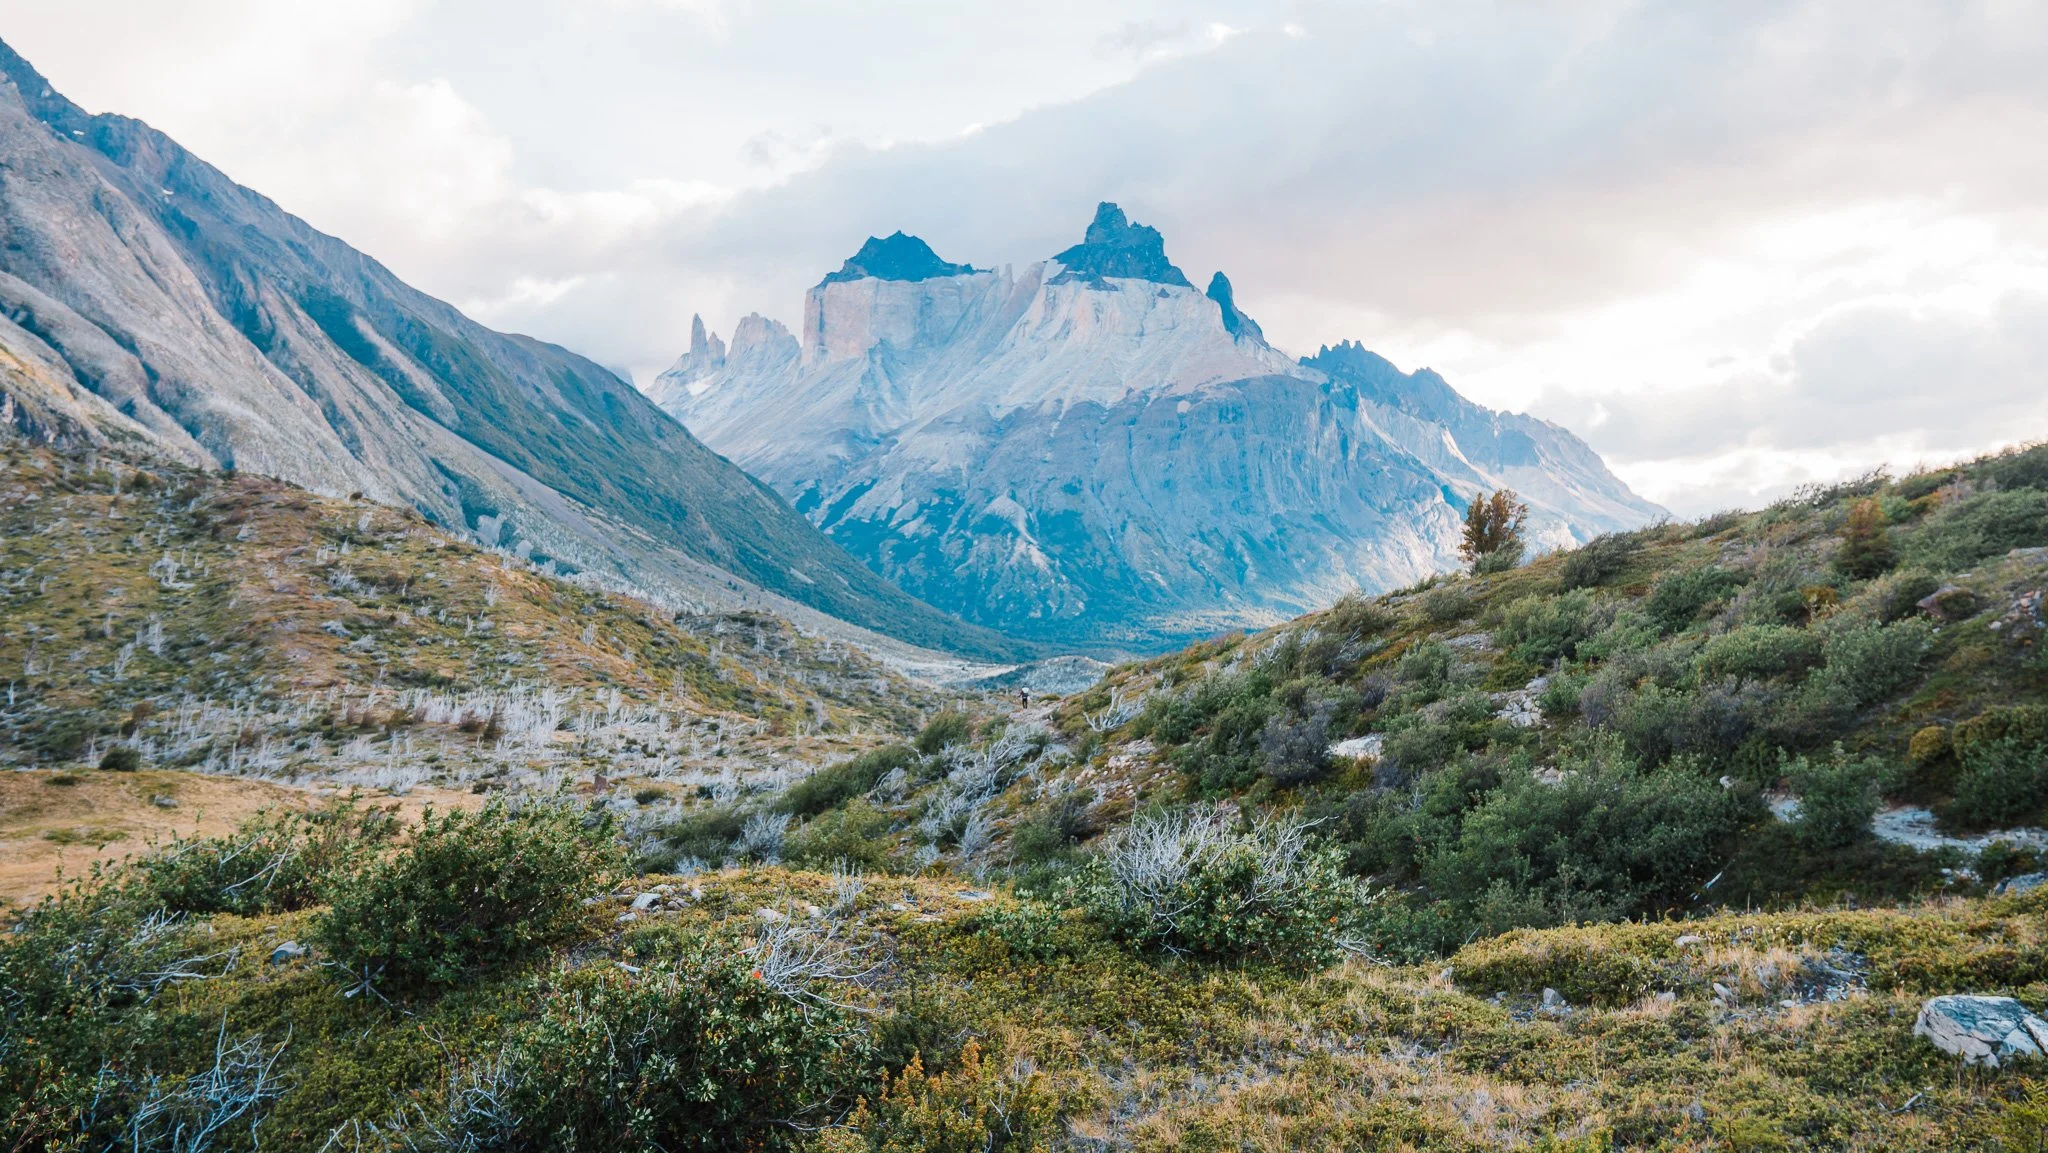
We started hiking early from Seron since we knew we had a long day ahead of us. The beginning of the day was pretty easy with a couple of miles of flat and then a very small pass. The top of the pass was stunning, overlooking the back side and mountains we had not yet seen. From there we hiked down, dropping in elevation into the next valley. We stopped for lunch at Refugio Dickson which looked really nice, had a well stocked store, and was beautiful sitting on the edge of a blue lake. We would have camped here if we had been able to get a reservation, but when we booked, the campground was full, hence why we hiked all the way to Los Perros. After lunch, we gained more elevation and hiked through a forest until finally breaking out into the high alpine. We passed a stunning Laguna Los Perros with peaks and glaciers above it, before reaching Los Perros. This campground is the most remote of all and does not have a refugio, so everyone camps. They do still have a store, bathrooms, and cold showers. We were exhausted by the time we made it to camp after a full day of hiking, so we made dinner and got into our tent.

Day 7 - Los Perros to Refugio Grey
9.13 miles (14.7 km), 3,508 feet (1,069 m) of gain
Los Perros also makes you start hiking way earlier than all the other camps. They required us to be on the trail heading towards John Gardner Pass by 7am. We started hiking early and made it to the top of the pass in less than an hour and a half. If you are in good hiking shape, it doesn’t feel very hard at all. It was snowing in the pass though, and with the wind, the snow pelted our faces and we hiked in down jackets. When we reached the top of the pass, it was our first time seeing the Southern Patagonia Icefield below and the scale of the glacier took my breath away. Though the way up the pass didn’t feel too hard, the way down was more draining since it was extremely steep. After breaking out of the woods, the view is beautiful as you traverse the Grey Glacier and Lago Grey. We passed over three suspension bridges and then made it to Refugio Grey. This was the only refugio we actually stayed in because we could not get camping at Grey. It was by far the nicest refugio of all so we were glad to be inside. We shared a bunk room with two other couples, all of whom were awesome. The bathrooms and showers were wonderful here, as was the food. We opted to purchase an amazing pizza for dinner to celebrate the hard parts of the trek being over, and it was worth the splurge.
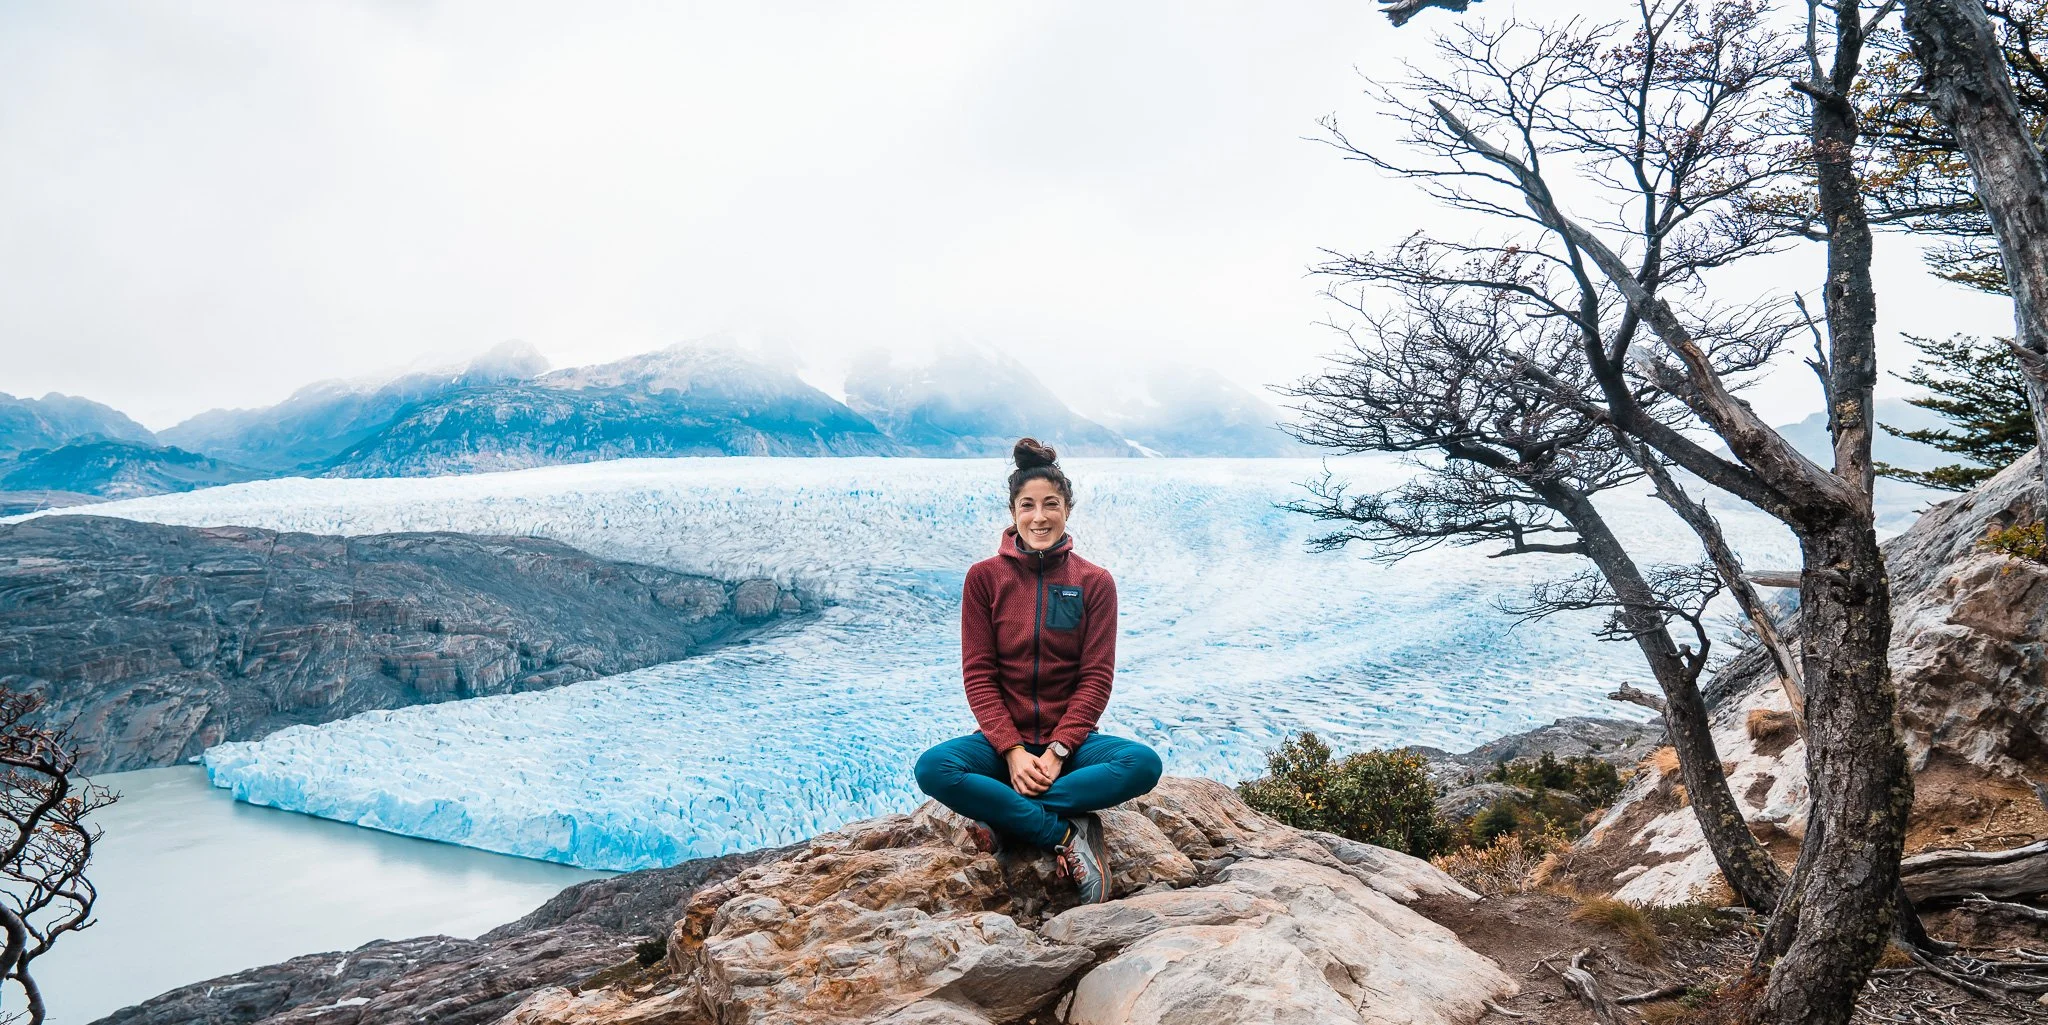
Day 8 - Refugio Grey to Paine Grande
6.7 miles (10.7 km), 1,317 feet (401 m) of gain
We started the morning with a hike out to a view point, Mirador Grey, where you could see Lago Grey and the Grey Glacier, along with some icebergs floating in the lake. This was well worth the short hike up, and I would have done it for sunset the night before if it hadn’t been foggy and rainy. Then we hiked on a beautiful trail up to a traverse overlooking the lake before dropping down to Paine Grande. When we booked the trek, the website we used would not let us exit the park that day, which we would have had time to do, so instead we camped one more night at the campsite we started from. Another windy night being blasted with sand, and then we woke up early to catch the first catamaran back across the lake to Pudeto.
Travel Day - Paine Grande to Puerto Natales
No hiking, just taking the catamaran back across the lake to then catch our bus back to Puerto Natales. When we got across the lake, we hiked out to view the waterfall, before catching our bus back to Puerto Natales.

The W Trek in Patagonia: A 4–5 Day Alternative to the O Circuit
If you don’t have the time for the full O Circuit, the W Trek is a fantastic alternative. Completed in 4–5 days, the W Trek takes you through some of the most iconic landscapes of Torres del Paine, including the Base of the Towers, French Valley, and Grey Glacier.
While shorter than the O Circuit, the W Trek still delivers dramatic mountain views, glacier scenery, and pristine Patagonian lakes. Many hikers use it as a stepping stone to the O Circuit, getting a feel for the trails, campsites, and weather conditions before committing to the longer trek.
Tips for planning your trek:
Reserve campsites or refugios well in advance, especially in peak season.
Pack for rapidly changing weather — even on a shorter trek, rain, wind, and sun are all possible in one day.
Consider starting with the W Trek if it’s your first time in Patagonia. It’s a manageable introduction to the region’s stunning landscapes.
W Trek vs O Circuit: Which Torres del Paine Hike is Right for You?
If you’re planning a Patagonia adventure, choosing between the W Trek and the O Circuit comes down to time, experience, and stamina:
| Feature | W Trek | O Circuit |
|---|---|---|
| Duration | 4–5 days | 8–10 days |
| Distance | ~70 km / 43 miles | ~120 km / 75 miles |
| Difficulty | Moderate | Challenging |
| Highlights | Base of the Towers, French Valley, Grey Glacier | W Trek highlights + John Gardner Pass, remote backcountry scenery |
| Camping / Refugios | Easier to book, more popular | More remote, requires careful planning |
| Ideal for | Short trips, first-time hikers, less experienced trekkers | Experienced hikers, longer vacations, those seeking solitude |
Quick Takeaways:
Choose the W Trek if you have limited time, want a manageable hike, or want a preview of Patagonia’s iconic landscapes.
Opt for the O Circuit if you have a full week or more, enjoy longer backcountry treks, and want to see more remote corners of Torres del Paine.
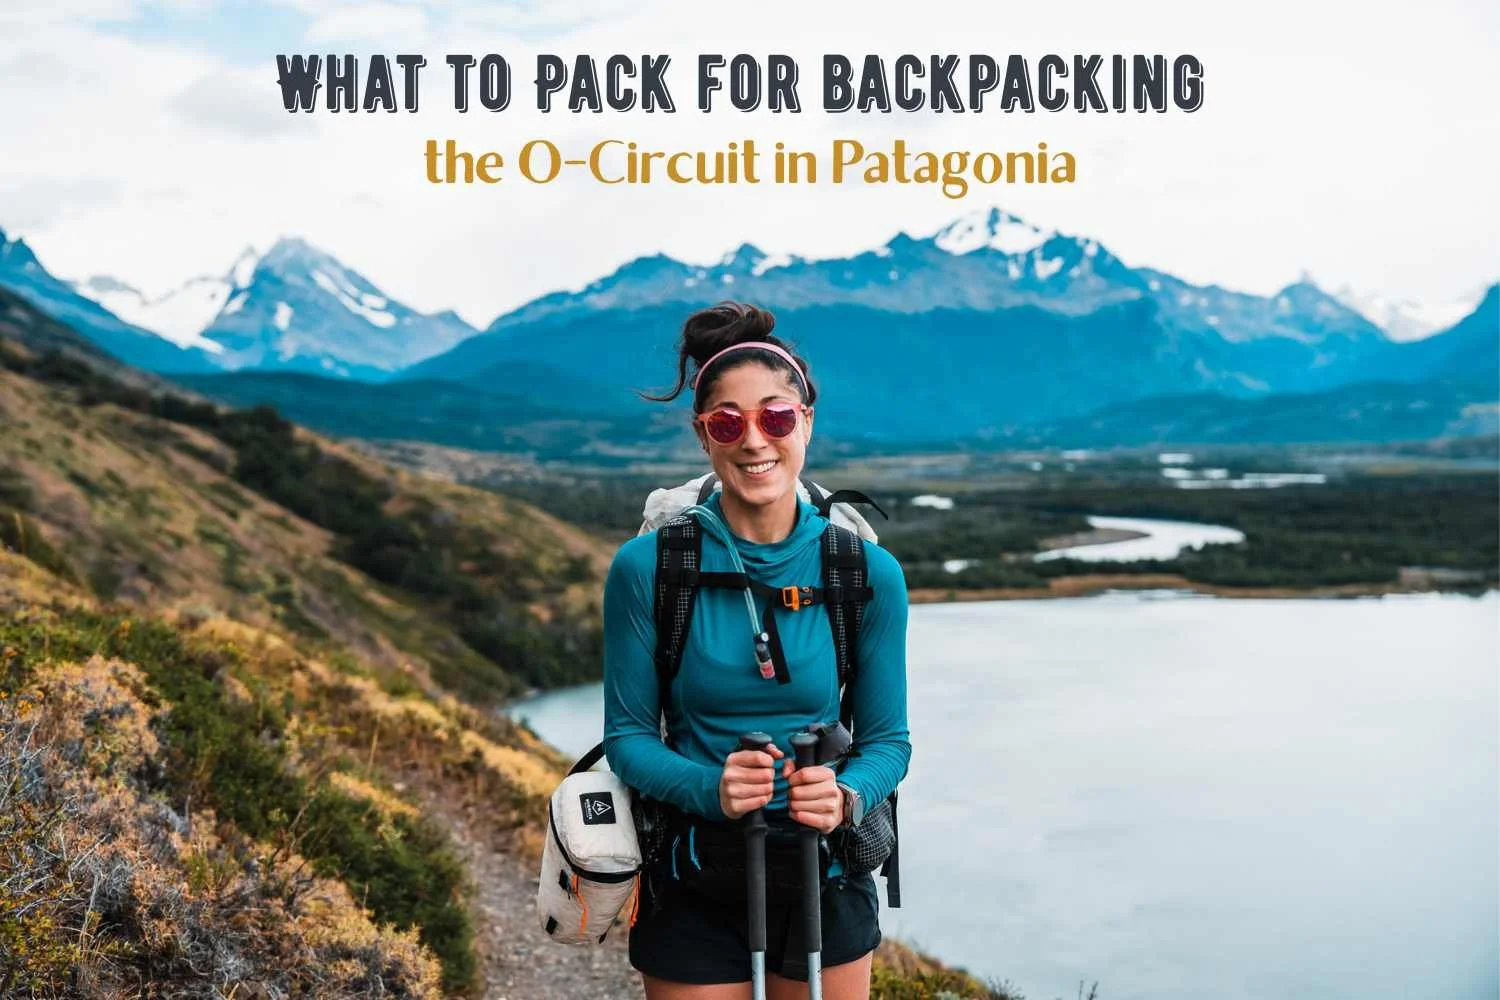
What to Pack for Backpacking the O-Circuit
I wrote a separate blog post all about packing, you can view it here. This is based on our eight-day itinerary and includes all of the clothes and camping gear we packed.
For our backpacking setup, we both used the Hyperlite Mountain Gear Southwest 55L. They were perfect for the 8 day trip! And if you’re looking for clothing suggestions, check out my full guide on What to Wear for Hiking and Backpacking.
Cooking & Food
Cooking is only allowed at designated areas throughout the trek. Each campsite will tell you where you can cook, it was always in either a shelter or cooking tent, and you were required to do any and all cooking there. They did not seem to care where you ate your food, but any stoves had to be used in cook shelters. There are also no fires allowed in the park, so make sure you bring a backpacking stove to cook with. We only cooked breakfast and dinner since we could not use a stove anywhere along the trail.
We packed freeze dried meals that we brought over from the US in our checked bag, and ate those for dinners. For breakfasts, we easily found instant oatmeal in Puerto Natales at the Unimarc grocery store and added membrillo (a solid block of jam) to make it flavorful. We also packed in bars, Clif Shot Bloks, and vegan jerky from the US, and then supplemented our snacks with cookies and a few protein bars we purchased in the park. For lunches we alternated between tortillas and bread with peanut butter (found in the Carnes Natales Express Market in Puerto Natales) and hard cheese and salami. We are vegetarian but tend to flex on long backpacking trips and bring salami when needed, that was the only meat we ate on this trek.
The refugios did offer all meals for purchase, but they needed to be purchased in advance when you made your camping or sleeping reservations. We did not opt into this option and went self supported for all meals. Every refugio did have a small store with cookies, chips, and sodas for purchase, along with many of them having the option to buy pizza when the kitchen was not serving the main meals.
Every campsite and refugio has a potable water spigot and/or sinks, so you don’t need to filter or boil water at any of the camps. Every blog we read about Patagonia talked about how clean all of the water was even in streams, but we were still hesitant and so brought a SteriPen with us. We only used it one time when filling up at a stream, other than that we were able to always get water from camps and refugios. So in reality, the SteriPen or a filter was not needed.
Camping vs. Refugios
There are multiple ways to do both the W and the O in terms of sleeping arrangements and food. We love long and hard backpacking trips, so we opted to do the trek fully self supported, carrying our own tent and sleep systems and all of our own food. Though this was the perfect option for us, and the most affordable, there are other options if you want a little more luxury or need to carry less weight on your trek.
Fully Self Supported - Backpacking
This is the most affordable option since you are only having to pay for your camping fees (between $10 and $20 USD per person, per night) and your park entrance fee ($98 USD per person). You pack and carry your own tent, sleep system, cookware, and food. If you are used to backpacking in the US or Canada, I highly recommend this option. We still had light packs, and it was nice to be able to plan out our own food.
Partially Supported - Rent Tents and/or Purchase Meals
If you want to stay in tents but either don’t own your own, or don’t want to carry the weight, you can rent tents at every campground. The rental tents looked sturdy in the wind and were for two people. Since we did not opt to rent, I am not sure what they looked like inside, but you do also have the option to rent sleeping pads as well. If you are not an avid backpacker or are worried about the mileage, this could be a good option, personally I just don’t like the idea of sleeping in a tent other people have slept in before. You also have the option when you book your reservations to purchase fully cooked meals at each refugio. You can opt in to meals even if you are camping, but they do need to be purchased in advance with your housing reservations.
Fully Supported - Staying in Refugios
This is the most expensive option, but many people do opt to sleep in all the refugios and have all of their meals served as well. For singles or friends, this can be a great option to stay in bunks, but for couples it can be better to camp so you can be next to each other. All of the refugios had bunks and usually there were between 4 and 6 people per room. I will say, if weather is bad, it would be nice to have a warm, dry bed to go to after a long day.
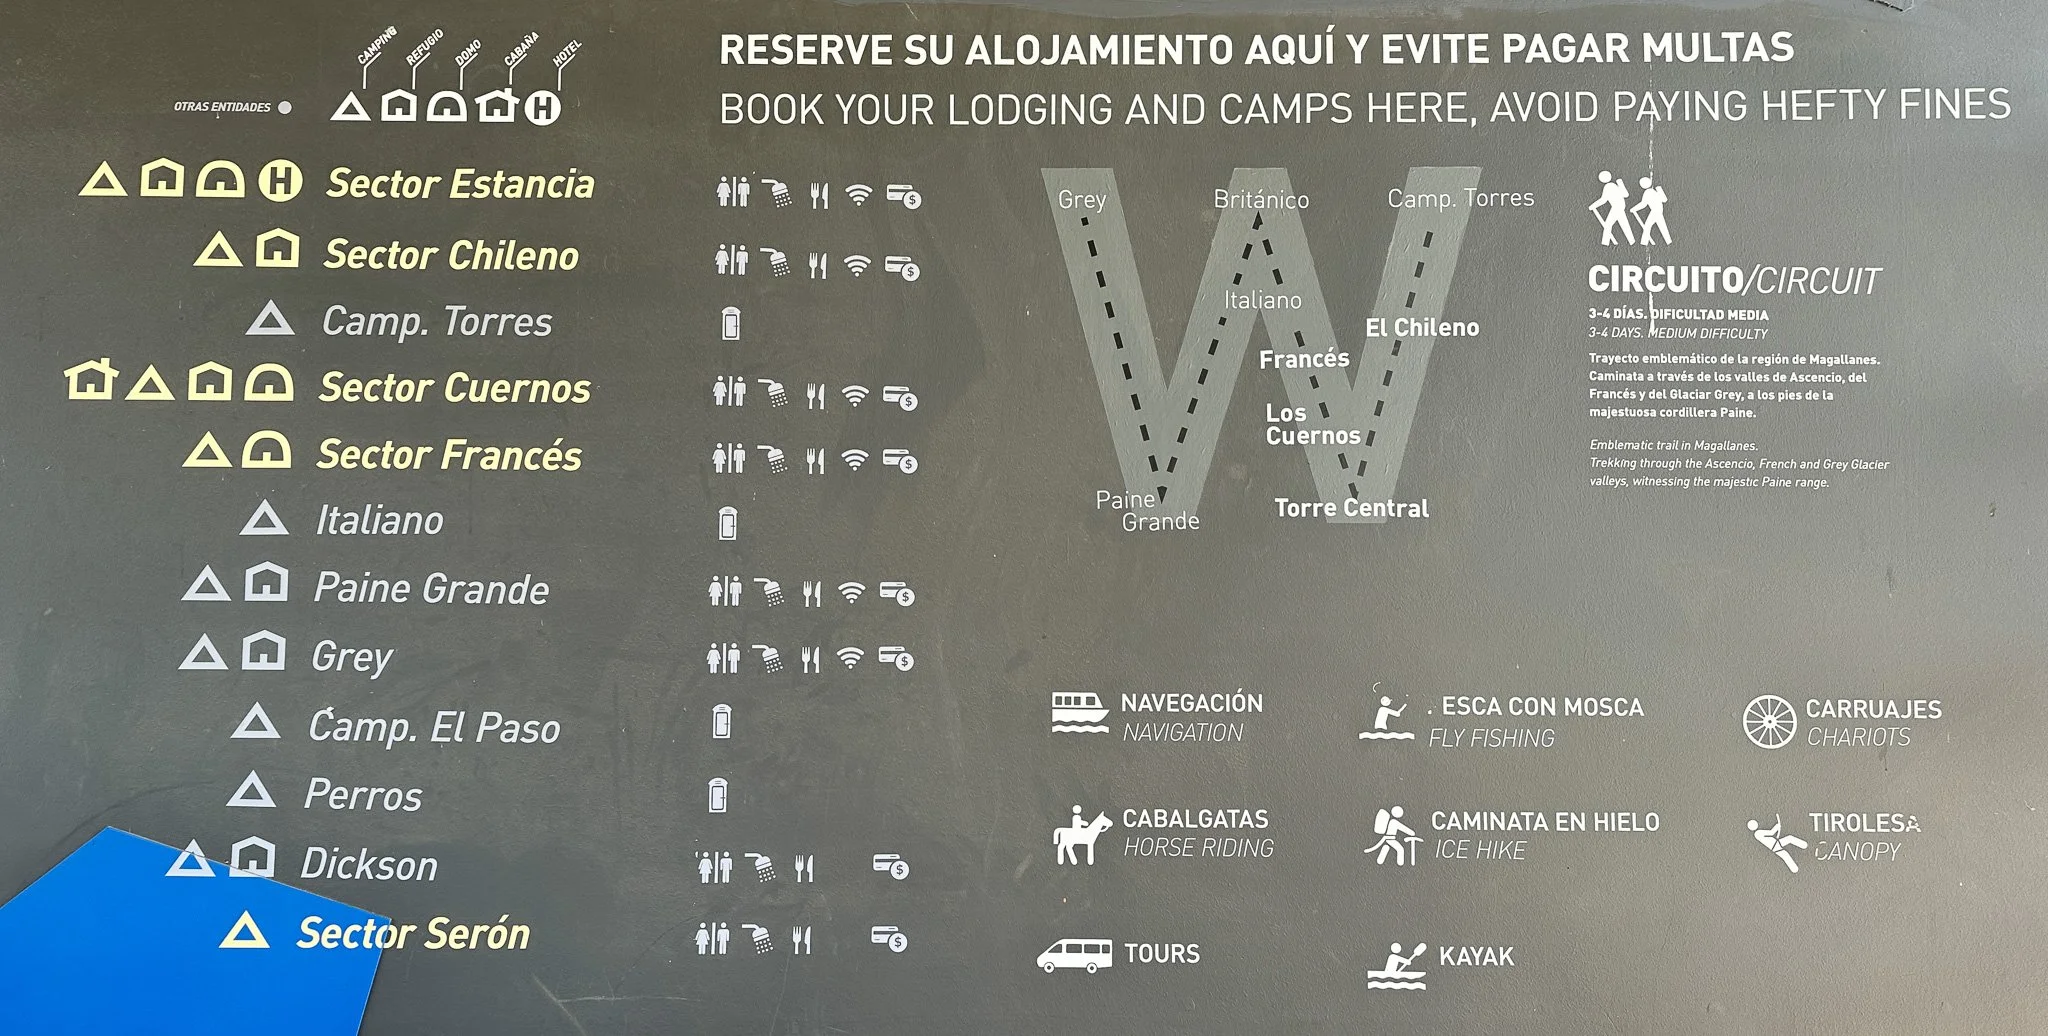
Below is a photo of a sign that shows amenities at each campground. Even though it highlights the W, it does list all campsites on the O.
Where to Stay Before & After Trekking in Torres del Paine, Patagonia
We flew into Puerto Natales, Chile before starting our trek. This is the closest airport to the park and the town is a great starting point to get any food and gear you did not bring along. Gas canisters for our Jetboil stove were easy to find at any of the many outdoor stores, and we did all of our grocery shopping at the Unimarc and Express Market. Most hostels and outdoor stores also rent equipment including trekking poles, backpacks, tents, sleeping bags, etc. though I highly recommend bringing all your own gear along so you have lightweight items that you already know how to use. We felt very light and streamlined with our Hyperlite Mountain Gear and equipment from home compared to the rental equipment available in-town.
We stayed at the Yaganhouse Hostel and absolutely loved it! The location was walkable to everything in town and even to the bus station. We spent three nights there before starting the trek. It was clean, cute, and quiet. We opted for a private room with ensuite bathroom since it was my first hostel experience and I’m glad we had our own space. Their breakfast was also one of the best we had on our entire South American adventure, and I would definitely stay here again. I highly recommend booking a couple nights before your trek to explore Puerto Natales and get anything you may need, and then also book your night after the trek in advance so you know where you are staying when you return. We booked all of our hostel accommodations through Hostelworld.
Storing Extra Gear/Luggage
If you are doing more than just Torres del Paine in your time in Patagonia, chances are you will have more gear or luggage than you want to backpack with. We checked a duffle bag when we flew in that included our trekking poles (you cannot carry them on a flight), and all of our freeze dried meals and snacks. This duffle then came in handy to leave with our additional gear at a hostel. Since we were spending a month and a half in South America, we had a little more clothes and an iPad that we left in the duffle. I bought an Apple airtag to keep in the duffle in case it ever got lost, and then we left it at a hostel while we were trekking. Most hostels either have lockers you can use, or a place where they hold luggage. Some are free if you are staying there when you return, and others charge a small fee to hold your gear (something like $4-7 USD for a few days).
Additional Resources for Planning Your Trip
Book your entire trek with Booking Patagonia (how we booked)
Booking camping and refugios through Las Torres - Chileno, Frances, Los Cuernos, Seron, Los Torres
Booking camping and refugios through Vertice - Dickson, Los Perros, Glacier Grey, Paine Grande
Book camping and refugios through CONAF (the national park) - Paso, Italiano (as of 2024 these sites are closed)
FAQ – Hiking the O Circuit in Torres del Paine
How long does it take to hike the O Circuit in Torres del Paine?
Most hikers complete the O Circuit in 7 to 9 days, depending on weather and fitness level. The official route covers around 75 miles (120 km), circling the entire Torres del Paine massif. Allow extra time in case of trail closures due to wind or rain — flexibility is key in Patagonia!
Do I need to book campsites in advance for the O Circuit?
Yes. Campsite reservations are required for every night of your trek. Spaces fill up months in advance, especially for January and February, so book early through the park’s three official operators: Vertice Patagonia, Las Torres, and CONAF.
What is the best time of year to hike the O Circuit?
The O Circuit is open from November through March, which is Patagonia’s summer season. The most stable weather tends to be in January and February, though strong winds are possible year-round. If you want fewer crowds, consider late November or early March.
Do I need a guide to hike the O Circuit?
No, the O Circuit can be done independently as long as you have all campsite bookings and proper gear. However, guided treks are available for those who prefer a more supported experience, which can simplify logistics.
What’s the difference between the O Circuit and the W Trek?
The W Trek covers only the southern portion of Torres del Paine and takes 4–5 days. The O Circuit is the full loop — longer, more remote, and includes the park’s wild northern section. It’s ideal for experienced backpackers seeking solitude and adventure.
Is the O Circuit difficult?
The trek is rated moderate to challenging, mainly due to its length and Patagonia’s unpredictable weather. Expect long hiking days, river crossings, and a steep climb over John Gardner Pass, the most demanding part of the trail.
What should I pack for the O Circuit?
You’ll need waterproof gear, warm layers, and a sturdy tent that can handle strong winds. Many trekkers use ultralight backpacking setups to reduce weight. Food and fuel must be carried between campsites. There are limited resupply points.
Can I hike the O Circuit in the opposite direction?
No, the O Circuit must be hiked counterclockwise, as required by park regulations. This helps manage trail traffic and protect fragile sections of the route.
Final Thoughts on Backpacking the O Circuit Torres del Paine
Backpacking the O Circuit or the shorter W Trek in Torres del Paine National Park, Patagonia is a once-in-a-lifetime adventure. Both treks showcase some of the world’s most dramatic landscapes, towering peaks, pristine glaciers, turquoise lakes, and endless hiking trails.
For those with limited time, the W Trek offers an incredible 4–5 day experience that highlights Patagonia’s most iconic spots. If you’re ready for a more immersive challenge, the O Circuit provides 8–10 days of backcountry exploration, including remote sections and spectacular passes like the John Gardner.
No matter which trek you choose, proper planning is key: reserve campsites or refugios in advance, prepare for rapidly changing weather, and bring the right gear to make your Patagonia hiking adventure safe and enjoyable.
Whether you’re a first-time hiker or an experienced trekker, both the W Trek and O Circuit deliver unforgettable experiences that truly capture the magic of Torres del Paine. Use this guide as a reference to plan your backpacking trip in Patagonia, and get ready for breathtaking scenery and adventures that will stay with you forever.
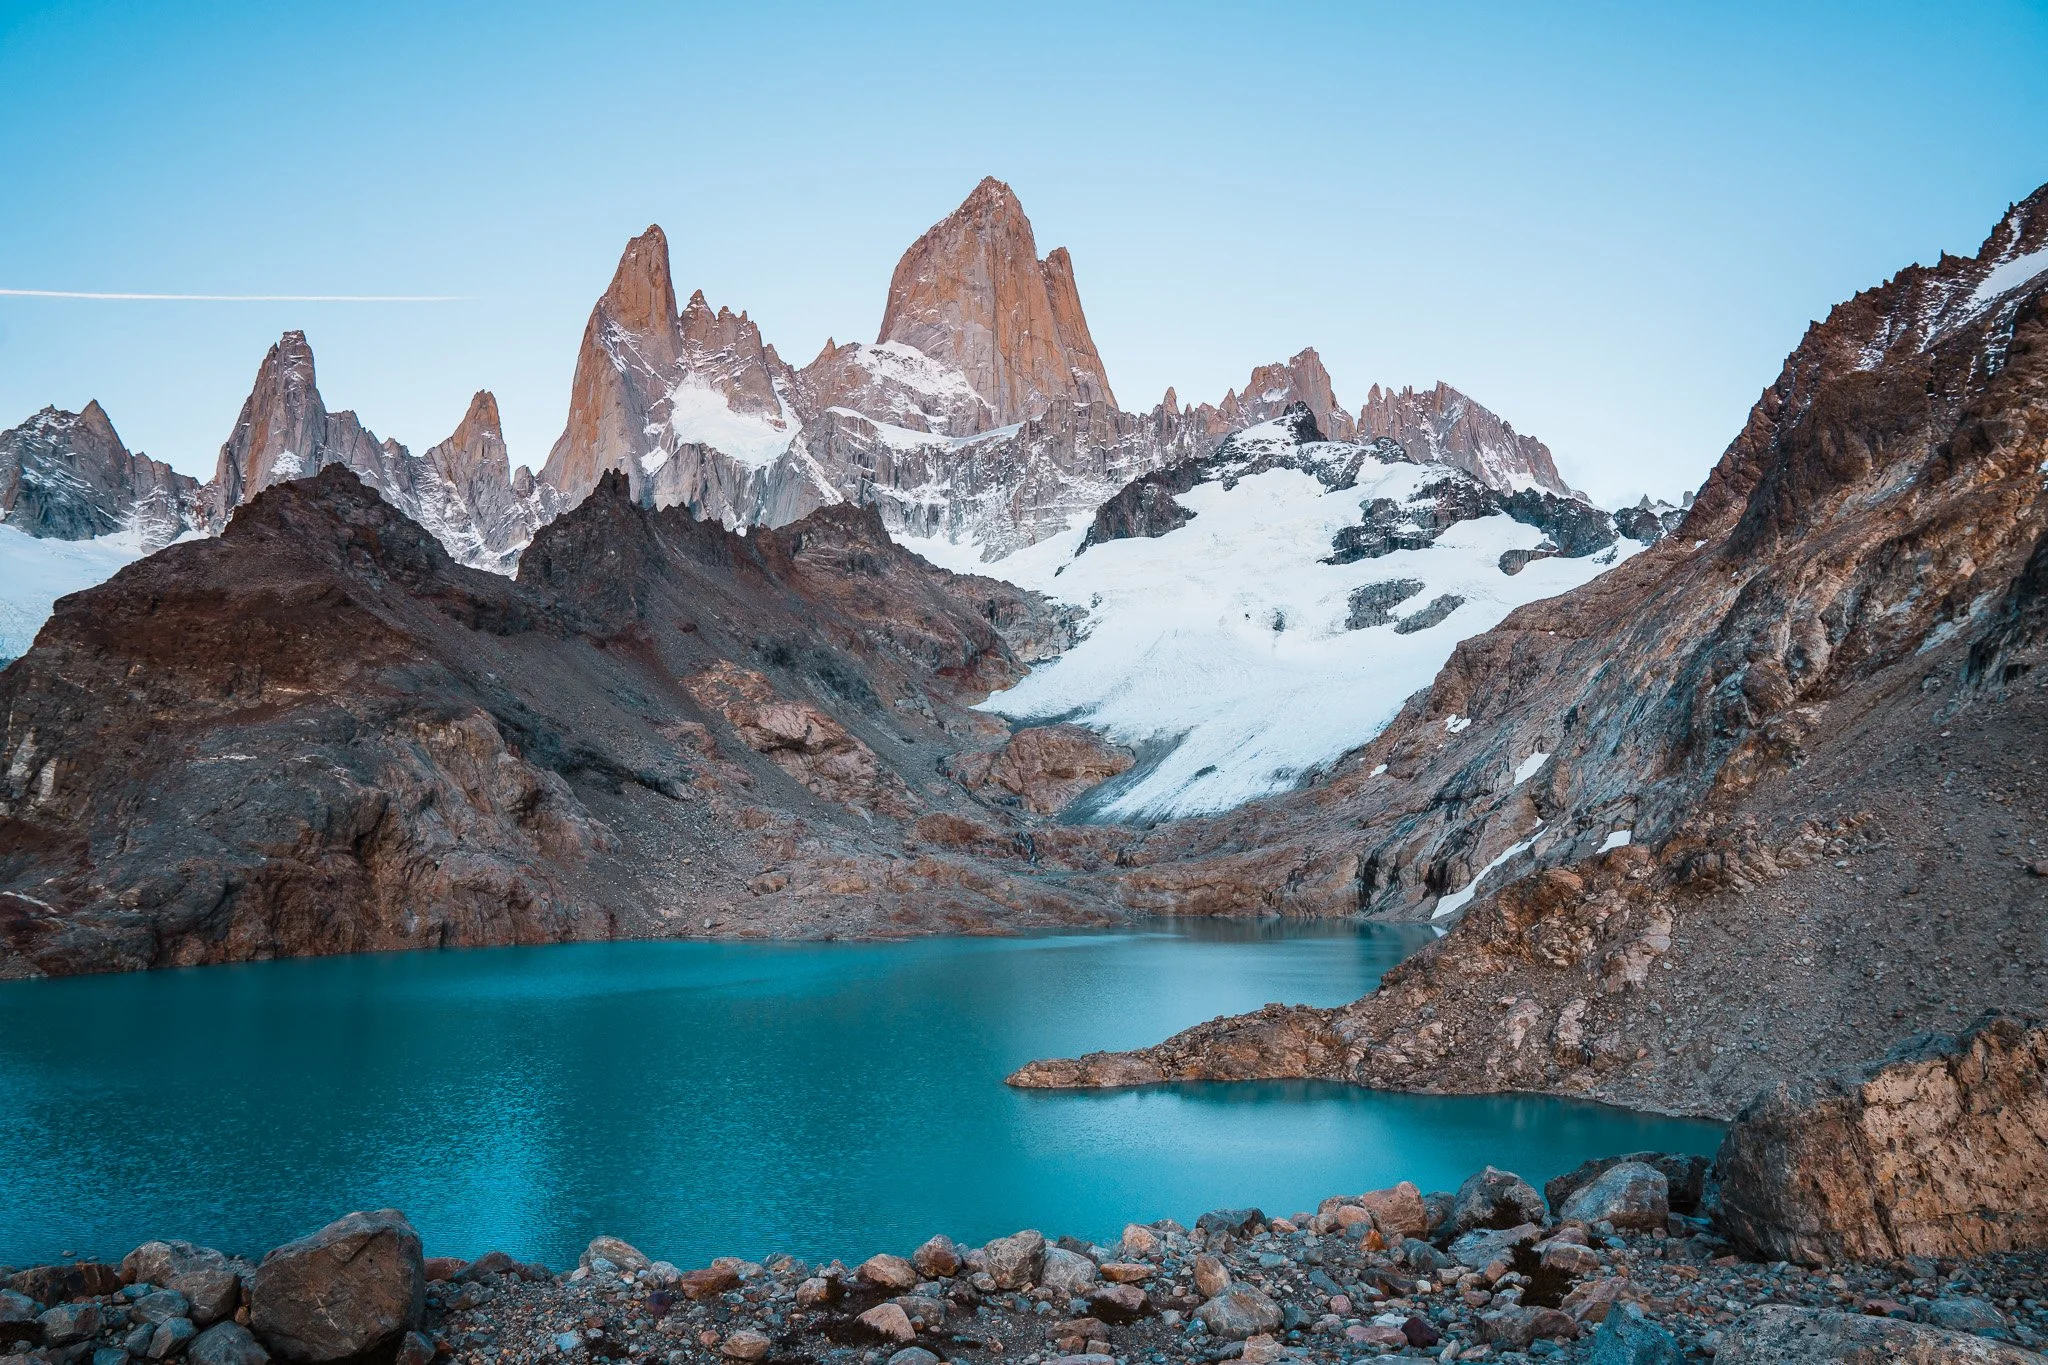
Looking for More Patagonia Backpacking and Hiking Ideas?
If you’re looking to extend your Patagonia adventure beyond Chile, El Chaltén in Argentinian Patagonia is a must-visit destination for hikers and backpackers. Known as Argentina’s trekking capital, it offers stunning trails to Fitz Roy, Cerro Torre, and Laguna Capri, with options ranging from half-day hikes to multi-day backcountry adventures. For a complete guide on planning your trip, gear tips, and the best trails in El Chaltén, check out my full guide on the area.
Gear Discount Codes and Links
I’ve partnered with a few of my favorite outdoor brands to hook you up with exclusive discounts on trail-tested gear. These are companies I actually use and love, and when you shop through the links below, you’ll get a deal and help support my blog. Win-win!
20% off SkyGOAT (grid fleece) - Click the link and add code SKYEGOAT to your cart at checkout to get 20% off your order.
15% off LUNA Sandals - Click the link and the discount will be added to your cart automatically.
15% off Stio with code SKYE15 - Click the link and enter the code in your cart.
10% off Will and Bear hats with code SKYESTOURY - Click the link and the discount will be added to your cart automatically.
20% off Wild Deodorant with code SKYESTOURY- Must enter the promo code at checkout to receive discount. They make a deodorant mini that is perfect for backpacking, it’s the size of a lip balm.
10% off Loop Earplugs with code SKYE10 - Enter the promo code at checkout. I use their Dream earplugs for sleeping both backpacking and car camping.
More Backpacking Related Posts to Check Out
The Best Ultralight Gear of 2026 - Field tested gear with my reviews
What to Pack for the O-Circuit in Torres del Paine: Essential Gear List for Chilean Patagonia
American Alpine Club Live Your Dream Grant
This image is copyrighted and owned by Skye Stoury Photography and skyestoury.com, if you would like to licence any images on this site, please email us at hello@skyestoury.com