
What to Pack for Backpacking the Enchantments (Complete 2026 Gear Guide)
A Complete Packing List for Backpacking the Enchantments in Washington
Backpacking the Enchantments in Washington State is one of the best trips in the country, and if you just scored a permit, we are genuinely excited for you. We've done this trip into the Core Zone multiple times across summer and fall, and our packing list is dialed. This is the guide we wish we'd had on our first Enchantments trip.
Scoring an Enchantments permit is something most backpackers wait years for. The last thing you want is to finally be standing at the Colchuck Lake trailhead and realize you overpacked, or worse, forgot something critical.
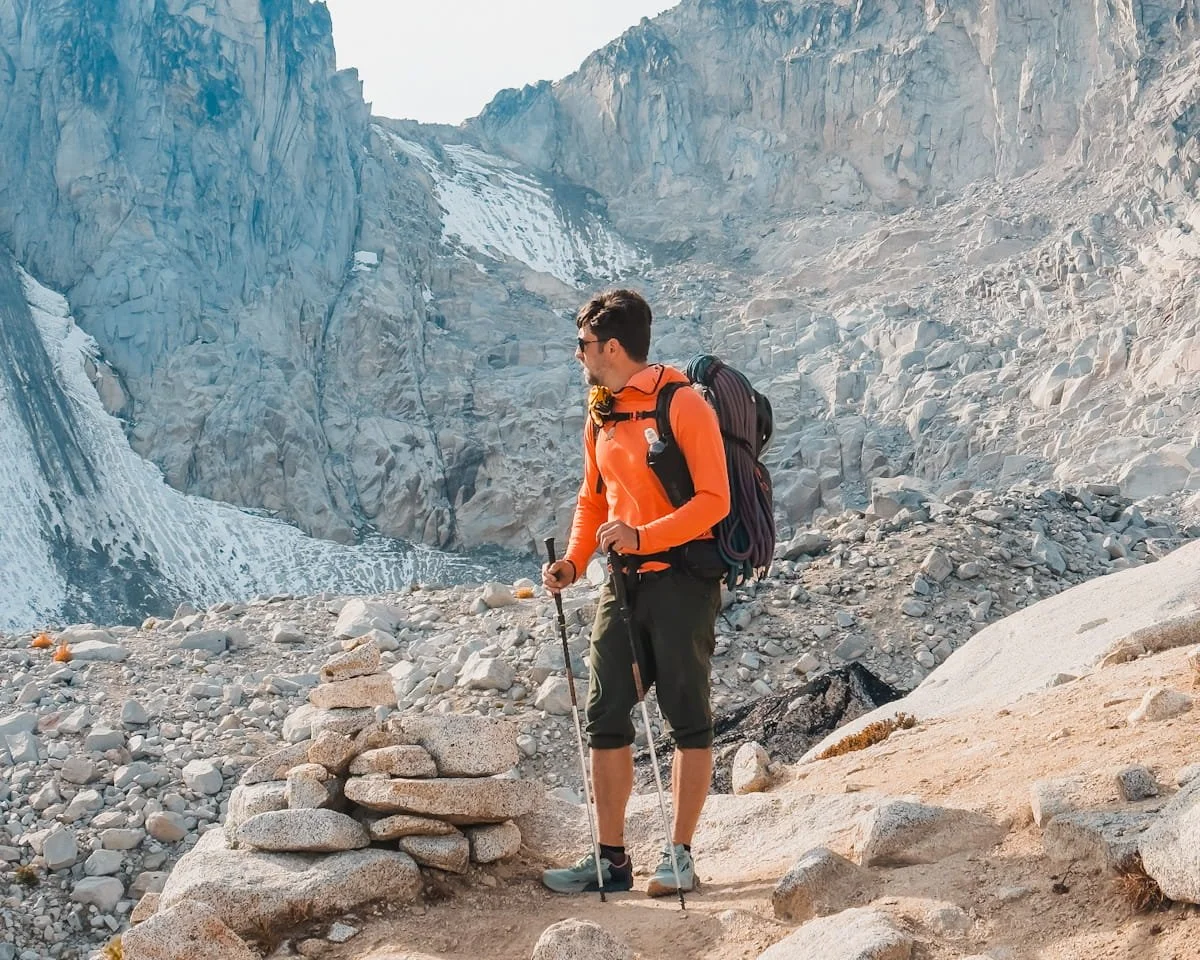
This isn't a typical overnight trip. You're hauling everything up Aasgard Pass, and every extra ounce matters, both for the climb and for how much you enjoy the days after it.
Whether you're packing for your first backpacking trip or refining a system you've used for years, this guide covers everything you need for a 2–4 night trip through the Enchantments, with specific callouts for terrain, the Aasgard Pass climb, and seasonal gear swaps.
→ If you're looking for all the details on backpacking the Enchantments, check out our Enchantments Backpacking Guide, which includes each section of trail, campsites, and everything you need to know for a successful backpacking trip.
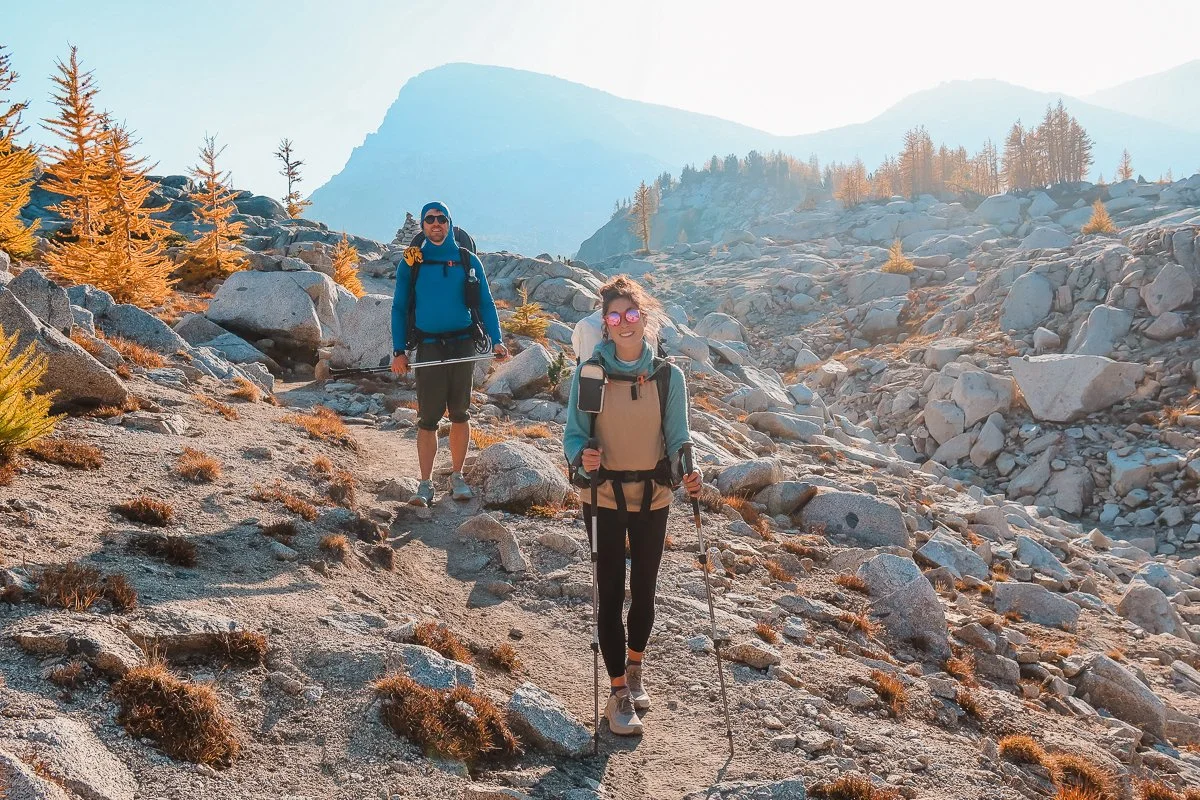
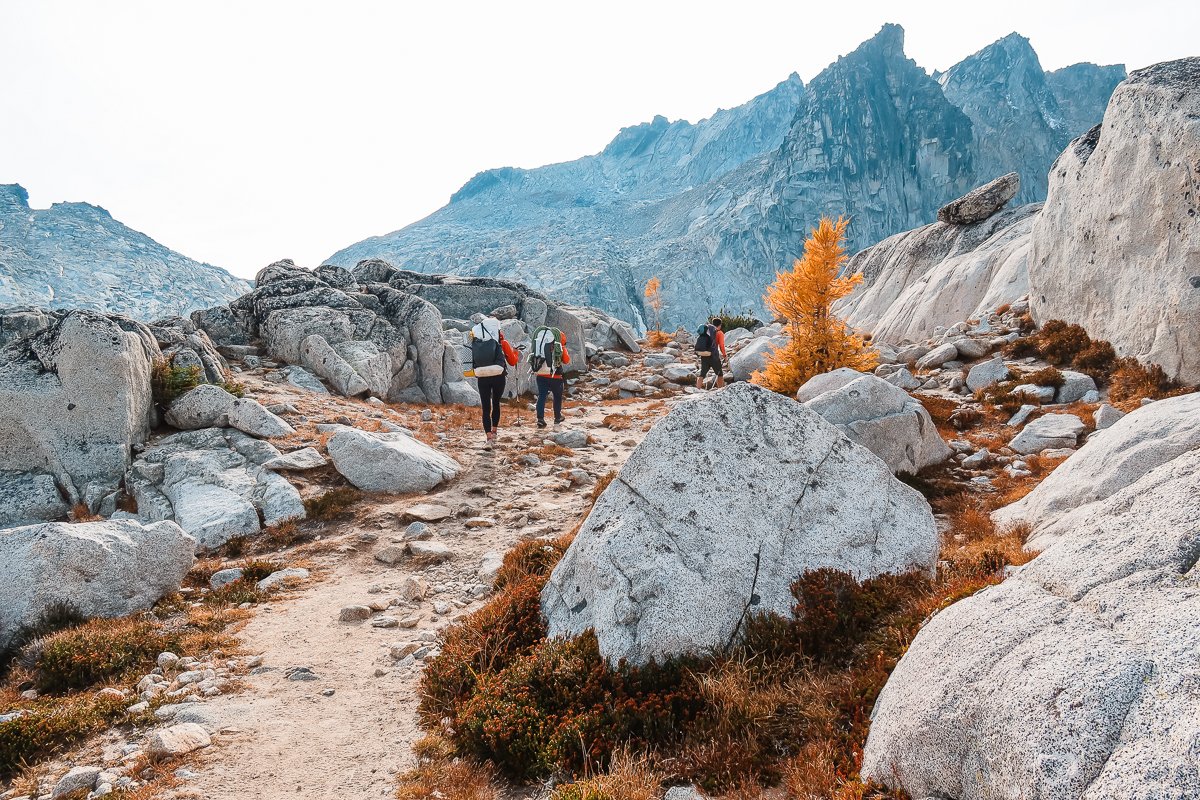
Garrett on the left and Skye on the right, hiking through the Upper Core. Photo credit: Rob Busack
Why Trust This Guide?
We’re Washington locals who have spent more than a decade exploring the Enchantments and backpacking throughout the Cascades. Over the past 12 years, we’ve backpacked through the Core Zone multiple times with overnight permits, completed countless day hikes to Colchuck Lake, climbed alpine peaks in the area like Prusik Peak and Colchuck Peak, and completed the full Enchantments thru hike in a single day during larch season.
This is a specific packing guide dives into what to pack for backpacking the Enchantments from our own personal experience.
Affiliate Disclaimer: This blog post contains affiliate links, meaning we receive a small commission of every purchase made with our links at no additional cost to you. Sometimes there is even a discount code for our readers which we specify next to the links.
Table of Contents
Quick Facts on What’s Inside this Enchantments Packing List
| Category | What to bring | Field Notes |
|---|---|---|
| Backpack | 45–60L, lightweight, waterproof or water-resistant | Be sure to have a pack that properly fits your waist and torso |
| Shelter | Freestanding or trekking pole tent | Most established sites are on sandy surfaces; stake into rock or anchor guylines to nearby rocks |
| Sleep system |
Down quilt or bag + insulated sleeping pad. Sleeping Bag Ratings — Summer 30° Fall 20°– 0° |
Bring extra ground insulation for snow-covered early season sites |
| Hiking layers | Sun hoodie, buff, lightweight fleece mid-layer, hiking pants or shorts | Temps swing widely throughout the day and night. Intense alpine sun during the day |
| Camp layers | Insulated puffy jacket, rain jacket, warm hat & gloves, base layer, camp socks, pillow, earplugs | Mountain weather can change quickly; check forecast and monitor day-of conditions |
| Footwear | Trail runners or lightweight hiking boots (broken in); camp sandals optional | You'll be on maintained trail, boulder fields, and loose scree. Camp sandals let your feet breathe after a long day |
| Blister kit | Injinji toe socks, Leukotape, anti-chafe stick | Apply Leukotape or anti-chafe to hotspots before you start |
| Navigation | Downloaded maps in a navigation app (e.g. GaiaGPS) | Little to no cell service throughout; download your route before you leave |
| Safety essentials | First aid kit, headlamp, power bank, trekking poles, satellite communicator (e.g. Garmin InReach) | Trekking poles are essential on Aasgard and the Snow Lakes descent. Satellite comms are critical — rescue takes a long time |
| Water & filtration | Katadyn BeFree 1L filter, 2–3L carry capacity | Water is abundant throughout; carry extra before the Snow Lakes descent |
| Food & cooking | Bring enough food for 1 extra day; canister stove, 1L pot, lighter | An extra emergency meal adds a small safety margin. Note: campfires prohibited above 5,000 ft in the Alpine Lakes Wilderness |
| Food storage | Ursack or bear canister | No bear boxes in The Enchantments; very few hang trees in the Core. Marmots & chipmunks will chew through an unprotected pack |
| Sun protection | SPF 50+ sunscreen, polarized sunglasses, SPF lip balm | Greater UV intensity in the alpine — reapply often, even on cloudy days |
| Hygiene & LNT | Trowel, toilet paper, waste bags, backcountry bidet or wipes, biodegradable soap, hand sanitizer, deodorant | Dig cat holes 6–8 inches deep, 200 ft from water. Pack everything out |
| Permits & passes | Printed overnight permit + parking pass; NW Forest Pass or America the Beautiful | You need both the overnight permit and a separate trailhead parking pass — don't forget either |
| Early season Late June–July | Ice axe, crampons or microspikes, gaiters, helmet | Aasgard holds steep snow & ice well into midsummer. Know self-arrest before going |
| Larch season Late Sept–Oct | Upgrade to 0–20°F sleep system, warmest puffy, microspikes accessible in pack | Overnight lows in the 20s–30s°F are common; early snow possible anytime |
What to bring
45–60L, lightweight, waterproof or water-resistant
Field Notes
Be sure to have a pack that properly fits your waist and torso
What to bring
Freestanding or trekking pole tent
Field Notes
Most established sites are on sandy surfaces; stake into rock or anchor guylines to nearby rocks
What to bring
Down quilt or bag + insulated sleeping pad.
Sleeping Bag Ratings — Summer 30°
Fall 20°– 0°
Field Notes
Bring extra ground insulation for snow-covered early season sites
What to bring
Sun hoodie, buff, lightweight fleece mid-layer, hiking pants or shorts
Field Notes
Temps swing widely throughout the day and night with intense alpine sun during the day
What to bring
Insulated puffy jacket, rain jacket, warm hat & gloves, base layer, camp socks, pillow, earplugs
Field Notes
Mountain weather can change quickly; check forecast and monitor day-of conditions
What to bring
Trail runners or lightweight hiking boots (broken in); camp sandals optional
Field Notes
You'll be on maintained trail, boulder fields, and loose scree. Camp sandals let your feet breathe after a long day
What to bring
Injinji toe socks, Leukotape, anti-chafe stick
Field Notes
Apply Leukotape or anti-chafe to hotspots before you start
What to bring
Downloaded maps in a navigation app (e.g. GaiaGPS)
Field Notes
Little to no cell service throughout; download your route before you leave
What to bring
First aid kit, headlamp, power bank, trekking poles, satellite communicator (e.g. Garmin InReach)
Field Notes
Trekking poles are essential on Aasgard and the Snow Lakes descent. Satellite comms are critical — rescue takes a long time
What to bring
Katadyn BeFree 1L filter, 2–3L carry capacity
Field Notes
Water is abundant throughout; carry extra before the Snow Lakes descent
What to bring
Bring enough food for 1 extra day; canister stove, 1L pot, lighter
Field Notes
An extra emergency meal adds a small safety margin. Note: campfires prohibited above 5,000 ft in the Alpine Lakes Wilderness
What to bring
Ursack or bear canister
Field Notes
No bear boxes in The Enchantments; very few hang trees in the Core. Marmots & chipmunks will chew through an unprotected pack
What to bring
SPF 50+ sunscreen, polarized sunglasses, SPF lip balm
Field Notes
Greater UV intensity in the alpine — reapply often, even on cloudy days
What to bring
Trowel, toilet paper, waste bags, backcountry bidet or wipes, biodegradable soap, hand sanitizer, deodorant
Field Notes
Dig cat holes 6–8 inches deep, 200 ft from water. Pack everything out
What to bring
Printed overnight permit + parking pass; NW Forest Pass or America the Beautiful
Field Notes
You need both the overnight permit and a separate trailhead parking pass — don't forget either
What to bring
Ice axe, crampons or microspikes, gaiters, helmet
Field Notes
Aasgard holds steep snow & ice well into midsummer. Know self-arrest before going
What to bring
Upgrade to 0–20°F sleep system, warmest puffy, microspikes accessible in pack
Field Notes
Overnight lows in the 20s–30s°F are common; early snow possible anytime

Heading up the lower section of Aasgard Pass. Photo credit: Rob Busack
Why Packing Light Matters in the Enchantments
Packing the right gear matters more in the Enchantments than on most backpacking trips. High alpine conditions, steep terrain, and unpredictable weather all raise the stakes, and Aasgard Pass has a way of making you regret every extra pound before you're halfway up.
We're ultralight backpackers, but we also know not everyone is starting from a fully dialed kit. That's why this guide includes budget-friendly alternatives alongside our personal go-to gear.
When we first backpacked the Enchantments together in 2018, we were carrying more than we needed, and we felt it. Every recommendation here is something we've actually used and tested in Washington and beyond.
What You Wear on Trail Matters as Much as What's in Your Pack
Layering is critical in the Enchantments. Temperatures can swing from blazing afternoon sun to near-freezing overnight, and afternoon thunderstorms in the Cascades are possible even in summer. A solid system of base layers, a fleece or mid-layer, a puffy jacket, and a rain shell covers you across all of it.
For footwear, trail runners or lightweight hiking boots work well for most hikers, though some prefer approach shoes for the boulder scrambling on Aasgard and throughout the Core Enchantments. We also highly recommend trekking poles for stability up Aasgard Pass and on the long descent to Snow Lakes (if you’re doing the full Enchantments traverse).
Below are our gear recommendations for backpacking the Enchantments, all products we personally use and have tested over the years in Washington and beyond.
For deeper dives on specific categories, check out these guides:
Best Ultralight Backpacking Gear - A deep dive into ultralight gear with multiple options for each piece of gear you may need/want to upgrade
Best Fleece Mid-Layers for Hiking & Backpacking - A gear review on all different types of fleece mid-layers, with information on type of fleece, use case, and weight
The Best Sun Hoodies and Sun Shirts for Hiking, Backpacking, and Climbing - Over the years we have tested just about every sun hoodie on the market, and this is a deep dive into our favorites for specific activities
Complete Enchantments Backpacking Gear Checklist
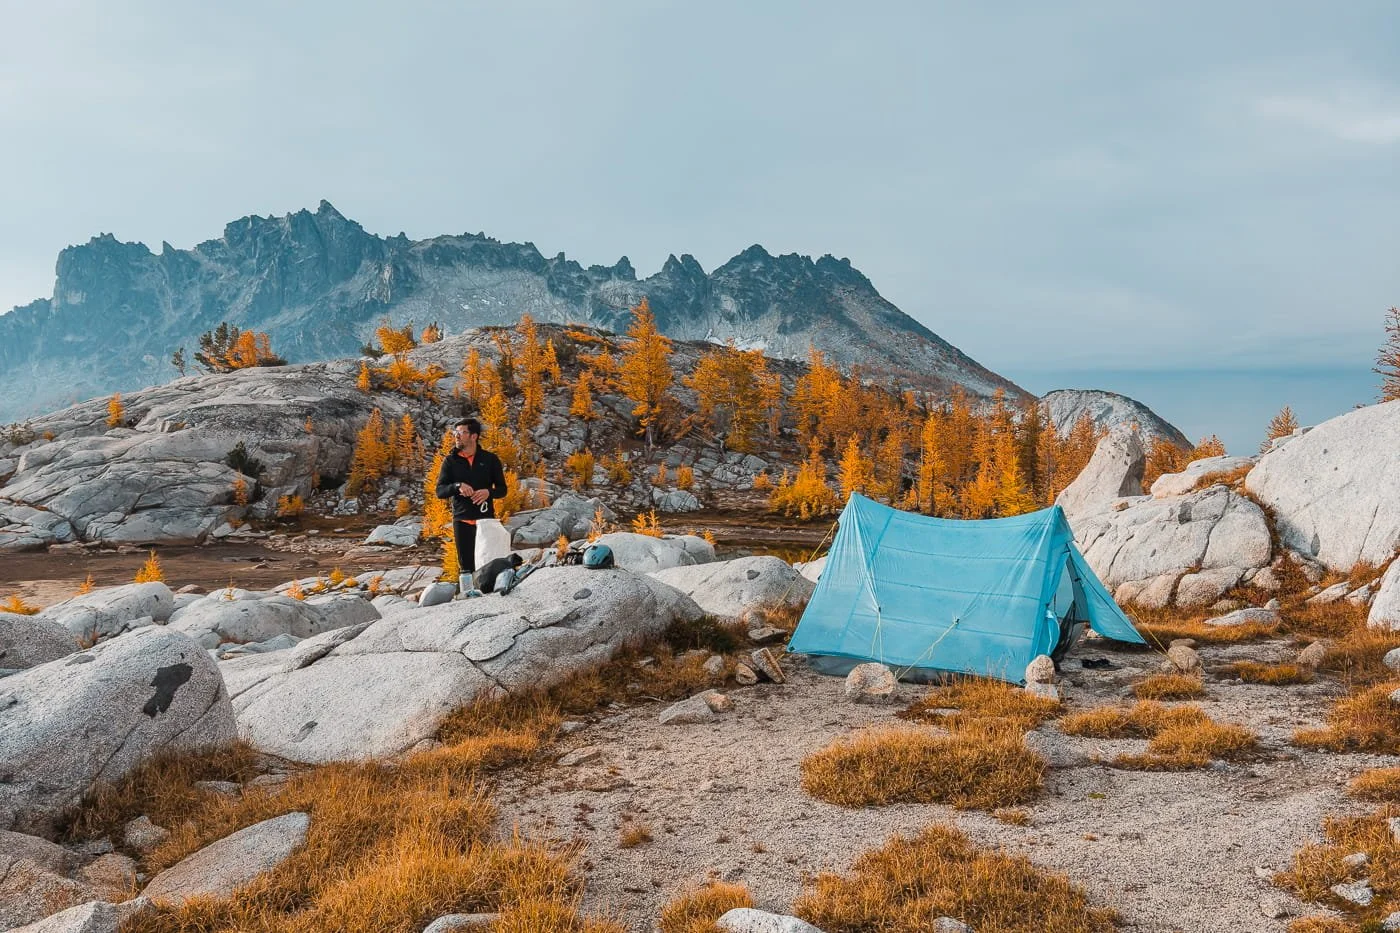
Our camp and Zpacks tent in the Core Zone in early October
The Big Three: Backpack, Tent & Sleep System
Your big three — backpack, tent, and sleep system — are the foundation of any backpacking kit, and they're where weight savings matter most. In the Enchantments, that's especially true. Every pound you shave off shows up on Aasgard Pass.
That said, ultralight gear is expensive, and hard to justify if this is your first or only backpacking trip. We're true ultralight backpackers, but we're always hunting for the lightest, most durable gear at a price that actually makes sense. Below is the gear we've personally carried into the Enchantments, along with solid alternatives for backpackers who are just getting started or don't want to go full ultralight.
→ Want the full breakdown? Check out our Ultralight Backpacking Gear Guide for our complete recommendations across every category.
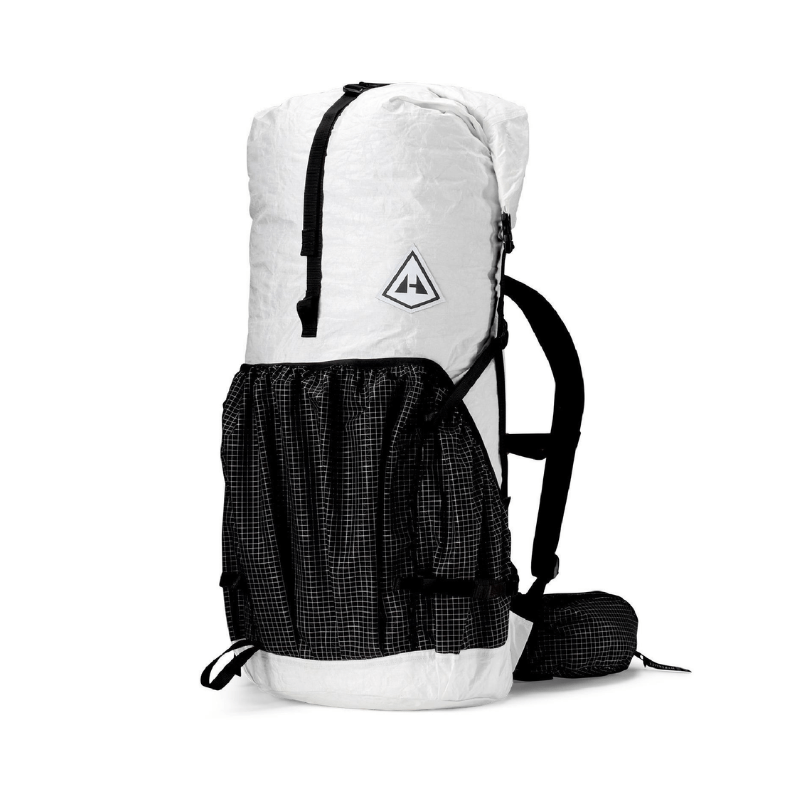
Backpacking Pack
Backpacking with Hyperlite Southwest packs and climbing gear, heading into the Enchantments. Photo credit: Rob Busack
For a 2–4 night Enchantments trip, a 50–60L pack is the sweet spot. We both use and swear by the Hyperlite Mountain Gear Southwest 55L, it's waterproof (useful when afternoon weather rolls in), extremely lightweight, durable and comfortable when fully loaded. We’ve carried it for hundreds of miles from the Enchantments to backpacking the Wind River Range, even to multiple backpacking trips in Patagonia. It's our all-time favorite backpacking pack, and the waterproofing alone is worth it when Cascade afternoon weather rolls in.
Backpack:
Ultralight (what we brought) - Hyperlite Southwest 55L
Budget-Friendly - REI Flash 55L
→ What to look for in a backpacking pack: Waterproof or highly water-resistant, lightweight frame, hip belt for load transfer on steep climbs, external attachment points for trekking poles and wet gear.
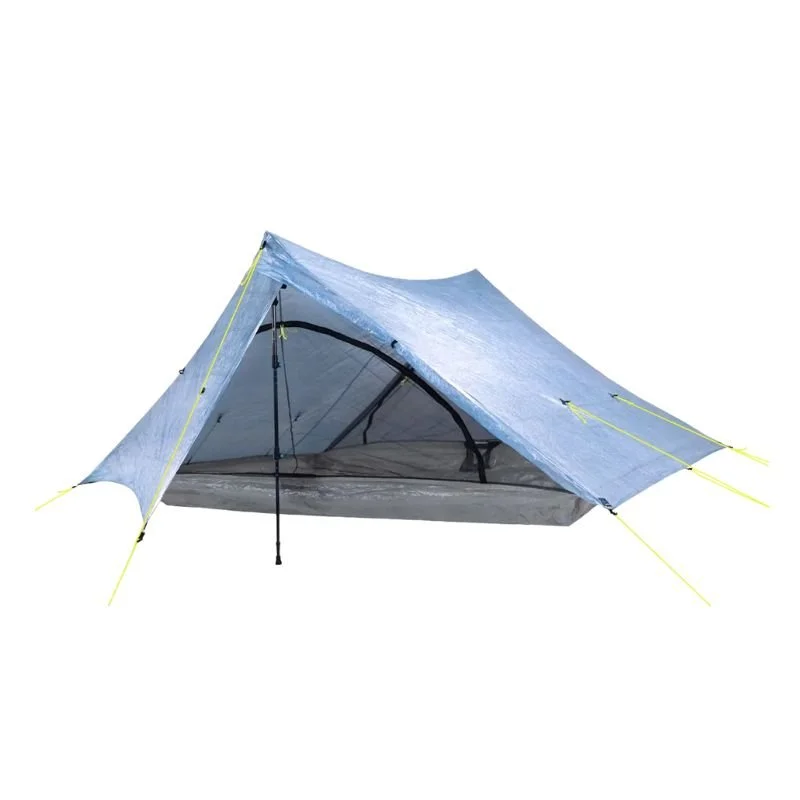
Backpacking Tent or Shelter
Our Zpacks Triplex tent and our friends’ Big Agnes tent at our campsite below Prusik Peak.
For the Enchantments, we love ultralight trekking pole tents, they're light, pack down small, set up fast, and use your trekking poles for structure instead of tent poles, which saves serious weight and bulk.
Our personal shelter is the Zpacks Triplex tent, which weighs under 1.5 lbs and offers generous interior space for two people, two doors, and dual vestibules. It's technically a three-person tent, but for the small weight penalty over the two-person Duplex 2-person tent, the extra room for gear management is well worth it.
We've taken both a trekking pole tent and a freestanding tent into the Core Zone, the Triplex wins every time.
If you go the trekking pole tent route, make sure your trekking poles are adjustable and compatible with your shelter before the trip, and practice the setup at home.
Tent:
Ultralight Trekking Pole Tent (what we brought in 2025) - Zpacks Triplex Tent
Lightweight Freestanding Tent / More Budget-Friendly (what we brought in 2018) - Big Agnes Fly Creek UL2 Tent
→ Pro Tip: Campsites in the Core Zone are established on rock, gravel, and sand and not typically on soft dirt or grass. When staking directly into rock or sandy soil doesn't work, anchor your guy lines to nearby rocks when needed.
Sleeping Bag or Quilt & Sleeping Pad
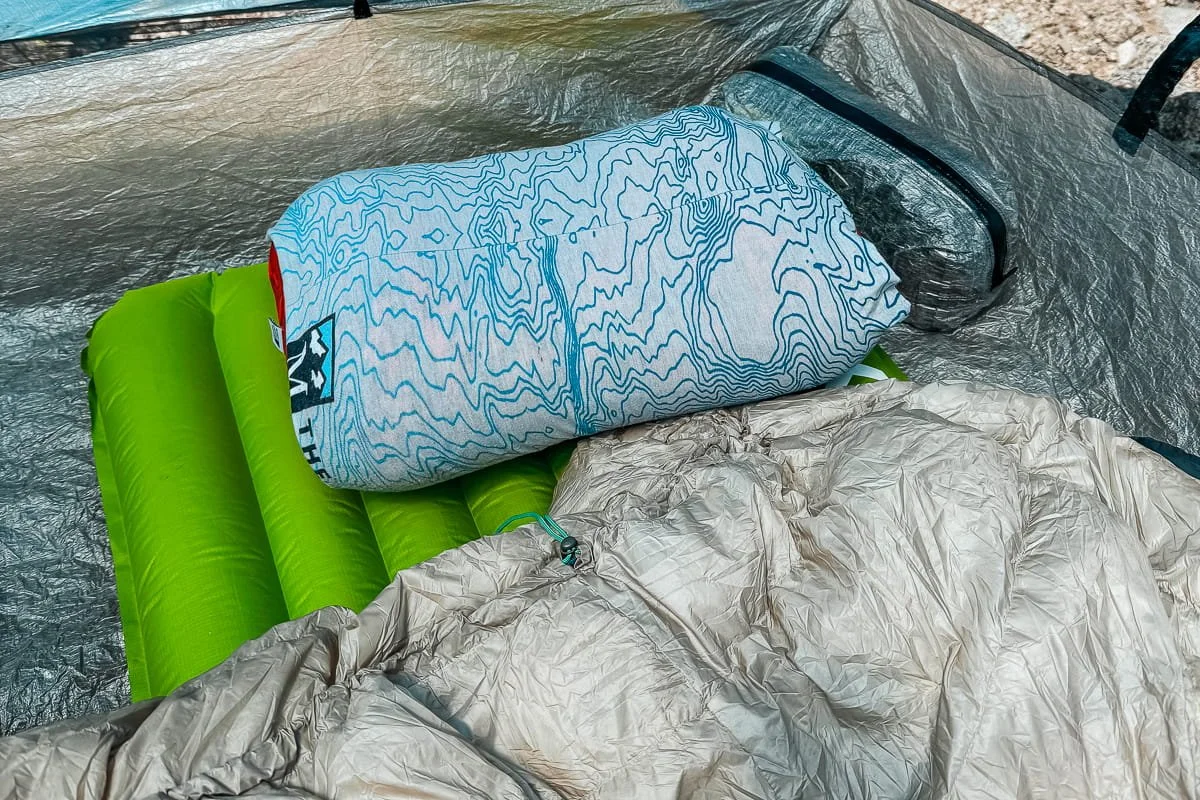
Skye’s sleep system setup with quilt, sleeping pad, and pillow with a buff as a pillow case
Don't underestimate how cold it gets in the Core Zone, even in summer. Nighttime temps in August can drop near freezing at elevation, and if you sleep cold, your sleep system is not the place to cut corners.
We both use lightweight quilts and brought our 20°F Hyperlite Quilts on our latest trip into the core in October, 2025, with sleeping bag liners as backup for added warmth. It's a versatile combo that's handled everything the Enchantments has thrown at us.
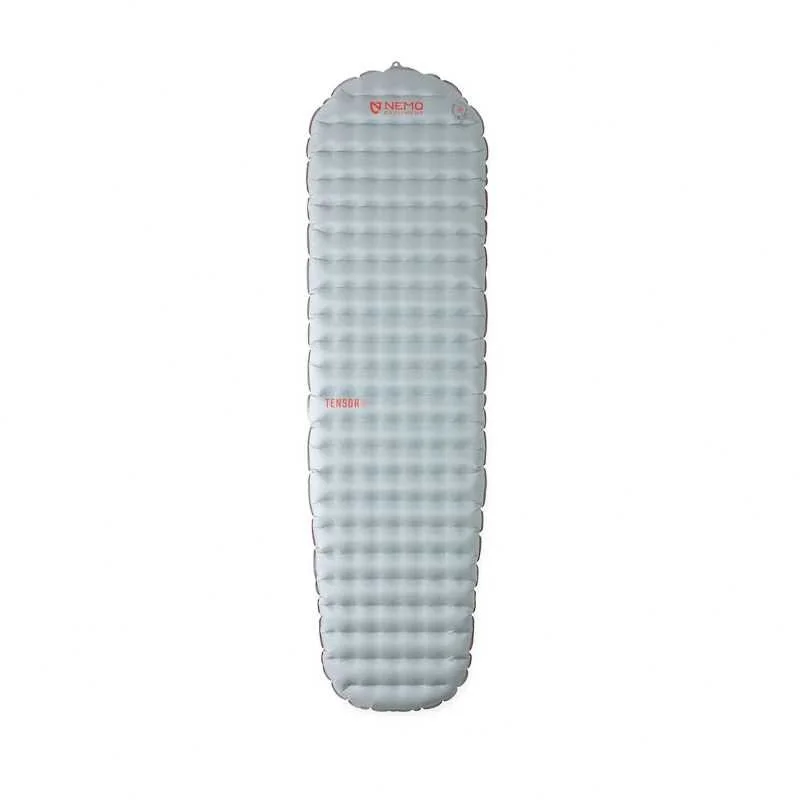
For your sleeping pad, prioritize insulation over everything else, rocky, uneven ground is the norm in the Core Zone, and early season visitors (before mid-July) may be sleeping on snow.
We love the Nemo Tensor All Season for its warmth and packability, and if you're going in early season, throwing an extra insulating z-pad in your kit as a backup insulating layer is worth the minimal extra weight.
Sleeping Bag/Quilt:
Ultralight Quilt (what we brought) - 20-degree Hyperlite Quilt
Budget-Friendly Sleeping Bag (Skye used to have this prior to switching to a quilt) - REI Magma 30 Sleeping Bag
Sleeping Pad:
Ultralight (what Garrett brought) - Therm-a-Rest NeoAir XLite NXT Sleeping Pad
Budget-Friendly (what Skye brought) - Exped Ultra 6.5R Sleeping Pad
Pillow:
We've tried a lot of camp pillows over the years searching for the right balance of comfort and packability. Our current favorite is an inflatable pillow with a soft padded cover, it's the combo that finally stuck. We also love using reversible packing pods that turn your puffy jacket into a pillow, which saves weight and eliminates one more thing to pack.
Most comfortable: Sea to Summit Aeros
Ultralight & still comfy: Hyperlite Stuff Sack Pillow (need clothing/a down jacket to fill it with)
Our Big Three Picks for Backpacking the Enchantments:

Skye in the Upper Core, wearing her Farpointe Alpha Cruiser. Photo credit: Rob Busack
What to Wear for Backpacking the Enchantments
Layering is everything in The Enchantments. You'll start hiking in cold pre-dawn air, warm up fast climbing up to Colchuck Lake and Aasgard, hit the alpine wind of the Core Zone, and then need serious insulation once you stop moving at camp.
Below are our go-to layers that have kept us comfortable in the backcountry year after year. If you want a deep dive into backpacking clothing, check out our guide on What to Wear for Hiking & Backpacking.
Active Hiking Layers to Wear on Trail
These are the pieces you'll have on your body for most of the trip, lightweight, breathable layers built to handle everything from a sweaty Aasgard climb to an exposed ridge in the Core Zone.
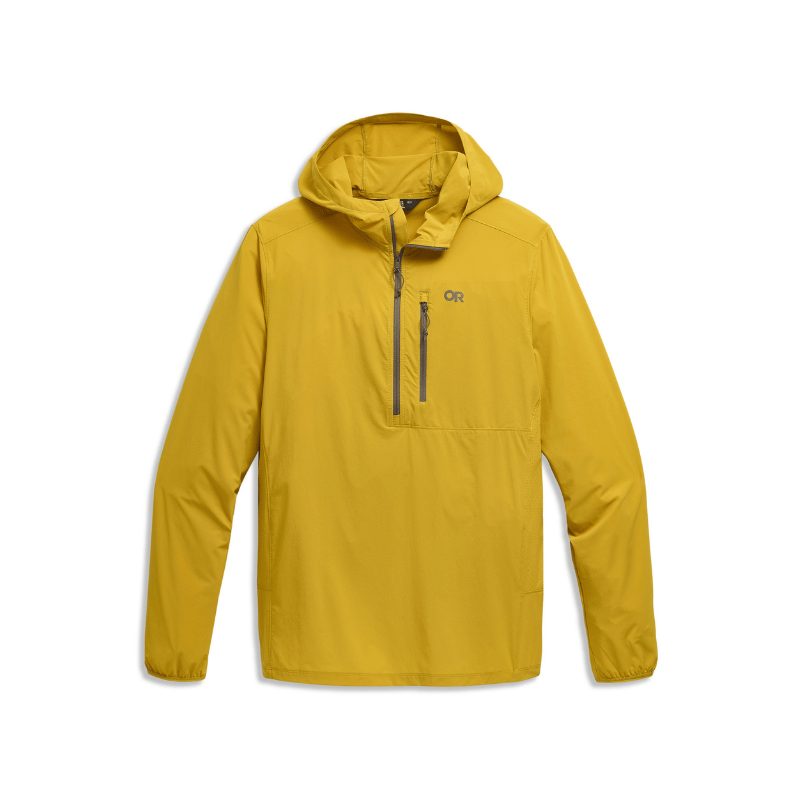
Sun Hoodie: UV exposure is intense in the alpine, especially across reflective granite or snow. A lightweight sun hoodie is our top pick for hiking. Our favorites are the Outdoor Research Astroman Air and OR Echo sun hoodies, but we also have a full gear review on the best sun hoodies for backpacking if you want to compare a lot of great options.
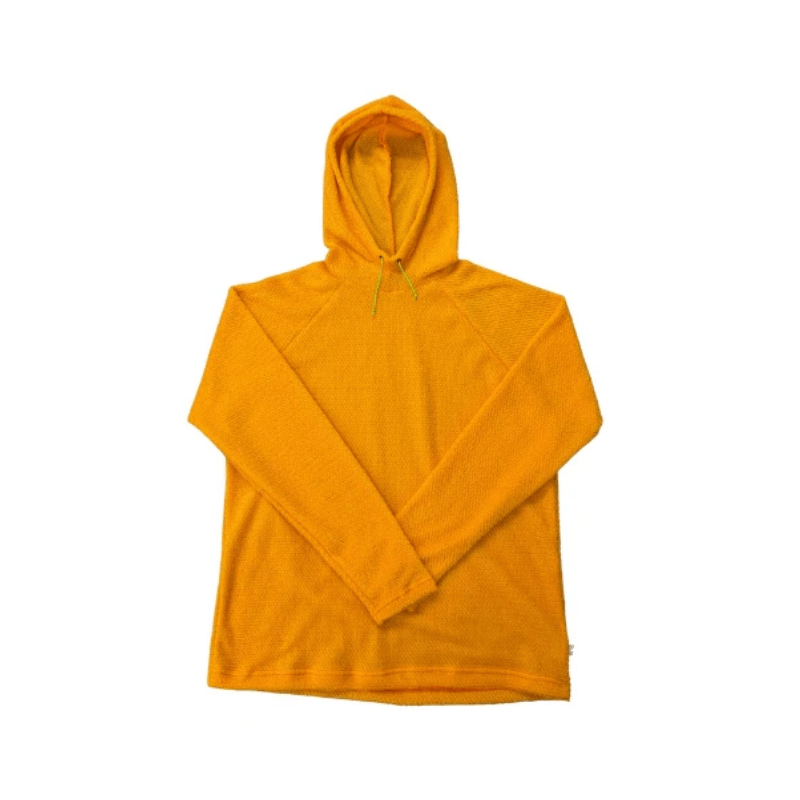
Lightweight Fleece Mid-Layer: For cold mornings and moving through chilly sections of trail. We love Alpha Direct fleece hoodies as an all around mid-layer for backpacking (they are super lightweight and so soft and warm). We also have a review on the best backpacking mid-layers if you want to compare more options.
Farpointe Alpha Cruiser - Unisex sizing (Skye is wearing an XS in the photo above)
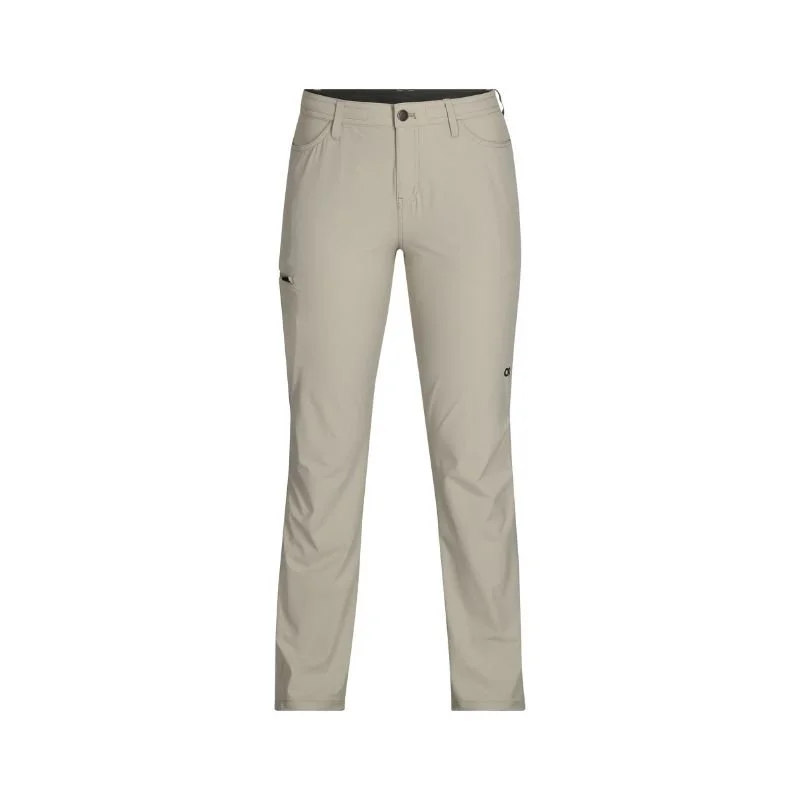
Hiking Pants or Shorts: We typically pack a pair of shorts to wear during the day and pants for colder weather or evenings. Patagonia Strider Pro Shorts are our favorite hiking shorts, and you can’t go wrong with Outdoor Research Ferrosi Pants.
Outdoor Research Ferrosi Pants (Garrett’s top pick for pants) - Men’s | Women’s
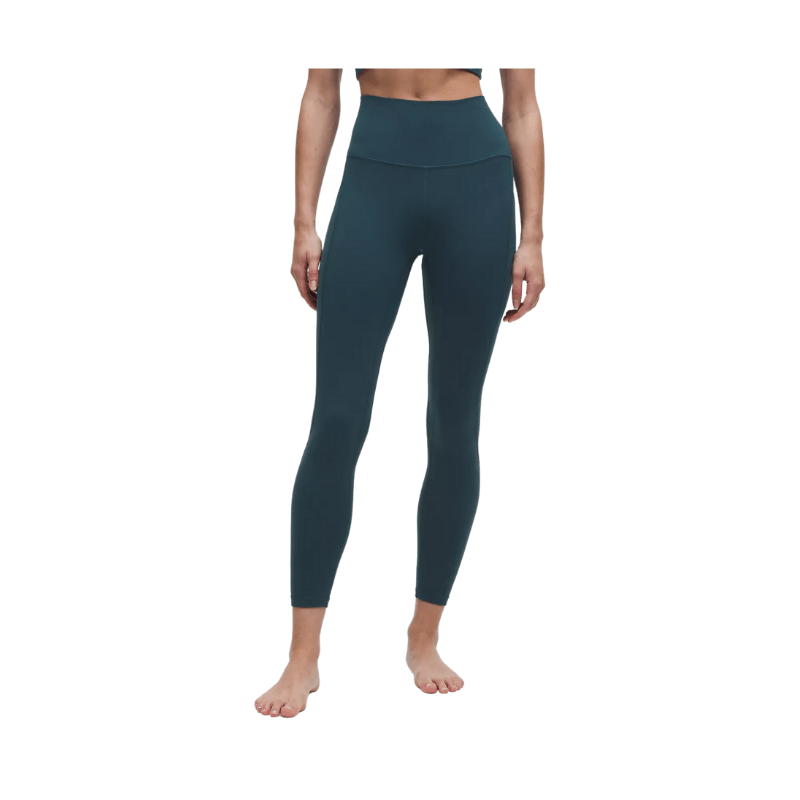
Lululemon Align 25” Leggings (Skye’s top pick for pants)
Sports Bra (for those who wear one): Vuori All the Feels Bra or for wool, the Branwyn Essential Bralette.
Underwear: Aim for moisture-wicking fabrics or shorts with built-in underwear, these will help prevent chafing but you still might need to use an Anti-chafing stick. Below are our top picks that we bring on every trip.
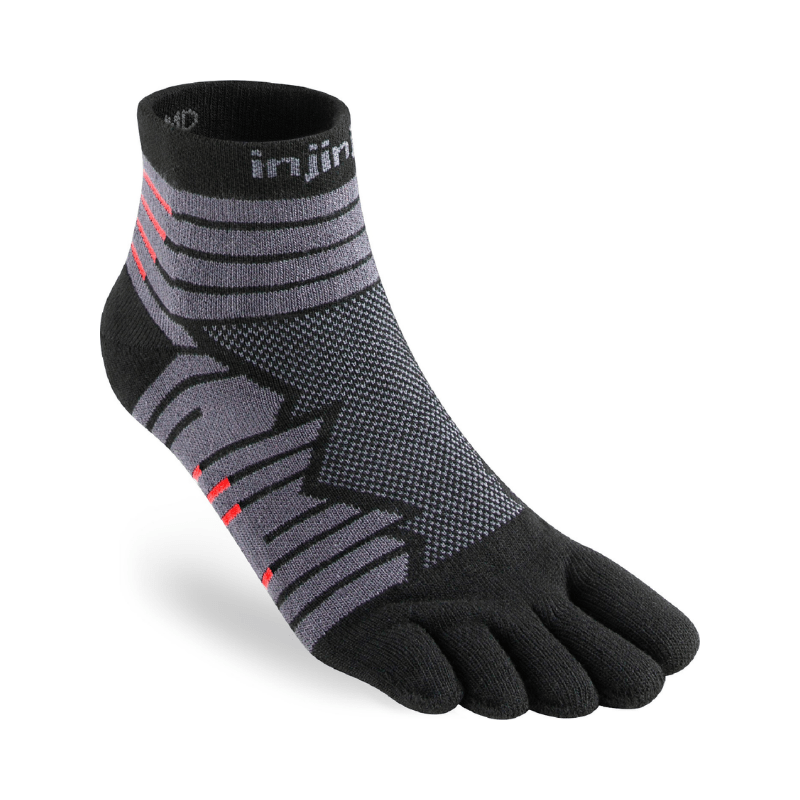
Hiking Socks: We love toe socks for long days on the trail, they have reduced our blister count dramatically by preventing toe-on-toe friction.
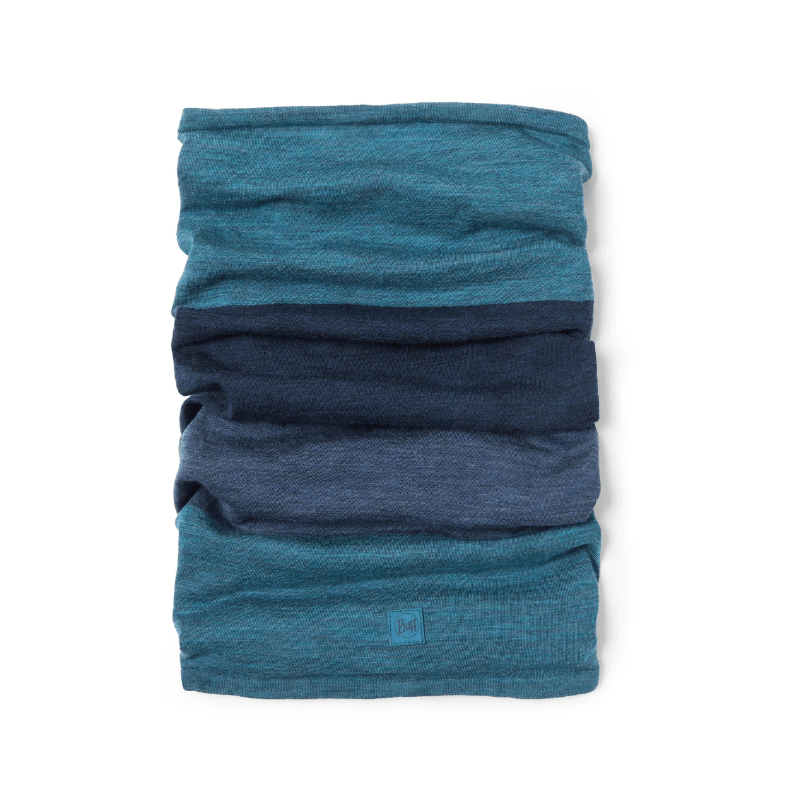
Buff or Neck Gaiter: Doubles as face protection from sun and wind, improvised headband, and sleep mask at night. We prefer lightweight fabric gaiters for their breathability and that they don’t hold smells as easily.


Insulation & Camp Layers for the Enchantments
Having breakfast at camp in the Core in early October. Photo credit: Rob Busack
Once you stop moving, temperatures in the Enchantments drop fast, even in August. These layers live in your pack on trail but earn their keep the moment you reach camp or the wind picks up.
Insulated Puffy Jacket: Once you stop moving at camp, it can get chilly fast. We both bring down puffy jackets for their extra warmth and compressibility.
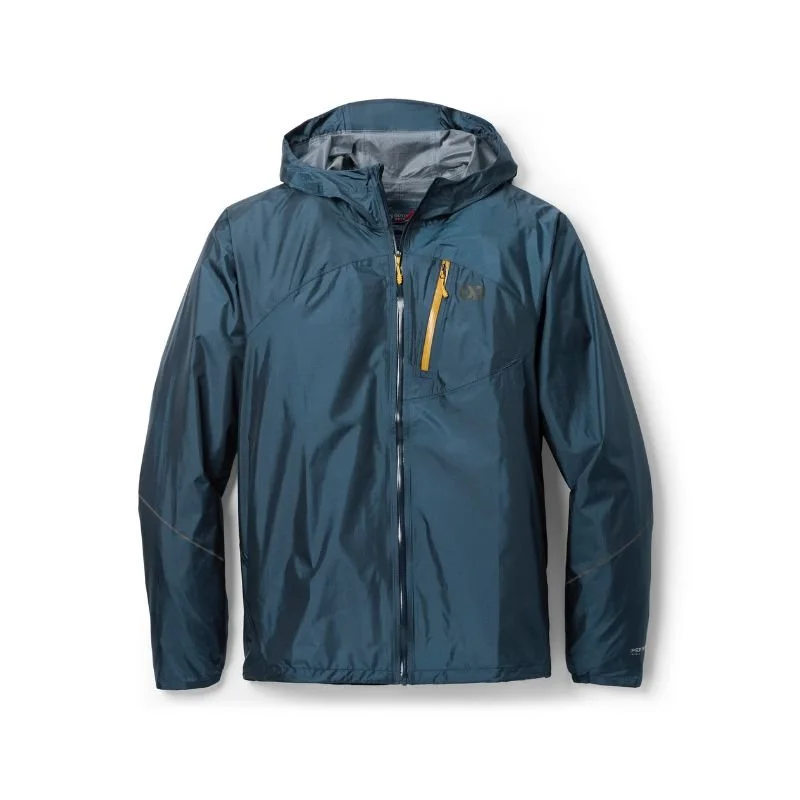
Rain Jacket: Alpine weather in the Cascades can be very unpredictable. We opt for a lightweight and packable rain shell over a heavy-duty (and more expensive) Gore-Tex style rain jacket. Even if rain isn’t in the forecast for your trip, we still recommend packing a lightweight rain shell, just in case (we got snowed on in the Core one year in August).
Beanie: Great for sitting around camp and keeping your head warm while tucked in at night.
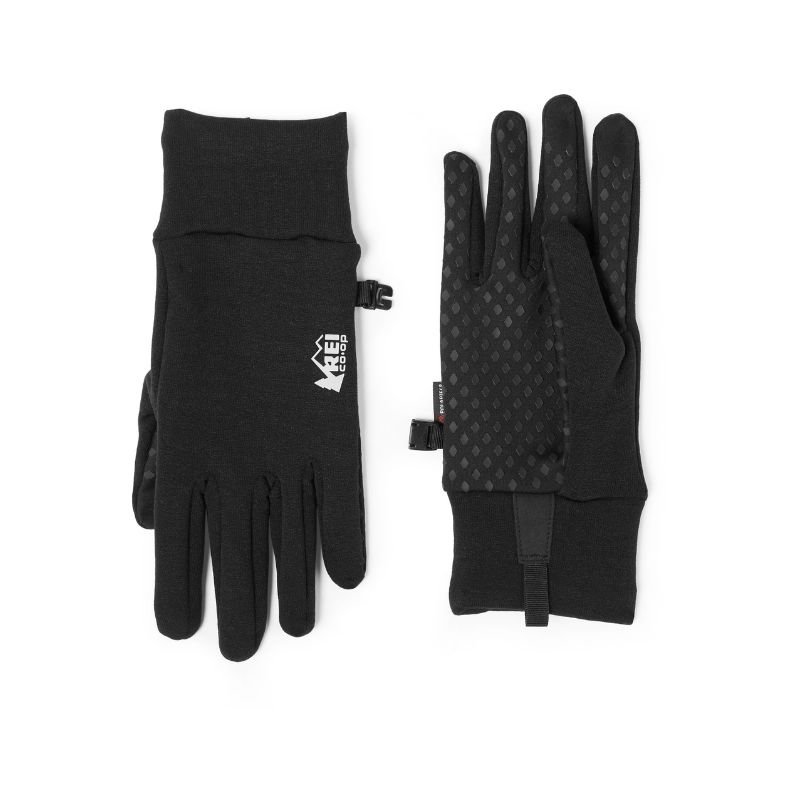
Gloves: Essential for larch season, and a good idea for summer mornings too. Thin gloves work great for dexterity and warmth in the mild temps.
Base Layer Top and Bottoms: We’re big on having a committed sleep layer for added warmth and comfort at night. It’s worth the extra weight to not sleep in sweaty clothes and be cozy at night.
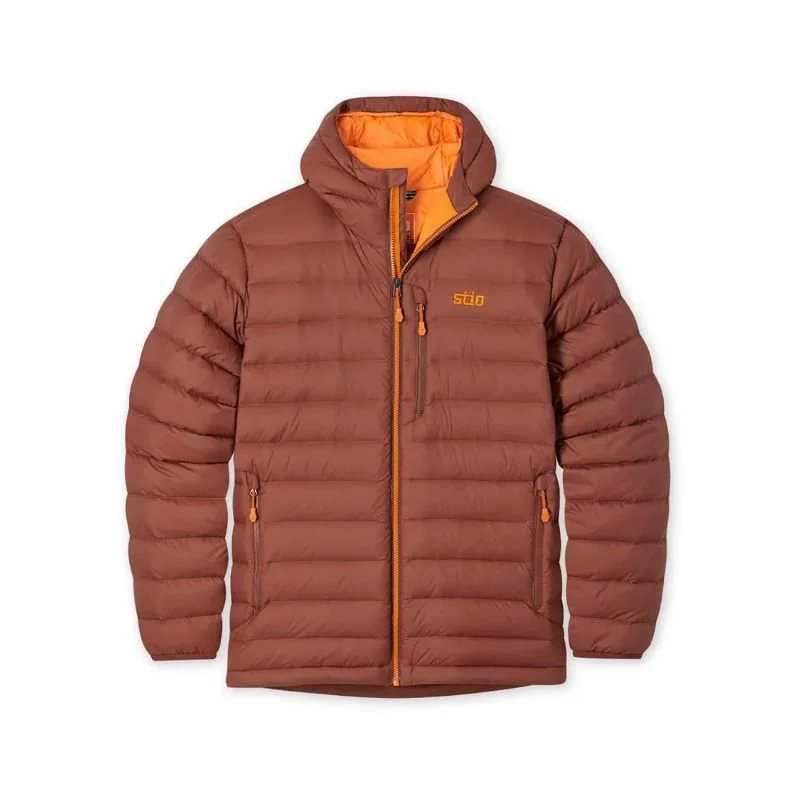
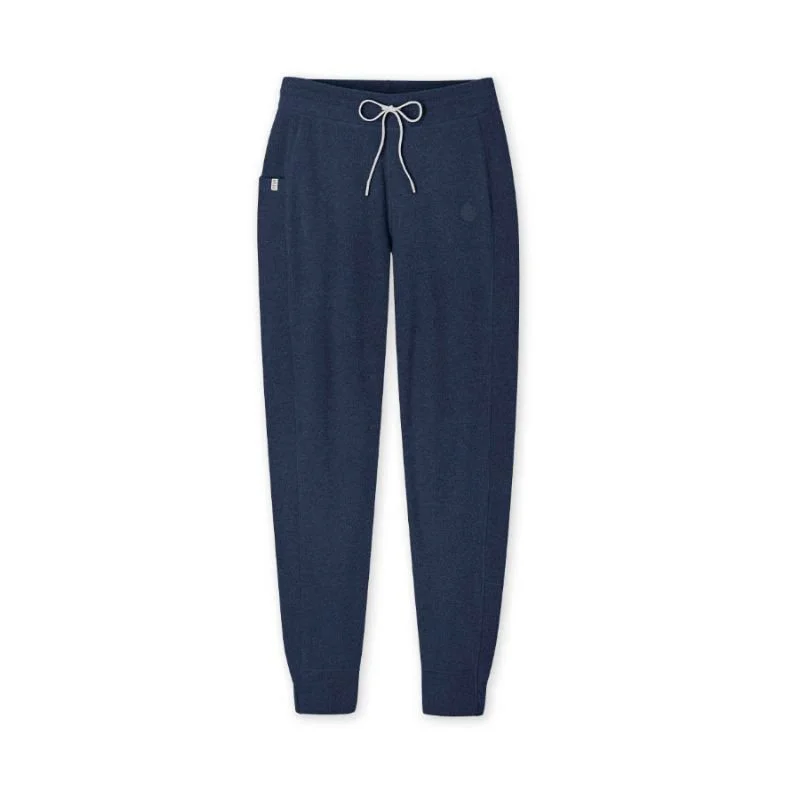
Fleece Joggers: If you are backpacking in the fall and need extra warmth for overnight and at camp, Skye brings her Stio Turpin Joggers on all fall trips. They are very lightweight and add a lot of warmth for cold nights and mornings, and are also super soft and cosy.
Sleep Socks: Keep your toes cozy, clean and dry with sleep socks.
Footwear for Hiking & at Camp
Garrett wearing Altra Timp trail runners in the Upper Core
Trail runners or lightweight hiking boots both work well in The Enchantments during summer and fall. We personally hike in trail runners all year round, they're lighter and comfortable over many miles, but if you prefer the ankle support of boots, a low-profile hiking boot like the Salewa Pedroc is our go-to when we need a boot in snow (but it’s a great summer boot for those looking for more than trail runners).
Approach shoes are also a great option if you're also planning to scramble up nearby peaks during your trip. Whatever footwear you choose, make sure they fit your feet well and they are broken in before you hit the trail.
Types of Shoes & Boots for Backpacking
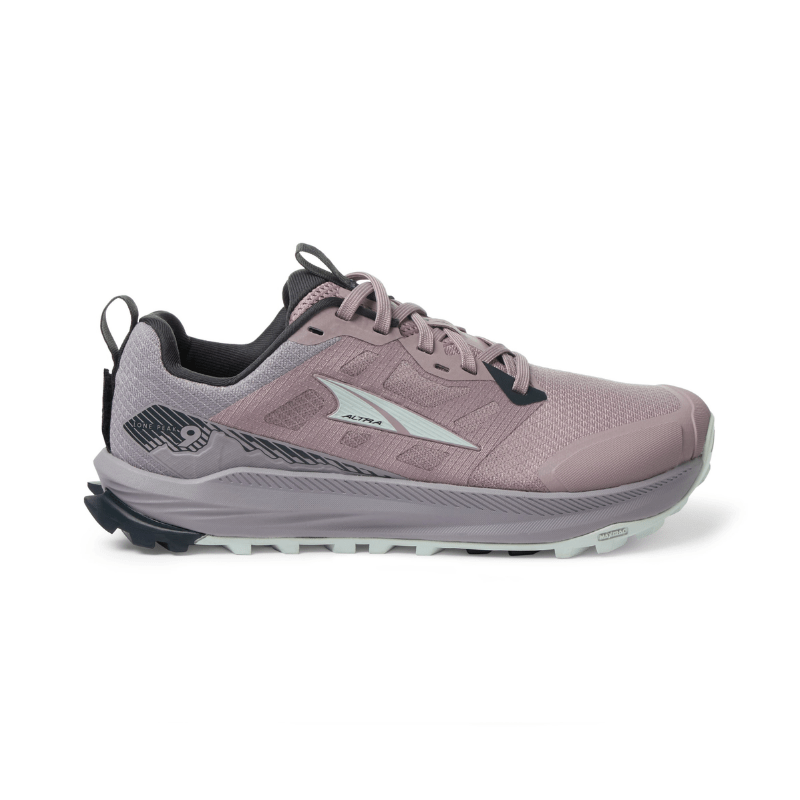
Trail runners excel during dry summer months and high-mileage hikes. As mentioned, they’re lighter than boots, which reduces fatigue, and provide excellent breathability to keep your feet cool. We’ve logged hundreds of miles in Altra Lone Peak (Garrett’s favorite) and Altra Timp (Skye’s favorite) trail runners. With their wide footbox and zero or low drop, they’ve helped us avoid toe blisters on long days.
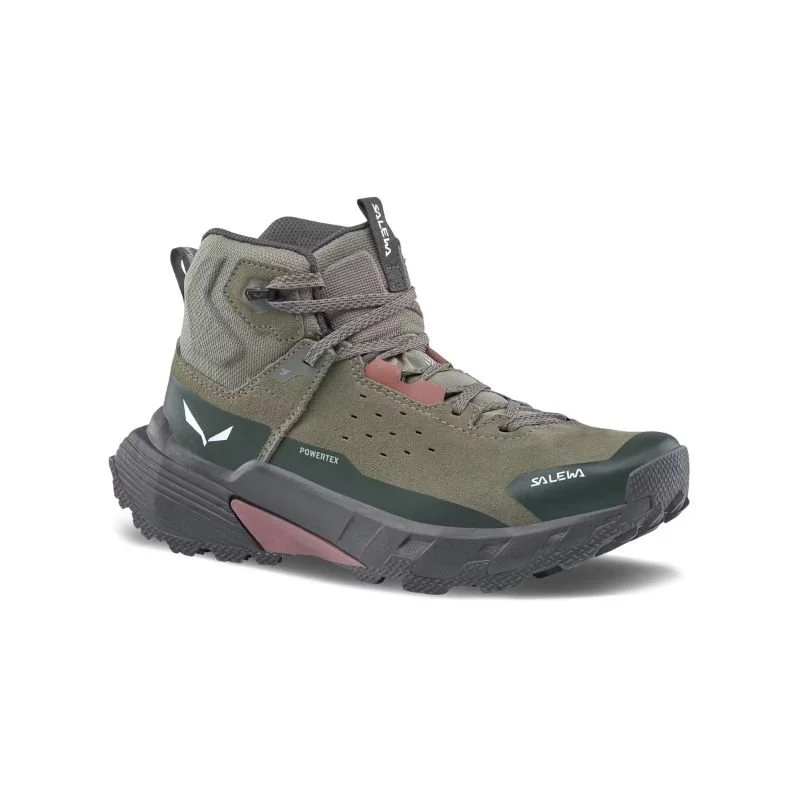
Hiking boots shine in wet, muddy, or snowy conditions, like late fall or early spring. Their waterproofing, ankle support, and robust construction provide stability and protection when trails get slippery. We’ve been loving the Salewa Pedroc 2 Leather Mid Boot for comfort, weight, and durability.
Approach shoes are another footwear option for tackling rocky terrain, boulder fields, and are perfect if you are planning to do any scrambles while in the Core. They have a firmer sole and grippier rubber than trail runners or standard hiking boots, making them ideal for short scrambles and technical footing. We often reach for approach shoes when trails require extra traction or when hiking over uneven, polished rock surfaces where stability is key. Our favorite is the La Sportiva TX4.
Camp sandals are super small and minimal to pack, and will make a huge difference if you’re spending a lot of time at camp. It’s so nice to switch out of shoes or boots and let your feet air-out at camp.
LUNA Sandals Venado 2.0 - Click here to get 15% off your LUNA order.


Justy above Aasgard Pass in the Upper Core. Photo credit: Rob Busack
Don't Overlook These Enchantments Hiking Essentials
The Enchantments will humble you fast if you're underprepared. Blisters, sunburn, and route-finding mistakes are among the most common trip-wreckers up here, and all three are easy to avoid with a little planning and the right gear in your pack.
Blister Prevention on Trail
With the mileage and elevation gain of the Enchantments thru hike, blister prevention is super important. Over the years, we’ve developed a good system that works for us to prevent blisters all together, and then stop them from getting worse if you start getting hot spots. Here's our tried-and-true system after many long miles:
Leukotape K: Apply to known hotspot areas before you start hiking. This thin, stretchy tape stays on for days and prevents rubbing from turning into blisters. We put this on our heels and even wrap small strips around blister-prone toes.
Dermatone Anti-Chafe Stick: The .45oz travel bar fits in your hip belt pocket and is a lifesaver on high-mileage days with heat and sweat.
Injinji Toe Socks: We already mentioned these in the clothing section, but toe socks have stoped us from getting blisters on or between our toes and have been a game changer for us.
Sun Protection while Hiking
Dermatone Sport Sunscreen Lotion, SPF 50: The best sunscreen on the market in our opinions, and we have tried so many different brands over the years. Dermatone also just launched a clear spray version of their SPF 50 and we love that as well.
SPF Lip Balm: Having a lip balm with SPF is key for on trail, as your lips can burn even easier than your face.
Sunglasses: Polarized lenses are ideal for cutting glare off the alpine lakes and granite. Garrett loves Ombraz sunglasses, they have an adjustable cord instead of earpieces, which means they fit any face, pack down tiny, and hang off your neck for easy temporary storage. And Skye usually hikes with goodr Circle Gs.
Navigation & Safety Gear
The Enchantments are well-traveled, but navigation through the boulder fields and heading up Aasgard Pass can be difficult, especially in poor weather. It’s also isolated backcountry so any rescue or evacuation will take a long time. Having the right safety and navigation gear isn't optional here.
Navigation
GaiaGPS with a Downloaded Track: Cell service is essentially nonexistent throughout The Enchantments. Download your GPX route and waypoints before you go. We prefer GaiaGPS as our backcountry navigation app.
Safety Essentials
First Aid Kit: A basic first kit with blister care, pain relievers, an emergency blanket, and basic wound care. We always include at least one emergency blanket per person for day hikes, though on backpacking trips you have a sleeping bag or quilt with you, so that is up to you.
Satellite Communication/SOS Device: We never go into the backcountry without our Garmin InReach Mini 3. It provides two-way messaging, SOS capability, weather updates and is currently much more reliable than a cell phone satellite messaging system.
Headlamp: Nitecore NU25 400 is one of the lightest and brightest rechargeable headlamps out there.
Powerbank: For recharging your phone and InReach. The UL Nitecore 10000 powerbank is one very lightweight and gives ~2 iPhone charges.
Trekking Poles: One of the most important pieces of gear for the Enchantments specifically. They significantly improve stability on Aasgard Pass going up, protect your knees on the long descent from Snow Lakes, and help with boulder scrambling throughout the Core. We use Black Diamond Distance Z or Black Diamond Trail Trekking Poles. If you’re using a trekking pole tent, only the extending style trekking poles (e.g. Black Diamond Trail) will work with it.
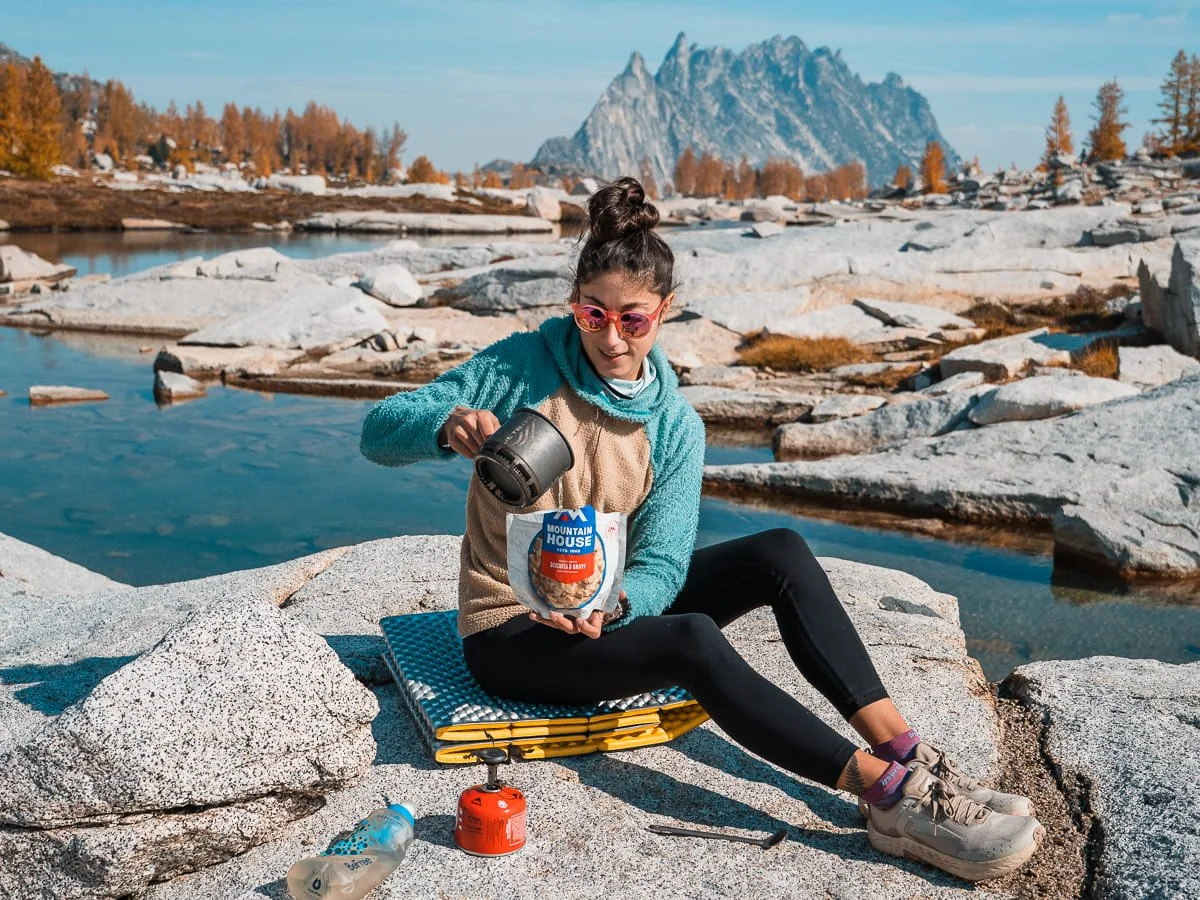
Skye making a Mountain House meal in the Core Enchantments for lunch on the hike out
Food, Water & Camp Kitchen Essentials for the Enchantments
Eating and drinking well in the backcountry takes more planning than it might seem, especially on a permit-only trip where you can't just run back to the car. Here's how we approach food, water, and cooking for a multi-night Enchantments trip.
Water Filtration
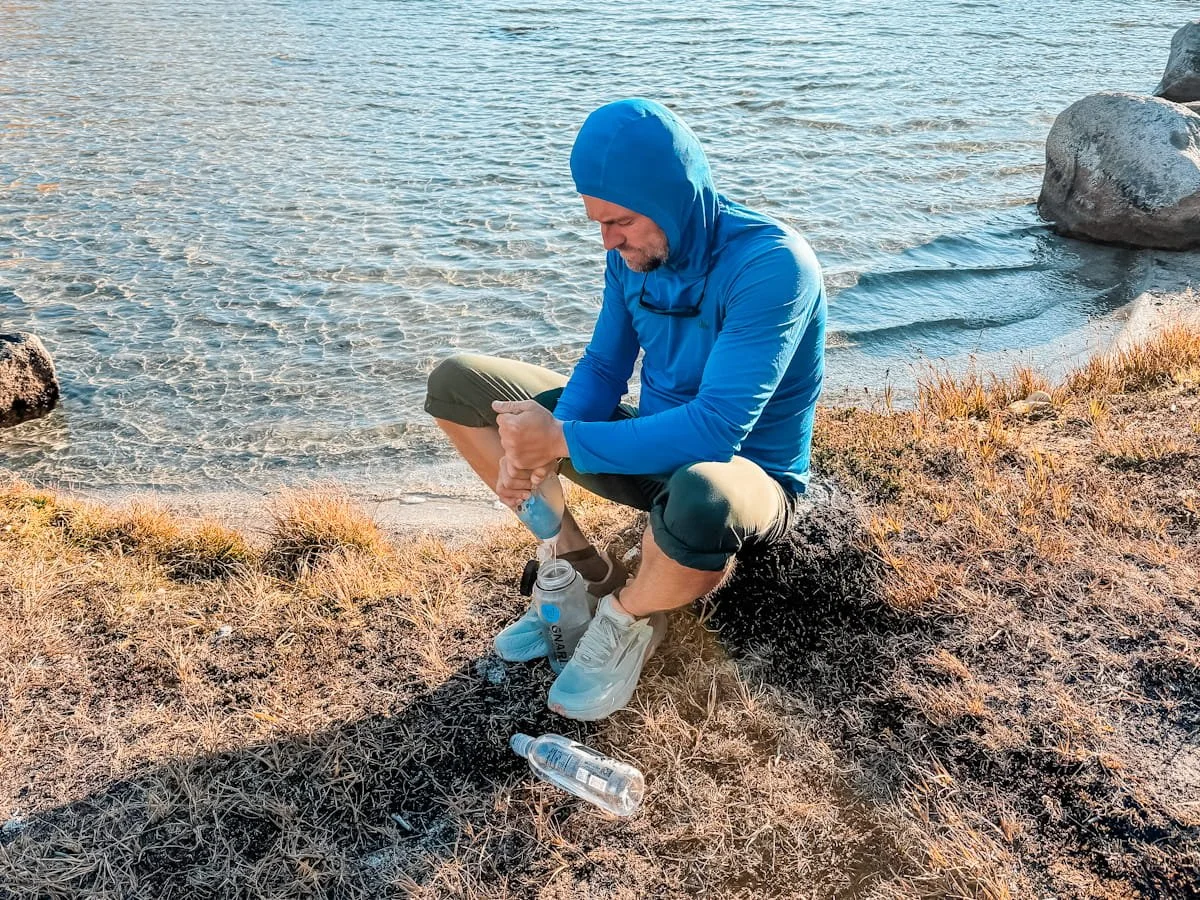
Garrett filtering water in the Core with our Katadyn BeFree filter
Water Bottle or Bladder: There are numerous ways to carry water, as a couple we’re split between hydration bladders and water bottles in shoulder strap mounted bottle pockets. Whichever system you prefer, make sure you have capacity for at least 1.5-2 liters of water.
Water Filter: Water is abundant throughout the Core Zone. Every alpine lake and stream is a potential refill point. The Katadyn BeFree 1L is our go-to filter for The Enchantments, you can fill it directly from a lake, squeeze to drink, and it integrates into a water bottle. Easy to use on the go and fast enough that you're never waiting long for a refill.
Food
For a 2–4 night trip, you're looking at roughly 1.5–2 lbs of food per day, depending on output and appetite. We prioritize calorie-dense, lightweight options. Food options are beyond the scope of this blog but here are some of our favorite staples:
Freeze-dried meals for dinners
Favorite Freeze-dried Meals - Peak Refuel Butternut Dal Bhat, Backpacker's Pantry Pad Thai, Mountain House Kung Pao Chicken
Alpine Start Instant coffee or tea for cold alpine mornings.
Camp Kitchen Essentials
Not in the Enchantments, but a good example of our backpacking cook set on another backpacking trip
You don't need much of a kitchen setup for a backcountry trip, but getting it wrong means cold meals or a stove that won't light at 7,500 feet. Here's the minimal kit we bring to keep things simple and reliable.
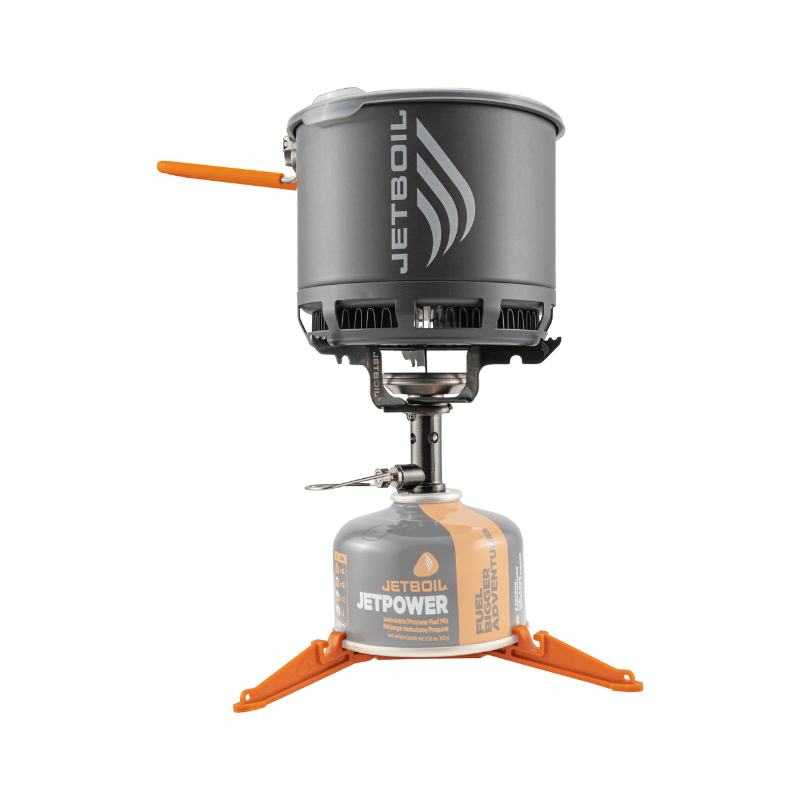
Backpacking Stove, Pot & Fuel: We love the Jetboil Stash Cooking pot/stove combo. Plus, one 3.9oz gas canister per 2–3 days (for two people).
Bear Canister or Bear Bag: There are no formal bear hangs or bear boxes in The Enchantments. Bears are rare but present in the area and there aren’t tall trees in the core to create a proper bear hang. Either bring a canister or tie your bear bag to a tree to help hide it from ground dwelling critters. We brought an Ursack bear bag on our trip and it worked great.
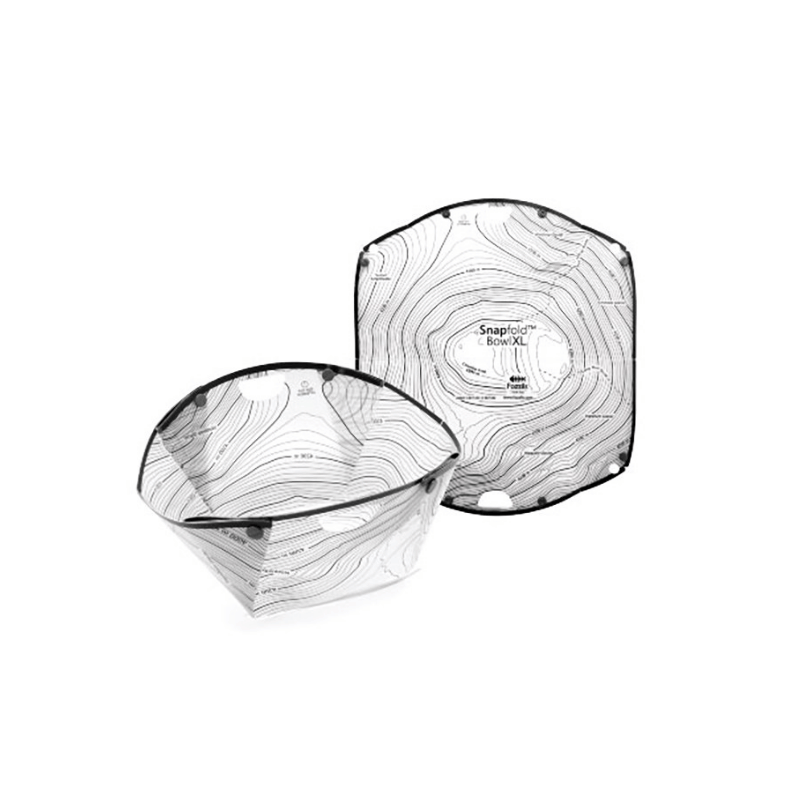
Eating Utensils: Lightweight spork or spoon and the collapsible Fozzils plate/bowl has worked great. We both use a long-handled titanium spoon, fits in freeze-dried meal pouches.
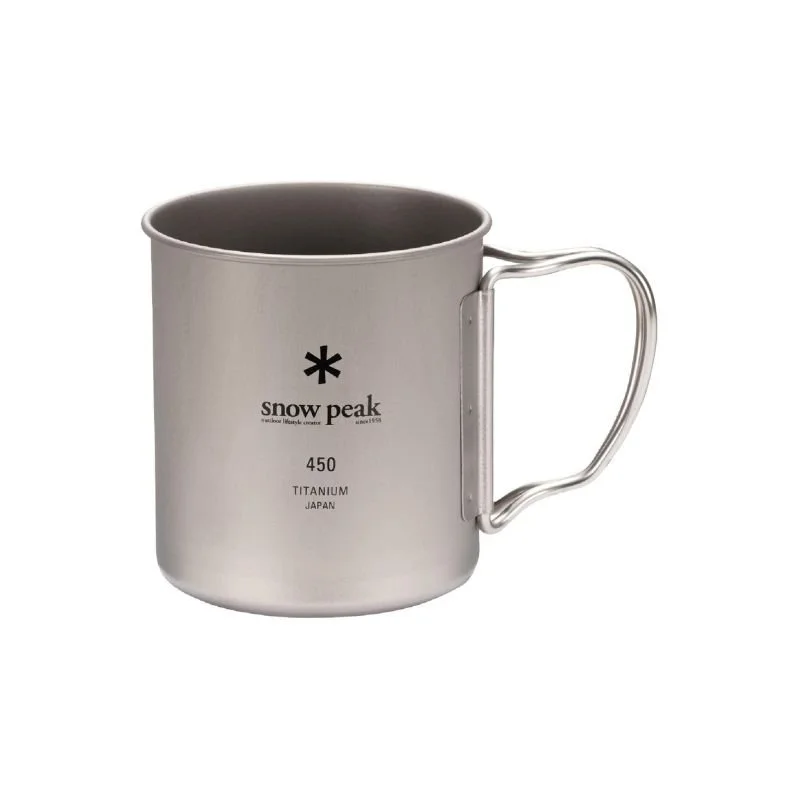
Camp Mug: We share a small titanium Snow Peak Mug for our morning coffee or evening tea.
Lighter: A BIC lighter.

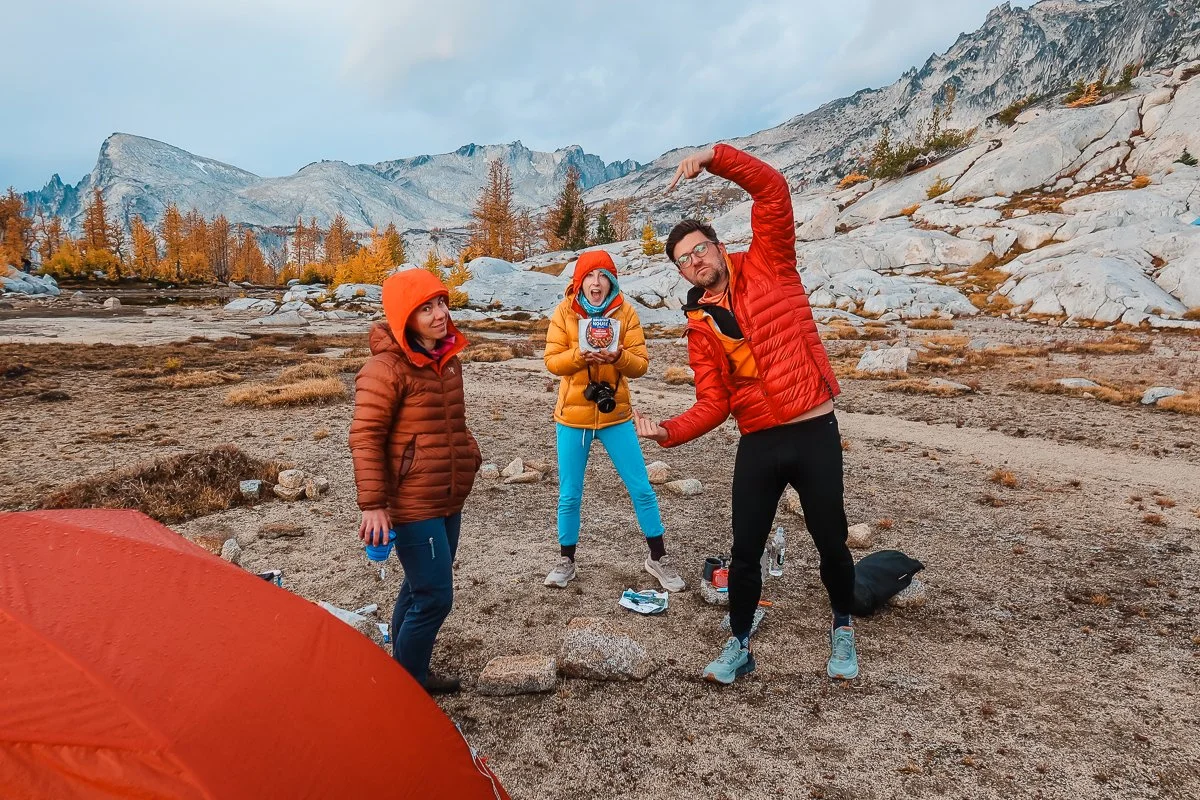
Taking a quick break in the Upper Core after ascending Aasgard Pass. Photo credit: Rob Busack
Hygiene, Toiletries, Sanitation, & Extras for the Enchantments
Leave No Trace compliance is strictly enforced in the Enchantments, and that starts with how you handle waste. WAG bags are required in the Core Zone, pack accordingly. Beyond that, a few simple toiletries go a long way toward feeling human after a long day on trail, even when you're miles from the nearest sink.
Backcountry Bathroom Essentials & Toiletries
Trowel: To dig cat holes. Be sure to dig 6–8 inches deep, at least 200 feet from water and camps. We like this tiny one. There are backcountry toilets at several locations throughout The Enchantments. We have them marked on our shared GaiaGPS track.
Toilet Paper and Waste Bags: Pack everything out. Leave no trace.
Culo Clean Backcountry Bidet - Backcountry bidets should be a whole post on its own. We’ve tried a few and this is by far the best. It’s tiny, can create good pressure and fits on any water bottle, so we got a super cheap plastic bottle. Highly recommend practicing in the front country or shower if you want to give it a try.
Wilderness Wipes - Great for a tent shower wipe down or as an alternative to a backcountry bidet.
Wild Deodorant Mini (20% off with code SKYESTOURY) - Tiny deodorant the size of a chapstick that smells amazing. Why not smell good on your trip when deodorant is this tiny and light?
Kula Cloth - A pee cloth for the ladies that is my 11th essential and comes on all trips with me.
Toiletries - Here is a list of what I (Skye) normally bring on backpacking trips to wash my face and body as needed.
Don't Forget: Enchantments Trip Extra Essentials
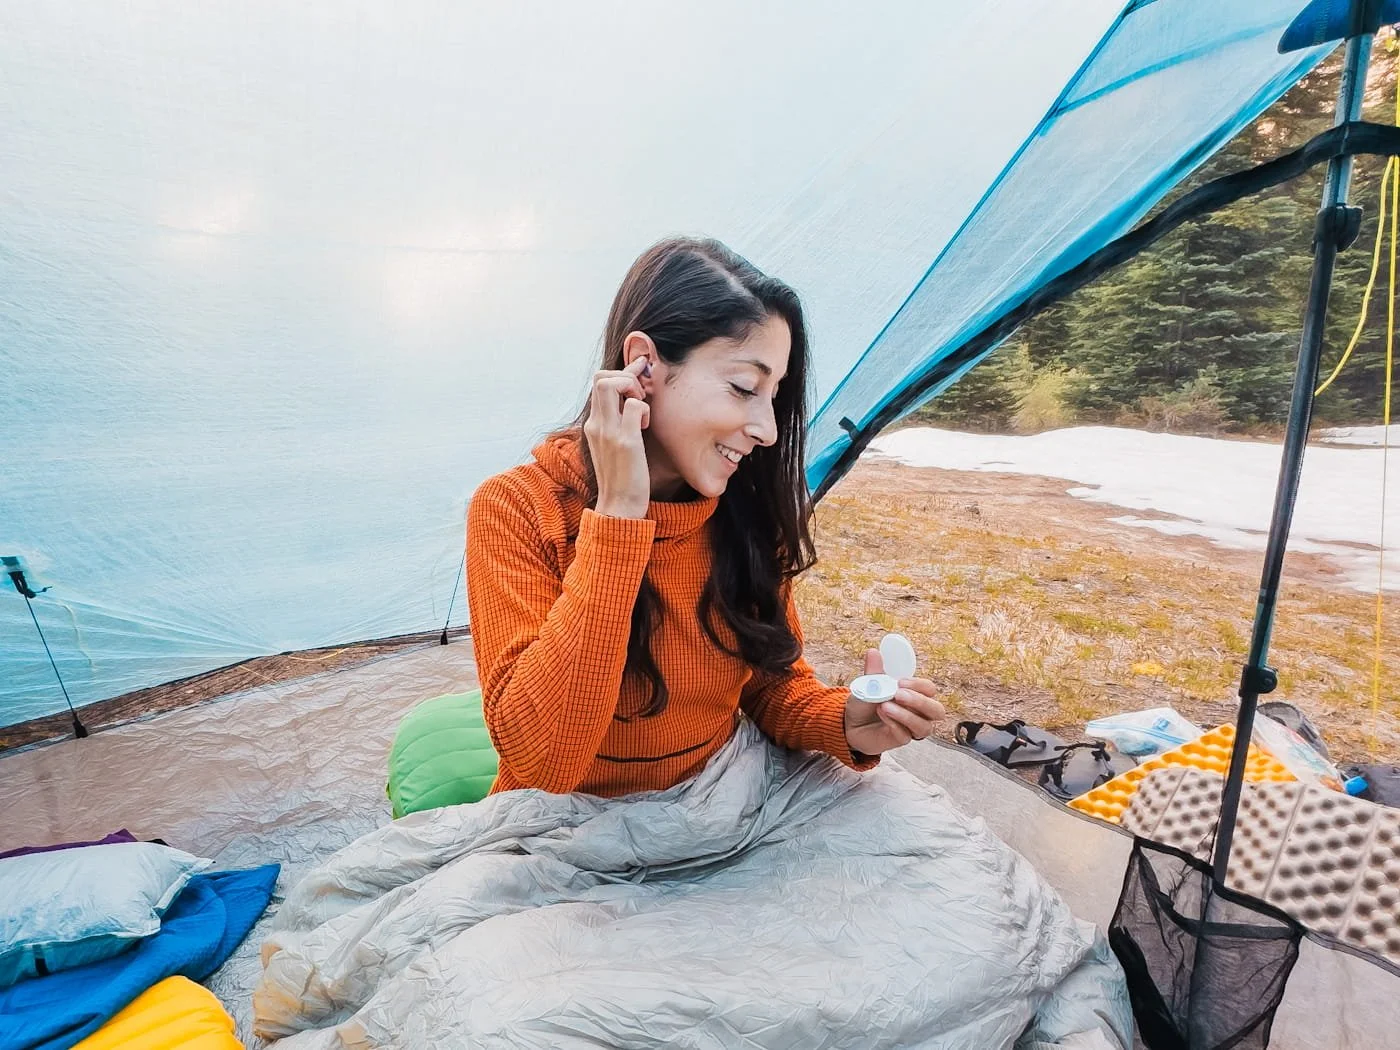
Using Loop Dream ear plugs while backpacking
Earplugs: If you’d rather not listen to a rattling tent, snoring neighbor, or whatever your imagination can conjure up outside your tent, then earplugs aren’t a bad idea. These specialized sleep ear plugs, come with a small carrying case, sit flush inside your ear and are reusable.
Loop Dream Ear Plugs - 10% off with code SKYE
Permit & Parking Pass: Print your overnight permit and have it on you. Also print the overnight parking pass (included with your permit) and display it in your windshield. You still need a Northwest Forest Pass or America the Beautiful Pass in addition to the overnight parking pass.
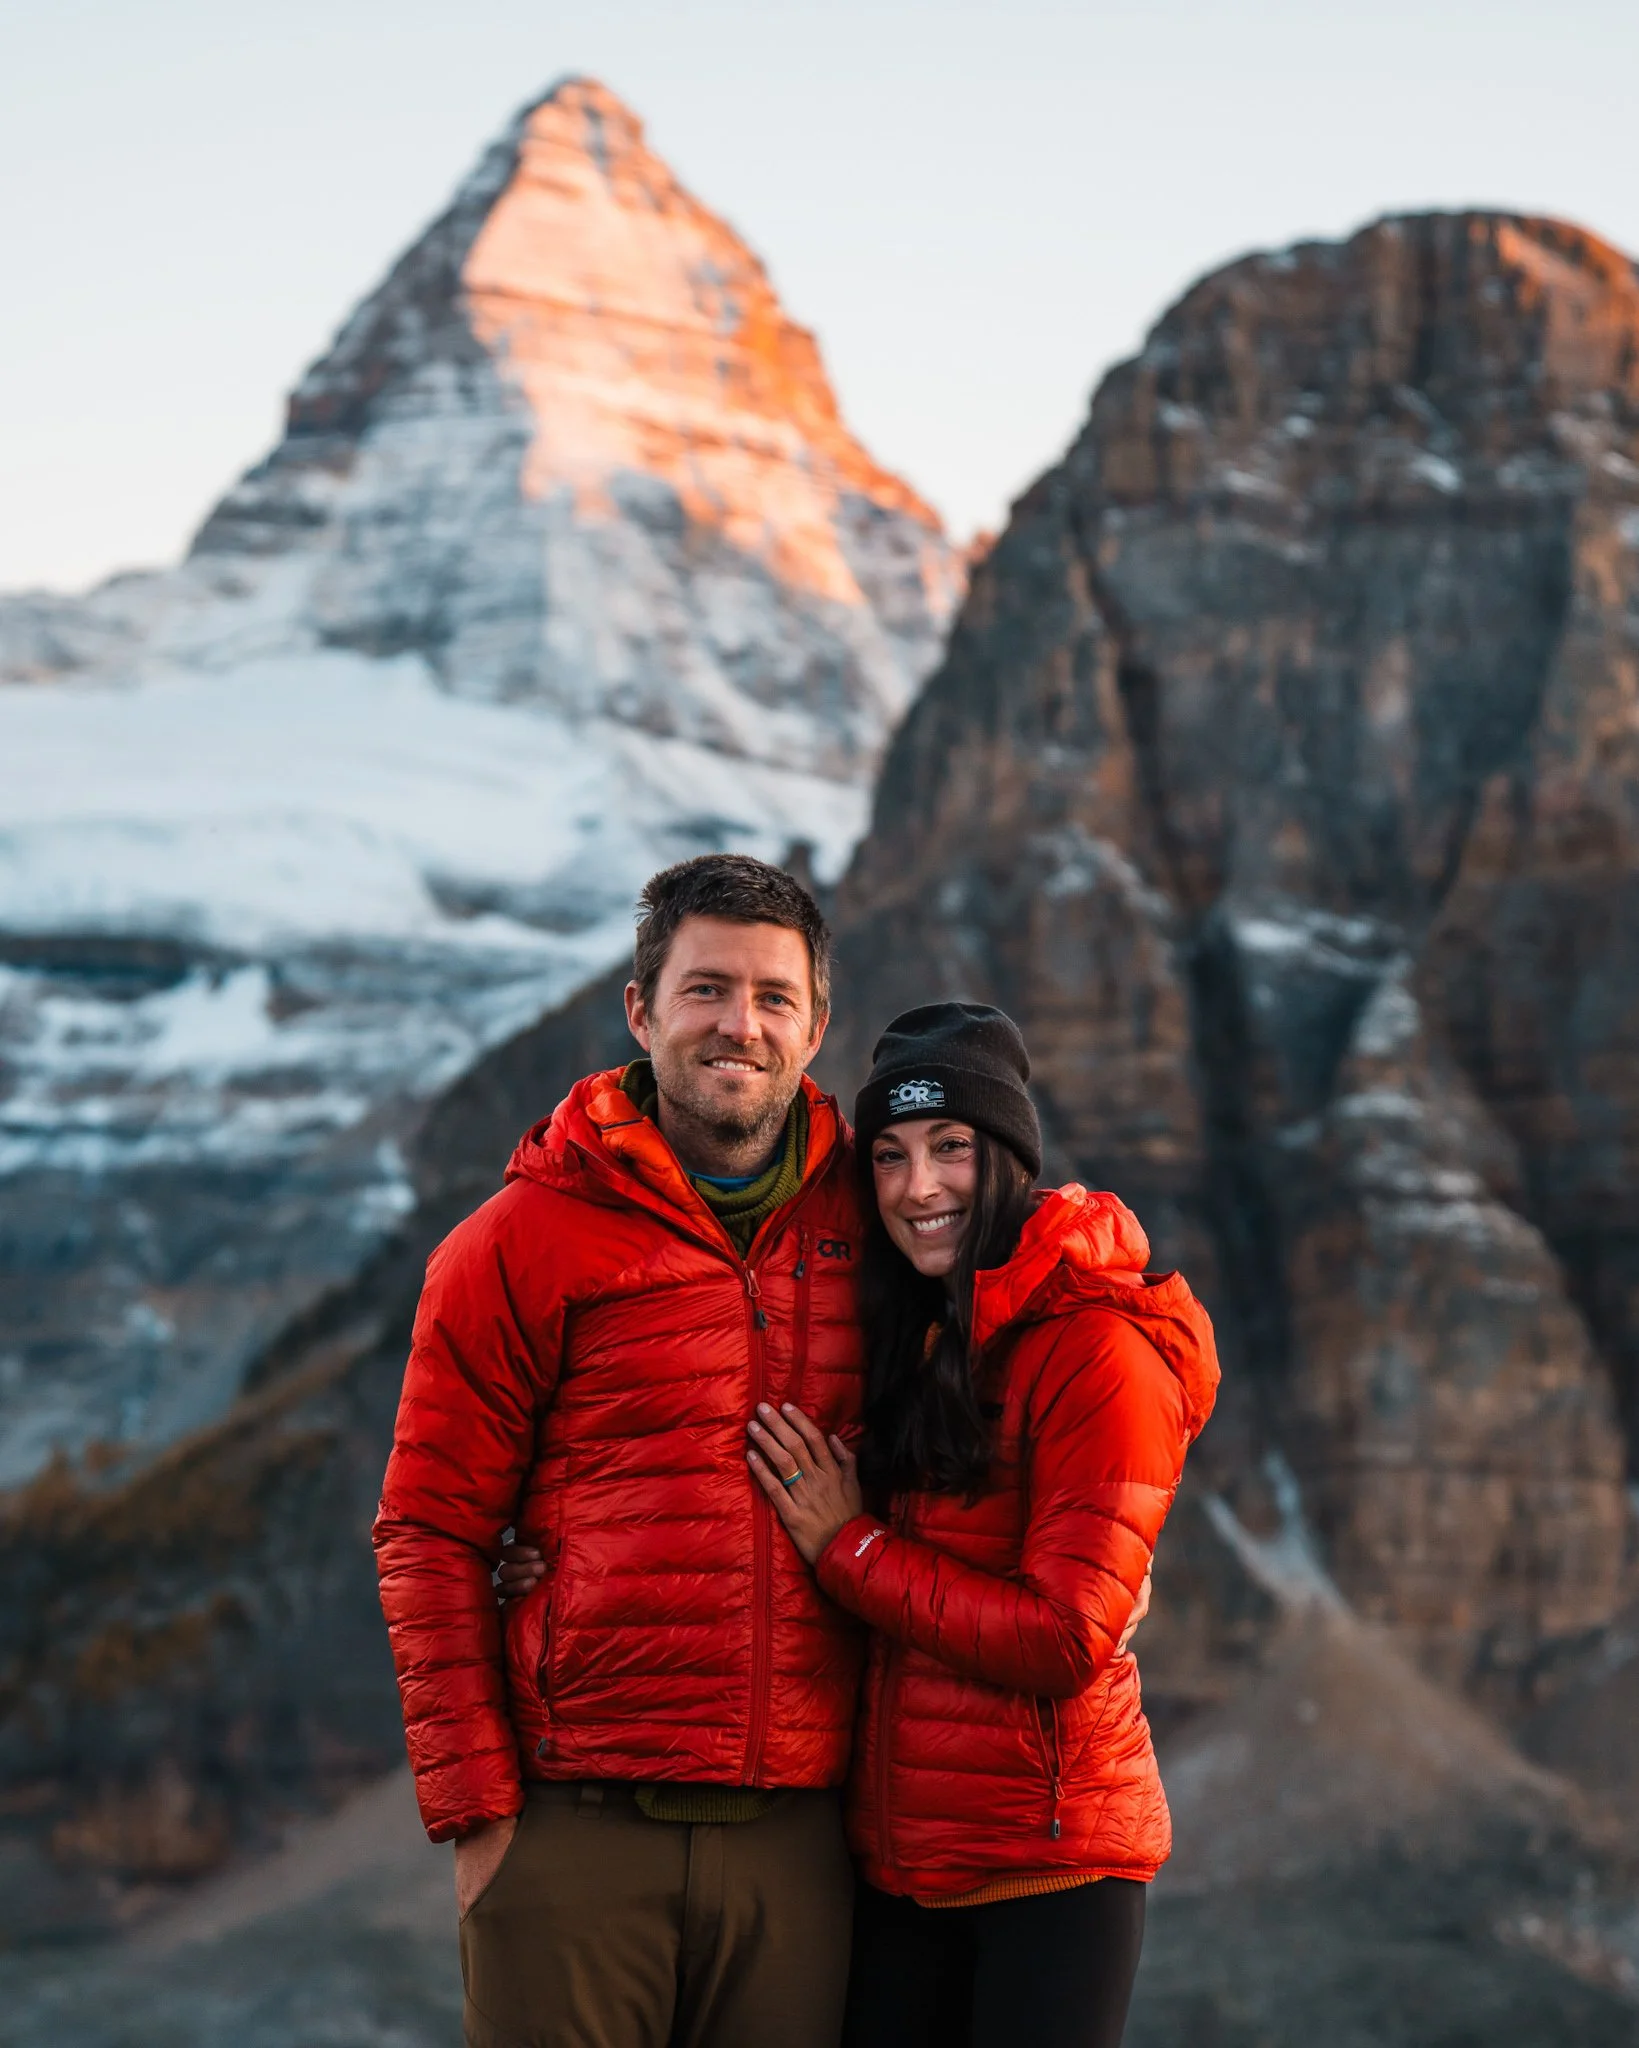
On the summit of Prusik Peak in very cold temps in October, 2025
Enchantments Gear For Early and Late Season
The gear you need for the Enchantments changes significantly depending on when you visit. Use the notes below for more detail on the two most critical seasonal scenarios.
| Season | Conditions | Required Gear | Recommendation |
|---|---|---|---|
| Early Season Late June – Early July Expert Skills |
|
|
For experienced mountaineers comfortable with snow travel. Only attempt if you have proper snow skills and gear. Doing it in a day is not recommended. |
| Mid Summer Mid-July – Mid-August All Skill Levels |
|
|
Ideal for most hikers and first-timers. The trail will be clear of snow and navigable. This is the easiest and safest time for a one-day hike. Monitor air quality during wildfire season. |
| Late Summer Late August – Early September All Skill Levels |
|
|
One of the best times for a one-day hike. Conditions are cooler in the morning and September and daylight is still pretty long. |
| Larch Season Late September – Early October Intermediate |
|
|
For photographers and experienced hikers willing to start early and manage colder conditions. The golden larches are absolutely worth it. |
| Shoulder Season Mid-October – November Advanced |
|
|
Recommended for only experienced backpackers during winter conditions. Be fully prepared for winter conditions. |
Early Season (Late June – Early July): Snow on Aasgard
If there's any time to NOT underestimate your gear, it's early season. Aasgard Pass retains significant snow well into June and sometimes July, and early season conditions introduce real mountaineering hazards: icy slopes, snow bridges concealing running water (including a dangerous waterfall trap climbers right of the main route), and avalanche risk.
You’ll Need to Bring:
Ice Axe: For self-arrest on icy slopes. Know how to use it before you go. Our favorite is the Petzl Summit 2. It’s compact, light, and easy to stow on your pack.
Crampons or Microspikes: Microspikes work for moderate snow conditions; crampons are better for icy slopes. Kahtoola Microspikes are our go-to.
Helmet: If you’re traveling on steep snow with an ice axe, then there is also a chance of falling at a high speed and needing extra head protection. We pack our BD Vision climbing helmet.
Gaiters: To keep snow out of your boots, we take our OR Crocodile Gaiters on all our snowy alpine ascents.
Extra Insulation: Even in late June, the Core Zone can see below-freezing nights. Always bring a warm puffy jacket but you should also consider taking a warmer sleeping bag or quilt rated within 0 - 20°F.
Our recommendation: if you haven't traveled on steep snow or know how to self-arrest with an ice axe, early season is not the time for your first Enchantments trip. The hazards are real and the consequences are serious.
Larch Season (Late September – Early October): Cold & Spectacular
Larch season is one of the most coveted time to visit the Enchantments, and for good reason (it’s our favorite). The golden larches scattered throughout the Core Zone are absolutely stunning and so photogenic. But larch season comes with very cold temperatures, especially at night. Overnight lows in the 20s and 30s°F are common, days are short, and an early-season snow can roll in without much warning.
Similar to early season conditions, upgrade your sleep system to a 0 - 20°F bag or quilt if you're not already there, bring your warmest puffy and hat/gloves combo, and keep your microspikes accessible in your pack. Snow is definitely possible during this time of year but it will likely be a thin layer of ice so you should only need microspikes and not an ice-axe or gaiters.
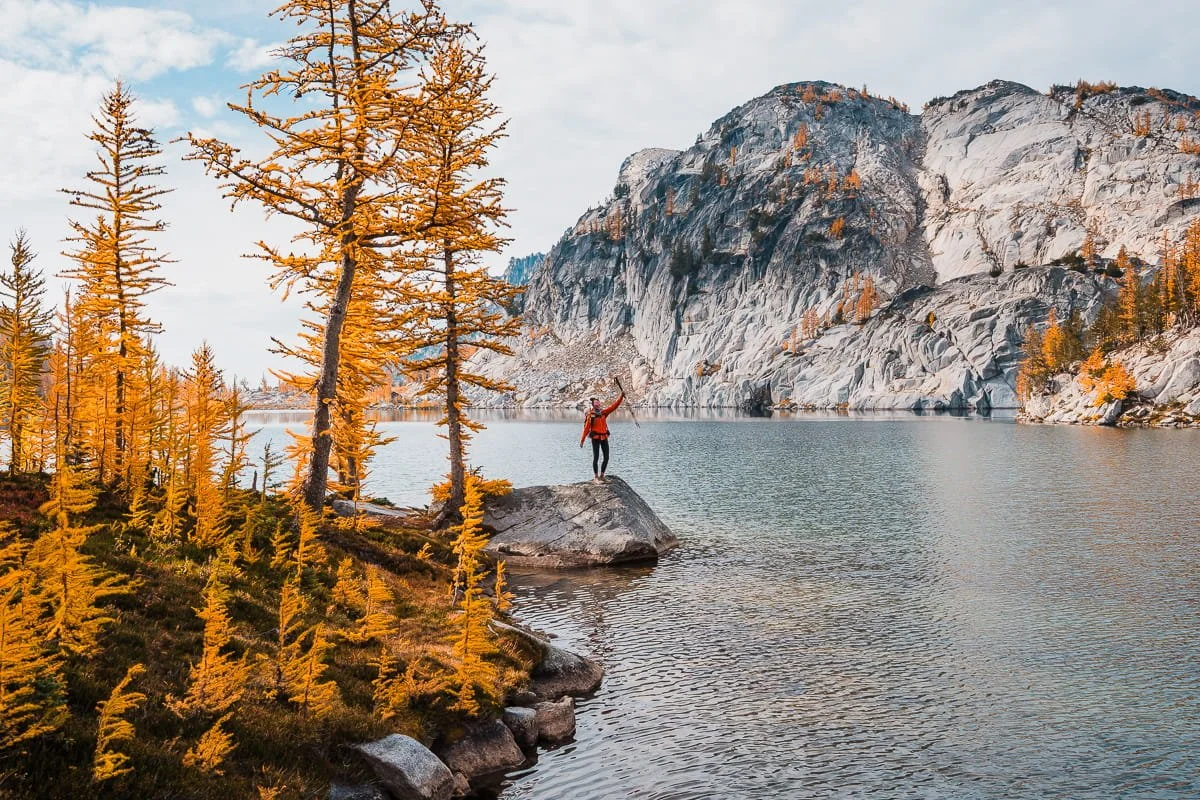
Backpacking through the Core Enchantments in larch season
FAQ: What to Pack for Backpacking the Enchantments
Do I need a bear canister for the Enchantments?
You don't need a hard-sided canister specifically, but proper food storage is absolutely required. We use an Ursack bear bag, which is approved for use in this area and is significantly lighter than a hard canister. Do not underestimate the small animals, marmots and chipmunks in the Core Zone are bold and will chew through your pack for food.
Can I use a bear bag instead of a canister?
Yes, a bear bag is acceptable in the Enchantments. We use the Ursack, which is significantly lighter than a hard canister and generally effective against both bears and small critters but there are some instances where they have failed. Make sure any bag solution you use is properly sealed and stored away from your tent. There are no designated hang trees in much of the Core Zone, so a system that doesn't require a tree is the most practical.
Are trekking poles necessary?
We consider them essential for the Enchantments. On the way up Aasgard Pass with a full pack, poles are a massive help for stability and uphill efficiency. On the long descent from Snow Lakes, they protect your knees during miles of steep switchbacks. They also help with boulder scrambling throughout the Core Zone. We use Black Diamond Distance Z or Black Diamond Trail Trekking Poles.
How heavy should my pack be for the Enchantments?
For a 2–3 night trip, we aim for a base weight (everything except food and water) under 15 lbs. With food and water, that typically puts us in the 25–32 lb range for a multi-day Core Zone trip. Going ultralight on your big three is the most effective way to reduce that number. Every pound you can cut from your pack is a pound you don't have to carry up to Colchuck Lake and Aasgard Pass.
What kind of shoes are best for backpacking the Enchantments?
Trail runners work great and are our preference, they're lighter, which matters on Aasgard, and dry faster if you get wet feet crossing streams. Lightweight hiking boots provide more ankle support, which some people prefer on the boulder scrambling. Whatever you choose, the most important thing is that your footwear is broken in well before your trip.
Do I need an ice axe for the Enchantments?
Seasonally, yes. For late June and early July trips, an ice axe and crampons or microspikes are essential for navigating Aasgard Pass safely. Snow lingers well into early summer, and the terrain above Colchuck Lake becomes genuinely hazardous without proper gear and skills. For mid-July through September, most years are clear of snow. For late September and October larch season trips, keep microspikes accessible, an early snow is always possible.
What's the most important thing to pack for The Enchantments?
If we had to pick one, it's layers. The temperature swings between midday sun and nighttime camp can be 40+ degrees Fahrenheit, and that range gets even more dramatic during larch season. Hikers who underestimate how cold the Core Zone gets at night are the ones who have miserable trips.
The Upper Core Enchantments just after sunset
Are You Ready for the Enchantments? Final Packing Tips & Reminders
Backpacking the Enchantments is a trip that rewards preparation. You've already done the hard part by securing a permit. Now it comes down to showing up with a pack that's light enough to make Aasgard Pass manageable and thoughtful enough to keep you comfortable and safe in the alpine.
Our biggest piece of advice: don't pack for a worst-case scenario and don't pack for a best-case scenario. Pack for the reality of alpine backpacking in Washington, which means layering for variable weather, protecting yourself from the sun on granite, filtering water from every lake you pass, and keeping your pack as light as your budget and experience allow.
Have an amazing trip!
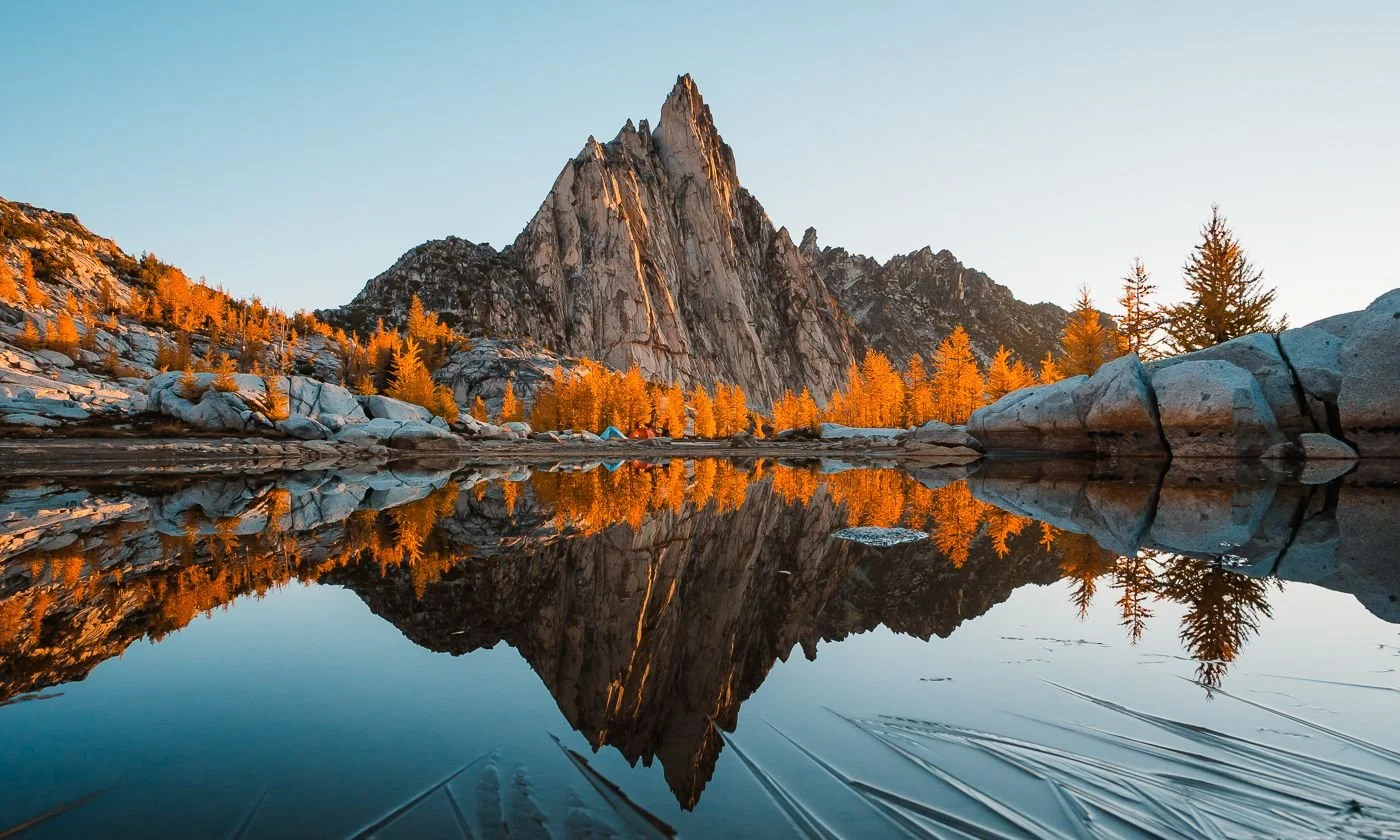
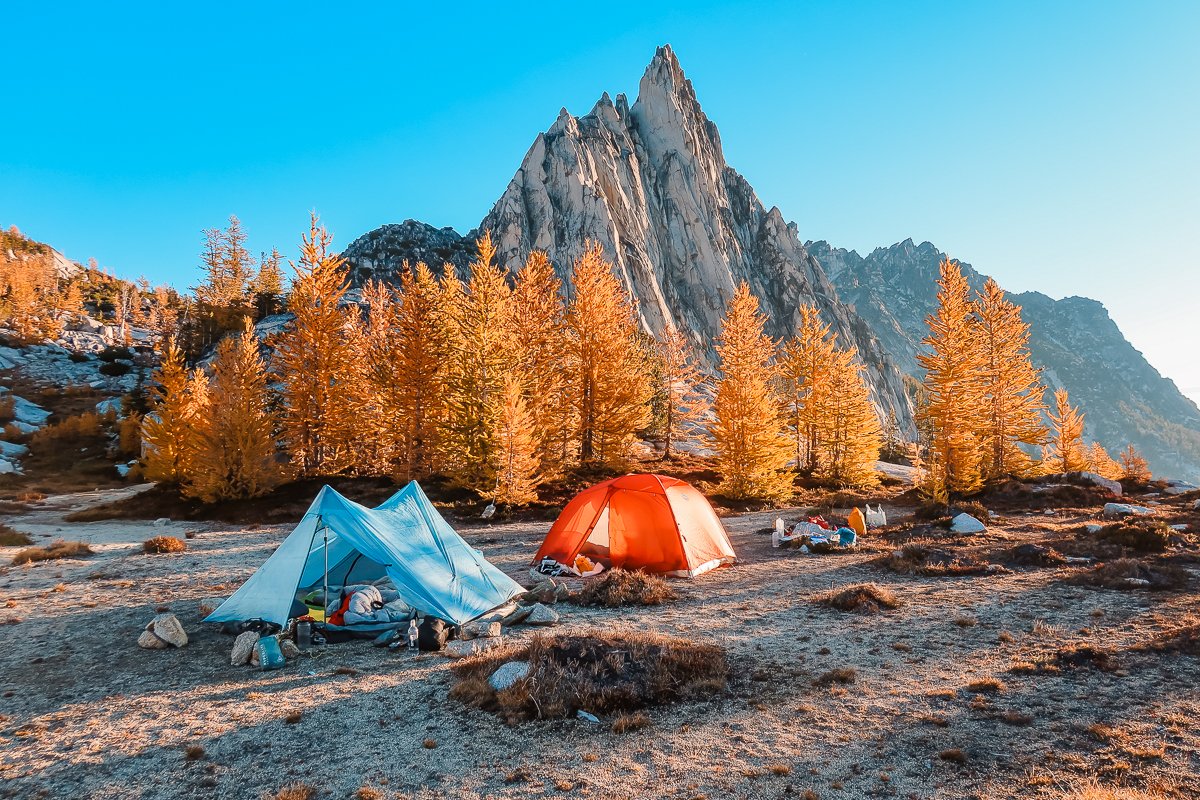
Sunrise at Gnome Tarn in the Core with our tents and larches
Related Enchantments & Leavenworth Hiking Guides
Leavenworth Specific Posts:
Backpacking Gear Guides:
Gear Discount Codes & Links
We've partnered with a few of our favorite outdoor brands to hook you up with exclusive discounts on trail-tested gear. These are all affiliate links, meaning we earn a very small commission at no cost to you, that helps us keep this blog going.
20% off SkyGOAT (grid fleece) - Code: SKYEGOAT
15% off LUNA Sandals - Click the link and the discount will be added to your cart automatically
15% off Stio - Code: SKYE15
20% off Wild Deodorant - Code: SKYESTOURY
10% off Loop Earplugs with code SKYE10 - Enter the promo code at checkout. We use their Dream earplugs for sleeping both backpacking and car camping.
Like this Post, Pin it & Save it For Later

Olalla Canyon Ridge: The Best Wildflower Hike Near Leavenworth, WA
7 Best Wildflower Hikes in Washington: Central Cascades & Leavenworth (2026)
This image is copyrighted and owned by Skye Stoury Photography and skyestoury.com, if you would like to licence any images on this site, please email us at hello@skyestoury.com